MAINTENANCE
Only qualified maintenance personnel are to perform the following repairs.
Seul le personnel d'entretien qualifié peut effectuer des réparations.
VACUUM MOTOR REPLACEMENT
1.Turn off all switches and unplug machine.
2.Remove recovery tank.
3.Remove the (2) screws that fasten the solution tank to the frame, and tilt tank back to expose the inside of the frame.
4.Locate the vacuum motor wires and disconnect at the connector. Close the solution tank.
5.Remove the (6) screws holding the vacuum motor cover (p/n 27809) to the solution tank.
6.Remove the vacuum motor.
7.Reverse process to install vacuum motor.
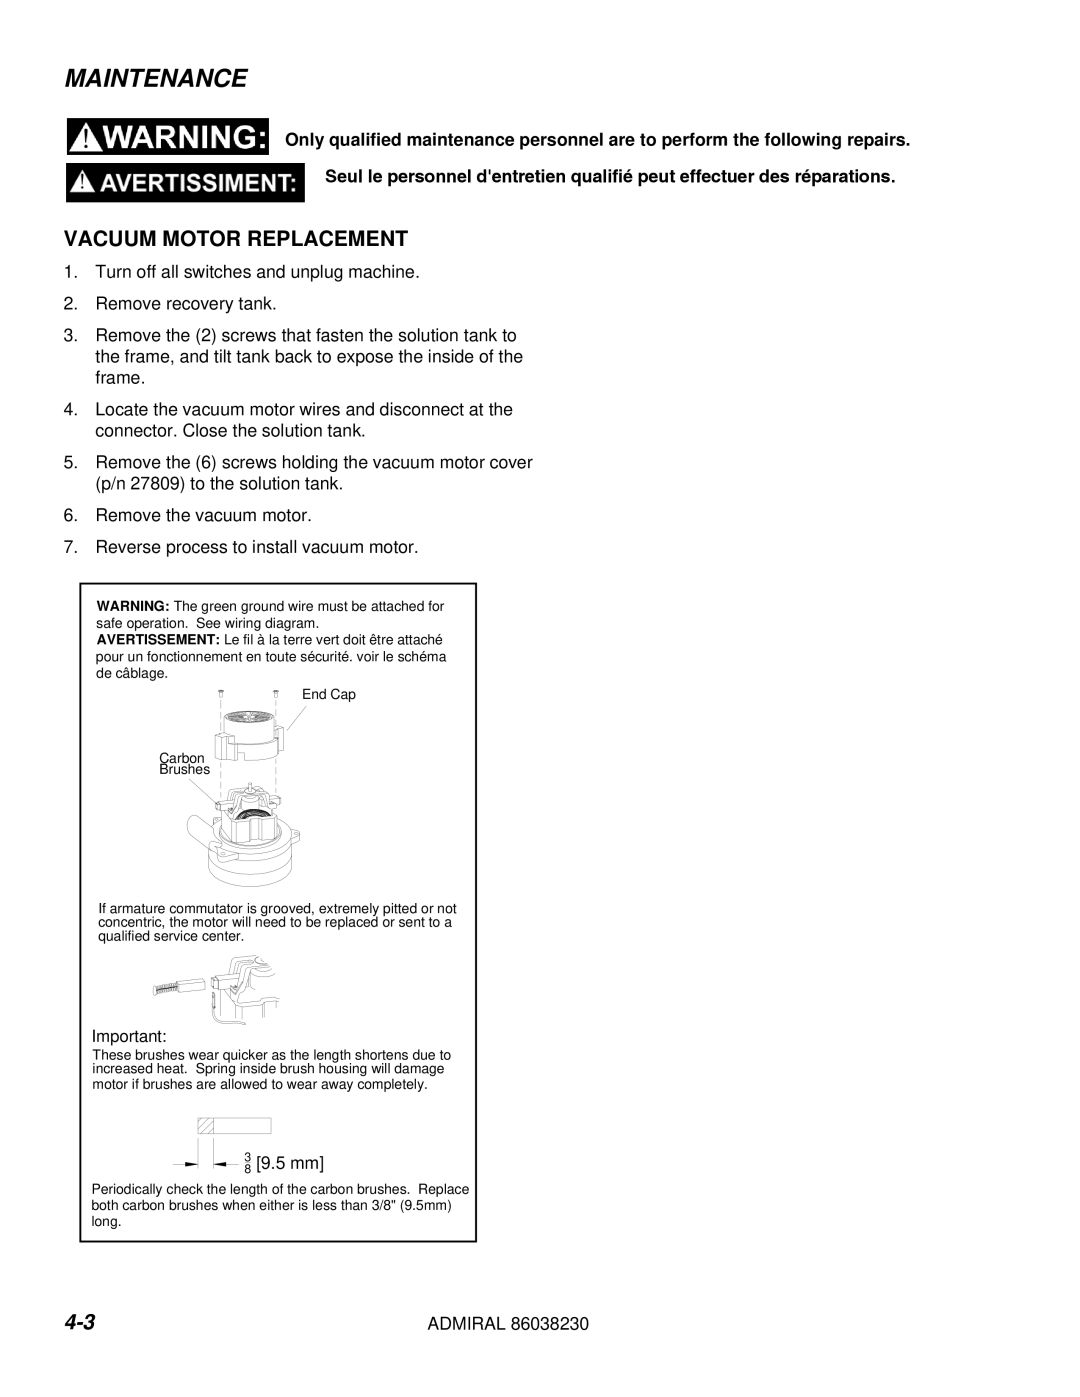
WARNING: The green ground wire must be attached for safe operation. See wiring diagram. AVERTISSEMENT: Le fil à la terre vert doit être attaché pour un fonctionnement en toute sécurité. voir le schéma de câblage.
End Cap
Carbon
Brushes
If armature commutator is grooved, extremely pitted or not concentric, the motor will need to be replaced or sent to a qualified service center.
Important:
These brushes wear quicker as the length shortens due to increased heat. Spring inside brush housing will damage motor if brushes are allowed to wear away completely.
 38 [9.5 mm]
Periodically check the length of the carbon brushes. Replace both carbon brushes when either is less than 3/8" (9.5mm) long.
ADMIRAL 86038230 |