M1048 10" x 18" Metal Cutting Bandsaw
SERVICE
Blade Change
CUTTING HAZARD! Blades are sharp! Wear heavy leather gloves when handling blades to prevent cuts.
Blades should be changed when they become dull, dam- aged, or when you are using materials that require a blade of a certain type or tooth count.
To change the blade on the bandsaw, do these steps:
1.DISCONNECT THE BANDSAW FROM POWER!
2.Raise the bow of the bandsaw about six inches then close the feed control valve by turning the knob to the right.
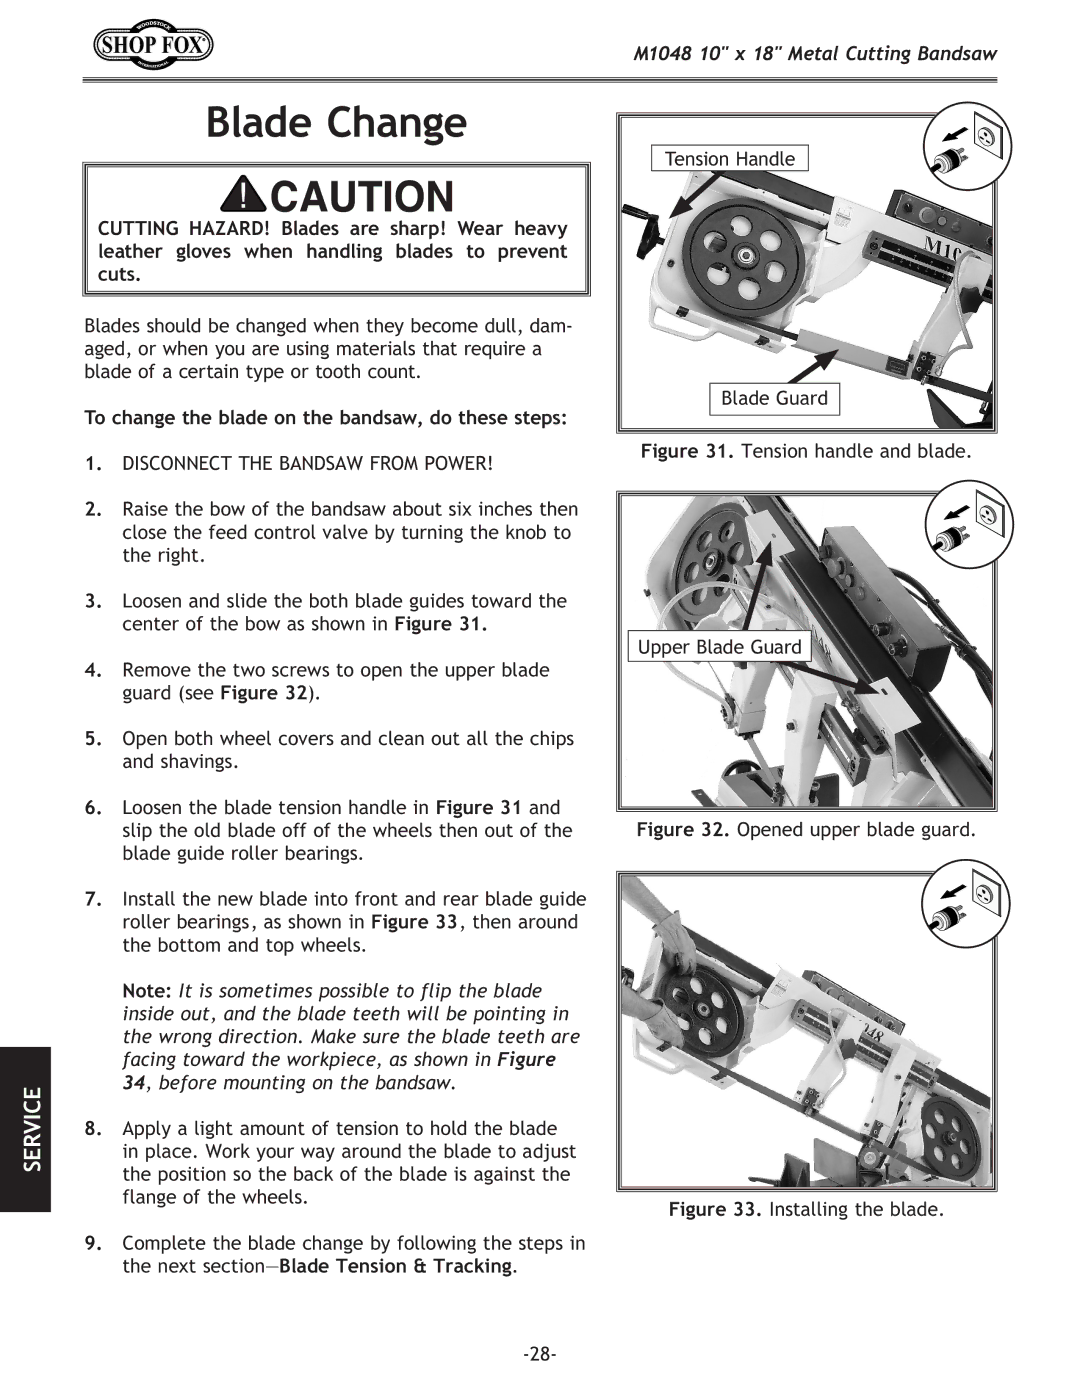
3.Loosen and slide the both blade guides toward the center of the bow as shown in Figure 31.
4.Remove the two screws to open the upper blade guard (see Figure 32).
5.Open both wheel covers and clean out all the chips and shavings.
6.Loosen the blade tension handle in Figure 31 and slip the old blade off of the wheels then out of the blade guide roller bearings.
7.Install the new blade into front and rear blade guide roller bearings, as shown in Figure 33, then around the bottom and top wheels.
Note: It is sometimes possible to flip the blade inside out, and the blade teeth will be pointing in the wrong direction. Make sure the blade teeth are facing toward the workpiece, as shown in Figure 34, before mounting on the bandsaw.
8.Apply a light amount of tension to hold the blade in place. Work your way around the blade to adjust the position so the back of the blade is against the flange of the wheels.
9.Complete the blade change by following the steps in the next
Tension Handle
Blade Guard
Figure 31. Tension handle and blade.
Upper Blade Guard |