WOOD/METAL Bandsaw
Page
Contents
Introduction
Woodstock Technical Support
Introduction
Introduction
Controls and Features
Safety
Standard Safety Instructions
Always Lock Mobile Bases if Used Before Operating Machinery
Additional Safety for Bandsaws
Electrical Specifications
Electrical
220V Operation
Extension Cords
Setup
Inventory
Main Components Figure Qty
Machine Placement
Cleaning Machine
Lifting & Moving
To lift and move the bandsaw with a forklift, do these steps
Mounting to Shop Floor
Bolting to Concrete Floors
Assembly
To assemble the bandsaw, do these steps
Installing fence onto rails
Dust Collection
Recommended CFM at each Dust Port
Blade Tracking
To center track the blade
Test Run
To test run the machine, do these steps
Blade Tensioning
To tension the bandsaw blade
Adjustment
To adjust the support bearings, do these steps
Support Bearing
Blade Guide Adjustment
To adjust the upper and lower blade guides, do these steps
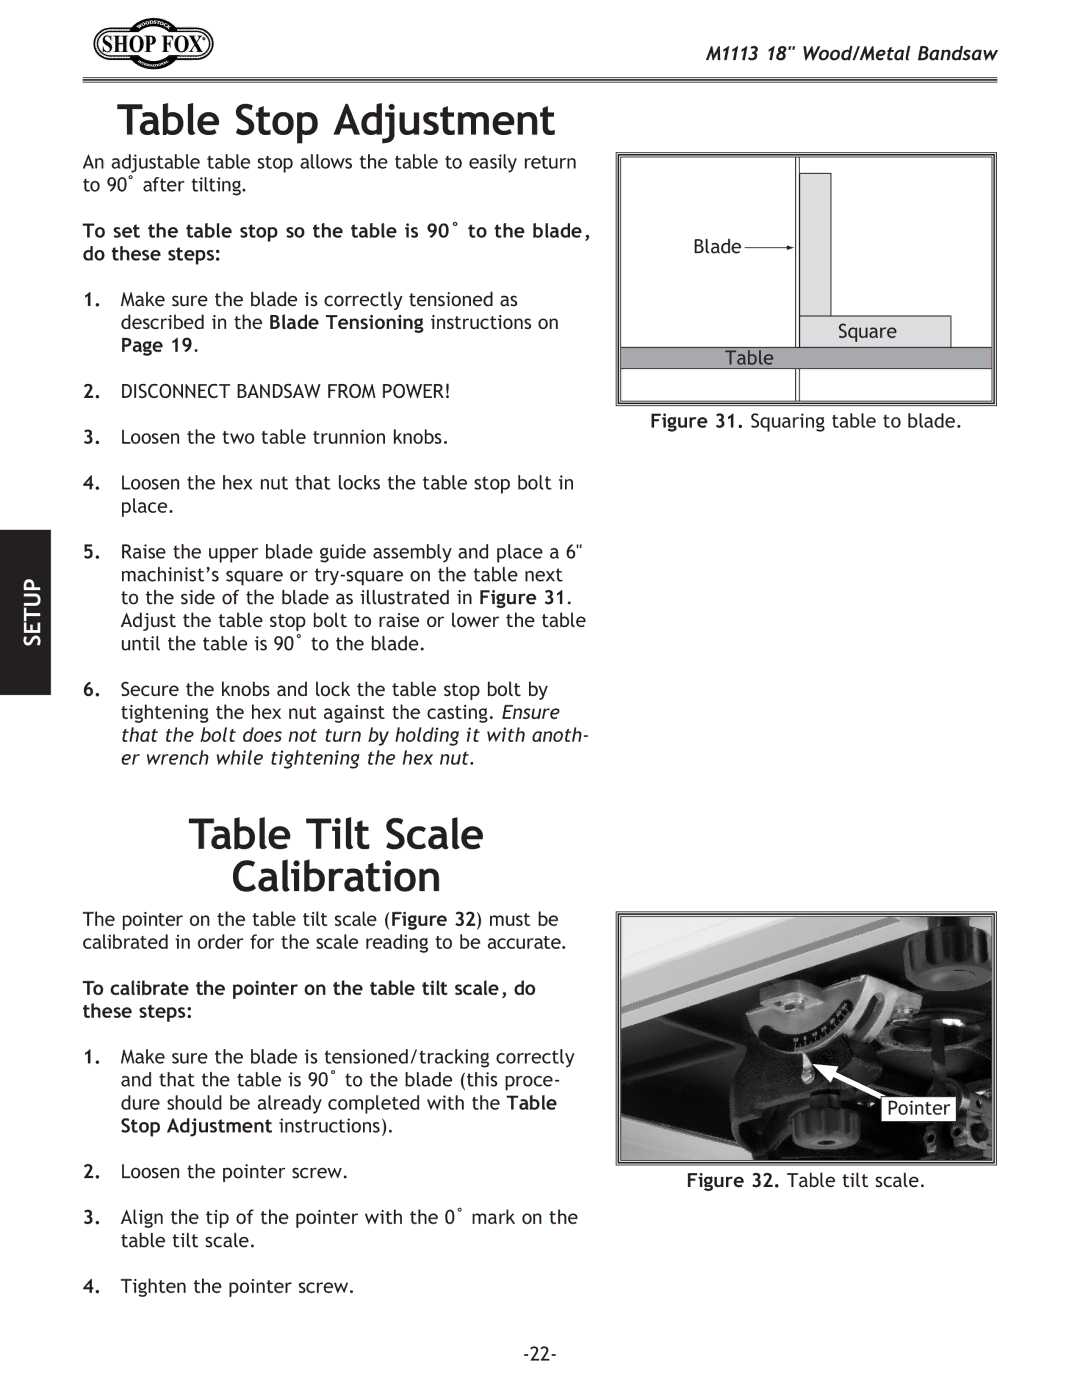
Table Stop Adjustment
Table Tilt Scale Calibration
Table Alignment
Fence Alignment
Operations
General
Basic Controls
Workpiece Inspection Wood
Choosing wood without embedded foreign objects embedded
Workpiece Inspection Metal
Cutting Overview
Table Tilt
Basic Cutting Tips
Guide Post
Rip Cutting
To make a rip cut, do these steps
Crosscutting
Resawing
To make a 90˚ crosscut, do these steps
To resaw a workpiece, do these steps
Cutting Curves
Stacked Cuts
To complete a stacked cut, do these steps
Blade Characteristics Wood Cutting
Blade Length
Blade Width
Tooth Style
Tooth Pitch
Blade Care
Blade Breakage
Most common causes of blade breakage are
Blade Selection Metal Cutting
To select the correct blade TPI, do these steps
Blade Changes
To replace the blade, do these steps
Fence Scale Calibration
To calibrate the scale, do these steps
Accessories
Model D3096 Shop Fox Featherboard
Model D3122 Shop Fox Push Stick
Maintenance
Cleaning
Schedule
Table & Base
Service
Accessing V-Belts
Servicing V-Belts
Checking V-Belts
Follow all previous instructions for Accessing V- Belts
Tensioning/Replacing V-Belts
Step
Shimming Table
Blade Lead
To shim the table, do these steps
To skew your fence, do these steps
Wheel Alignment
Verifying Upper/Lower Wheels are Coplanar
Shimming Upper Wheel
Adjusting Lower Wheel
To adjust the lower wheel, do these steps
Electrical Component Wiring
Motor junction box wiring
Wiring Diagram
Troubleshooting
Motor & Electrical
Cutting Operations
Miscellaneous
Wood/Metal Bandsaw
Bandsaw Body Parts List
PART# Description
Table & Guides Breakdown
Table & Guides Parts List
Fence Breakdown
Label Placement
M1113 18 Wood/Metal Bandsaw
Warranty Registration
Comments
BOX BELLINGHAM, WA