Clamping Mechanism Continued
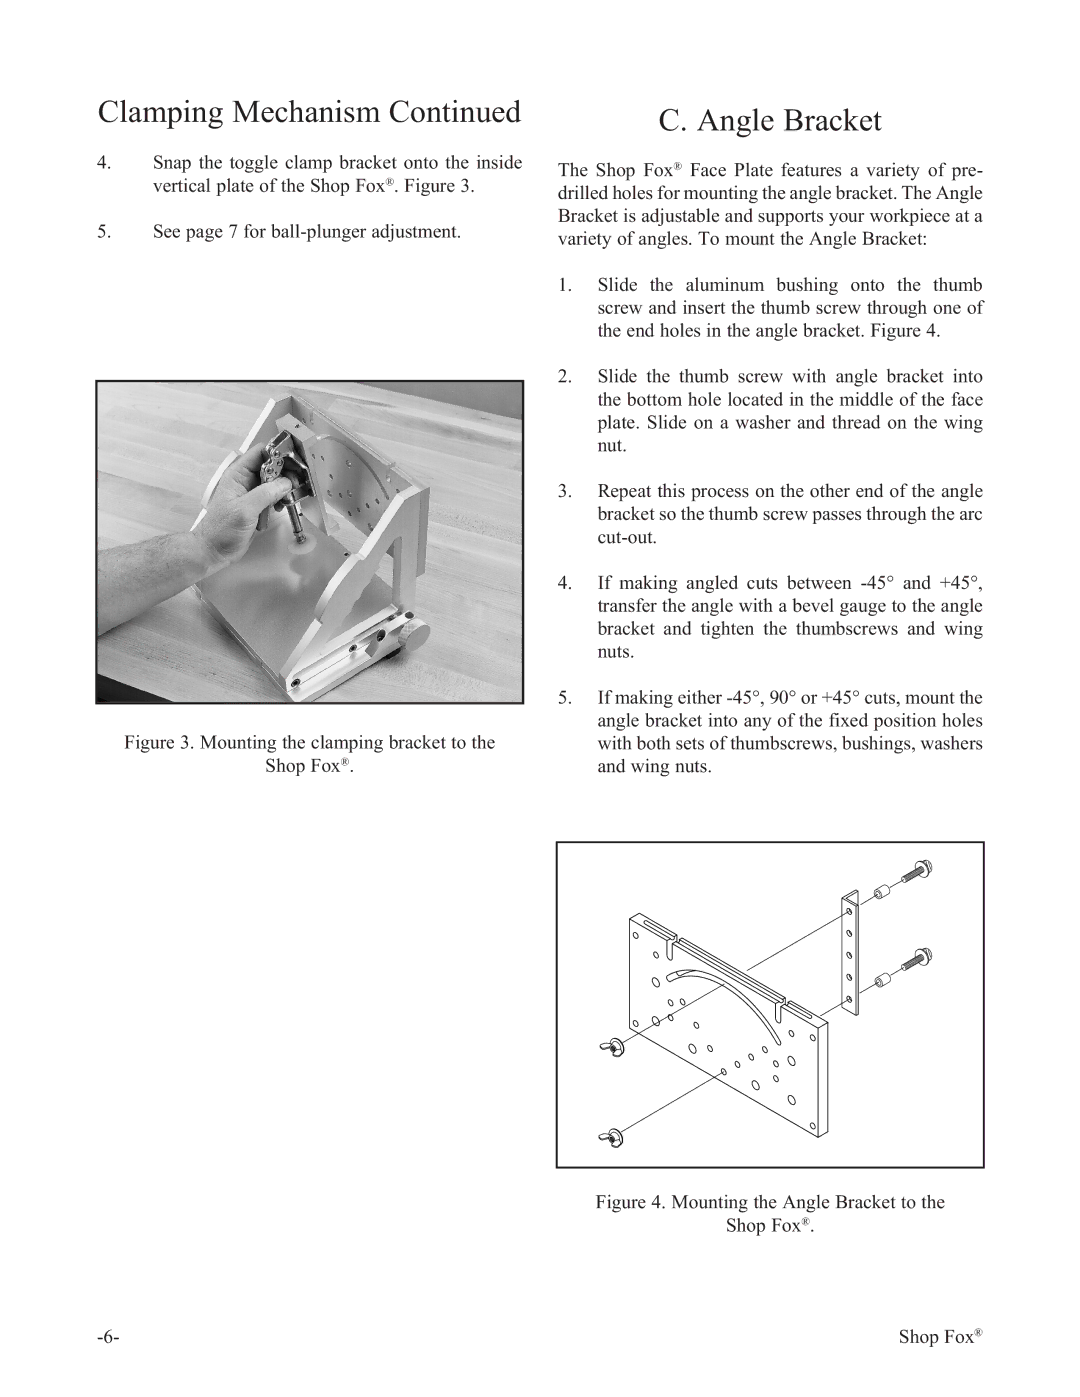
4.Snap the toggle clamp bracket onto the inside vertical plate of the Shop Fox®. Figure 3.
5.See page 7 for
Figure 3. Mounting the clamping bracket to the
Shop Fox®.
C. Angle Bracket
The Shop Fox® Face Plate features a variety of pre- drilled holes for mounting the angle bracket. The Angle Bracket is adjustable and supports your workpiece at a variety of angles. To mount the Angle Bracket:
1.Slide the aluminum bushing onto the thumb screw and insert the thumb screw through one of the end holes in the angle bracket. Figure 4.
2.Slide the thumb screw with angle bracket into the bottom hole located in the middle of the face plate. Slide on a washer and thread on the wing nut.
3.Repeat this process on the other end of the angle bracket so the thumb screw passes through the arc
4.If making angled cuts between
5.If making either
Figure 4. Mounting the Angle Bracket to the
Shop Fox®.
Shop Fox® |
