ADJUSTMENTS
ADJUSTMENTS
Checking Knives
The cutterhead knives have been set at the fac- tory and should require no adjustments when you first receive your jointer. However, it is always a good idea to verify the accuracy of any adjustments that will affect your finished prod- uct.
As your jointer gets used, the knives will need to be routinely inspected, adjusted, and ultimate- ly replaced.
To inspect knife position in the cutterhead:
1.Unplug the jointer!
2.Remove the cutterhead guard from the table, so that you have unfettered access to the top of the cutterhead.
3.Remove the pulley cover at the back of the machine and slowly turn the cutterhead with the pulley until one of the knives is exposed and is easily accessible.
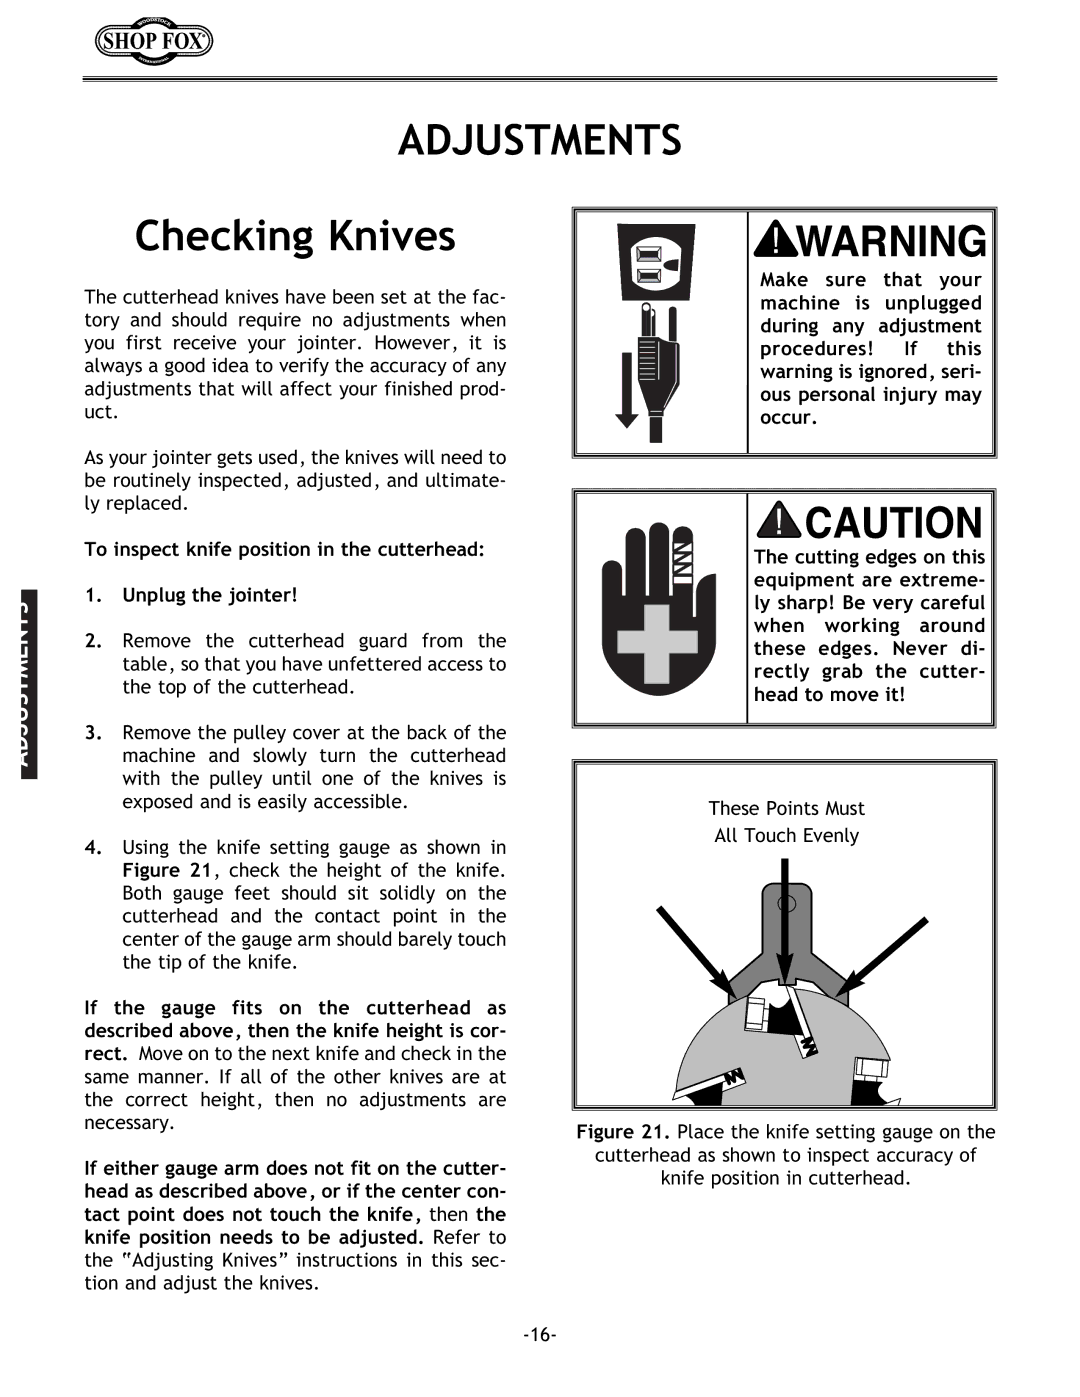
4.Using the knife setting gauge as shown in Figure 21, check the height of the knife. Both gauge feet should sit solidly on the cutterhead and the contact point in the center of the gauge arm should barely touch the tip of the knife.
If the gauge fits on the cutterhead as described above, then the knife height is cor- rect. Move on to the next knife and check in the same manner. If all of the other knives are at the correct height, then no adjustments are necessary.
If either gauge arm does not fit on the cutter- head as described above, or if the center con- tact point does not touch the knife, then the knife position needs to be adjusted. Refer to the “Adjusting Knives” instructions in this sec- tion and adjust the knives.
Make sure that your machine is unplugged during any adjustment procedures! If this warning is ignored, seri- ous personal injury may occur.
The cutting edges on this equipment are extreme- ly sharp! Be very careful when working around these edges. Never di- rectly grab the cutter- head to move it!
These Points Must
All Touch Evenly