Blade Height
The blade height must be adjusted correctly to increase the time between sharpenings, allow maximum performance, and to ensure a flat jointed surface. Check the blade height when- ever the blades are removed from the cutter- head or whenever cutting performance begins to degrade.
To check the cutterhead blade height, do these steps:
1.UNPLUG THE JOINTER!
2.Use a 61⁄4" wide piece of wood to prop the blade guard open.
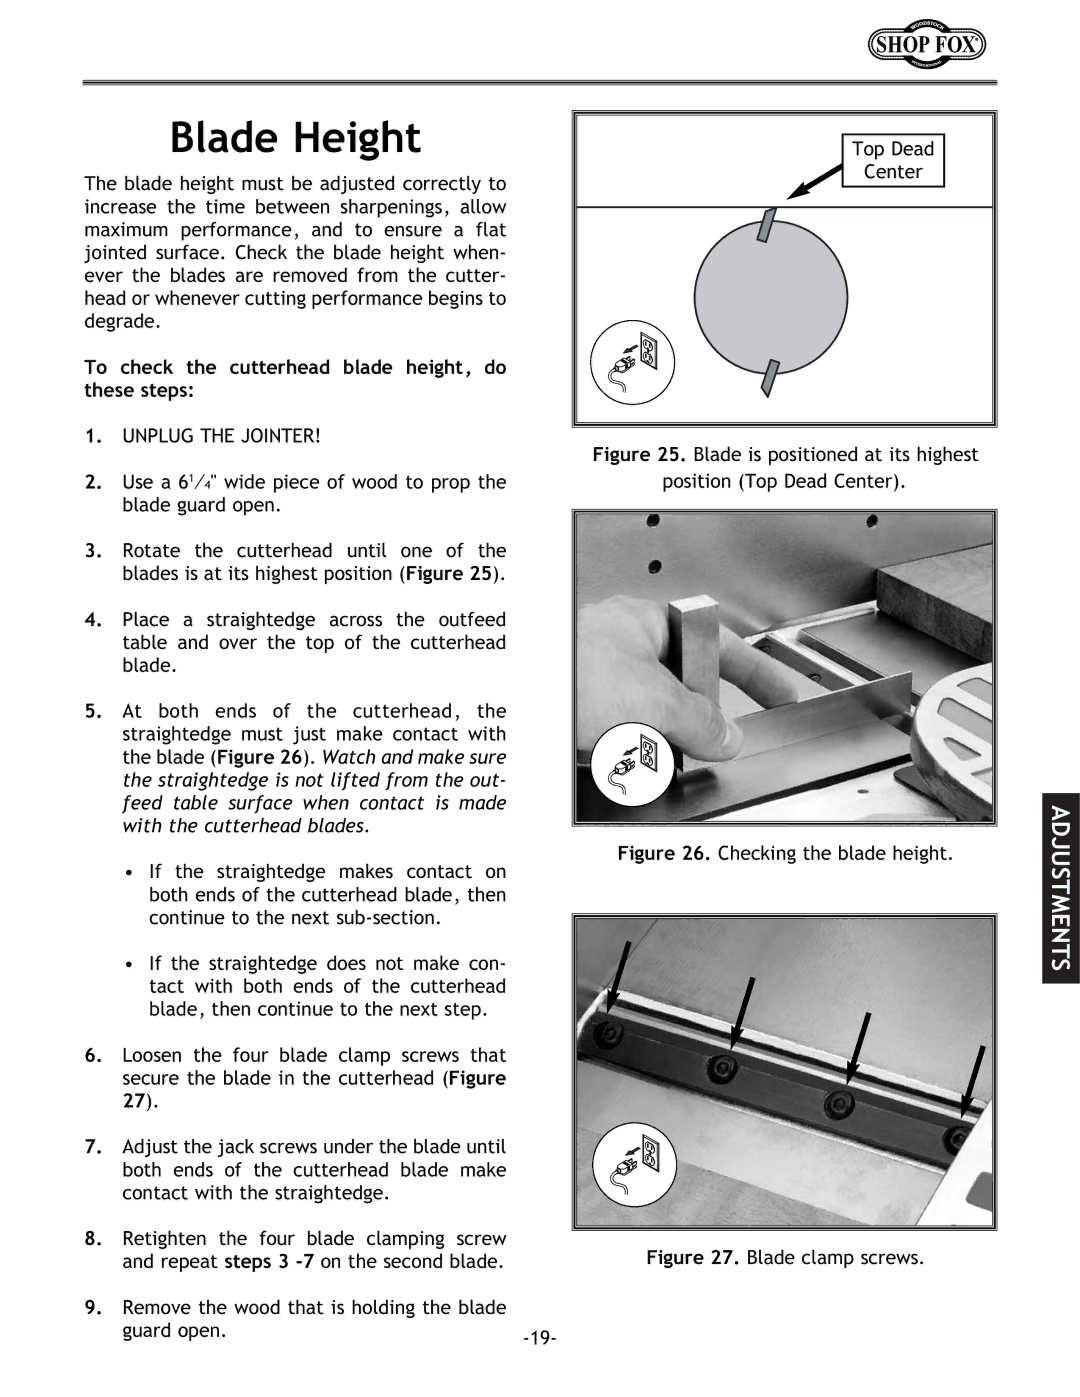
3.Rotate the cutterhead until one of the blades is at its highest position (Figure 25).
4.Place a straightedge across the outfeed table and over the top of the cutterhead blade.
5.At both ends of the cutterhead, the straightedge must just make contact with the blade (Figure 26). Watch and make sure the straightedge is not lifted from the out- feed table surface when contact is made with the cutterhead blades.
•If the straightedge makes contact on both ends of the cutterhead blade, then continue to the next
•If the straightedge does not make con- tact with both ends of the cutterhead blade, then continue to the next step.
6.Loosen the four blade clamp screws that secure the blade in the cutterhead (Figure 27).
7.Adjust the jack screws under the blade until both ends of the cutterhead blade make contact with the straightedge.
8.Retighten the four blade clamping screw and repeat steps 3
9.Remove the wood that is holding the blade
guard open. | |
|
Top Dead
![]() Center
Center