Audio and Video Compatibility
The IR32A IconRemote used in conjunction with the RE549 Half Powermid gives you control of Audio and Video components - even if they are in a different room from the remote.
The Half Powermid allows you to extend the distance you can use your remote. You will be able to hide the RE549 from sight and still control your TV or other electronic devices through entertainment centers, cabinet doors, from another room, etc. The transmitter will receive the RF commands and send them using IR through the transmitter cable included with the your package.
Description:
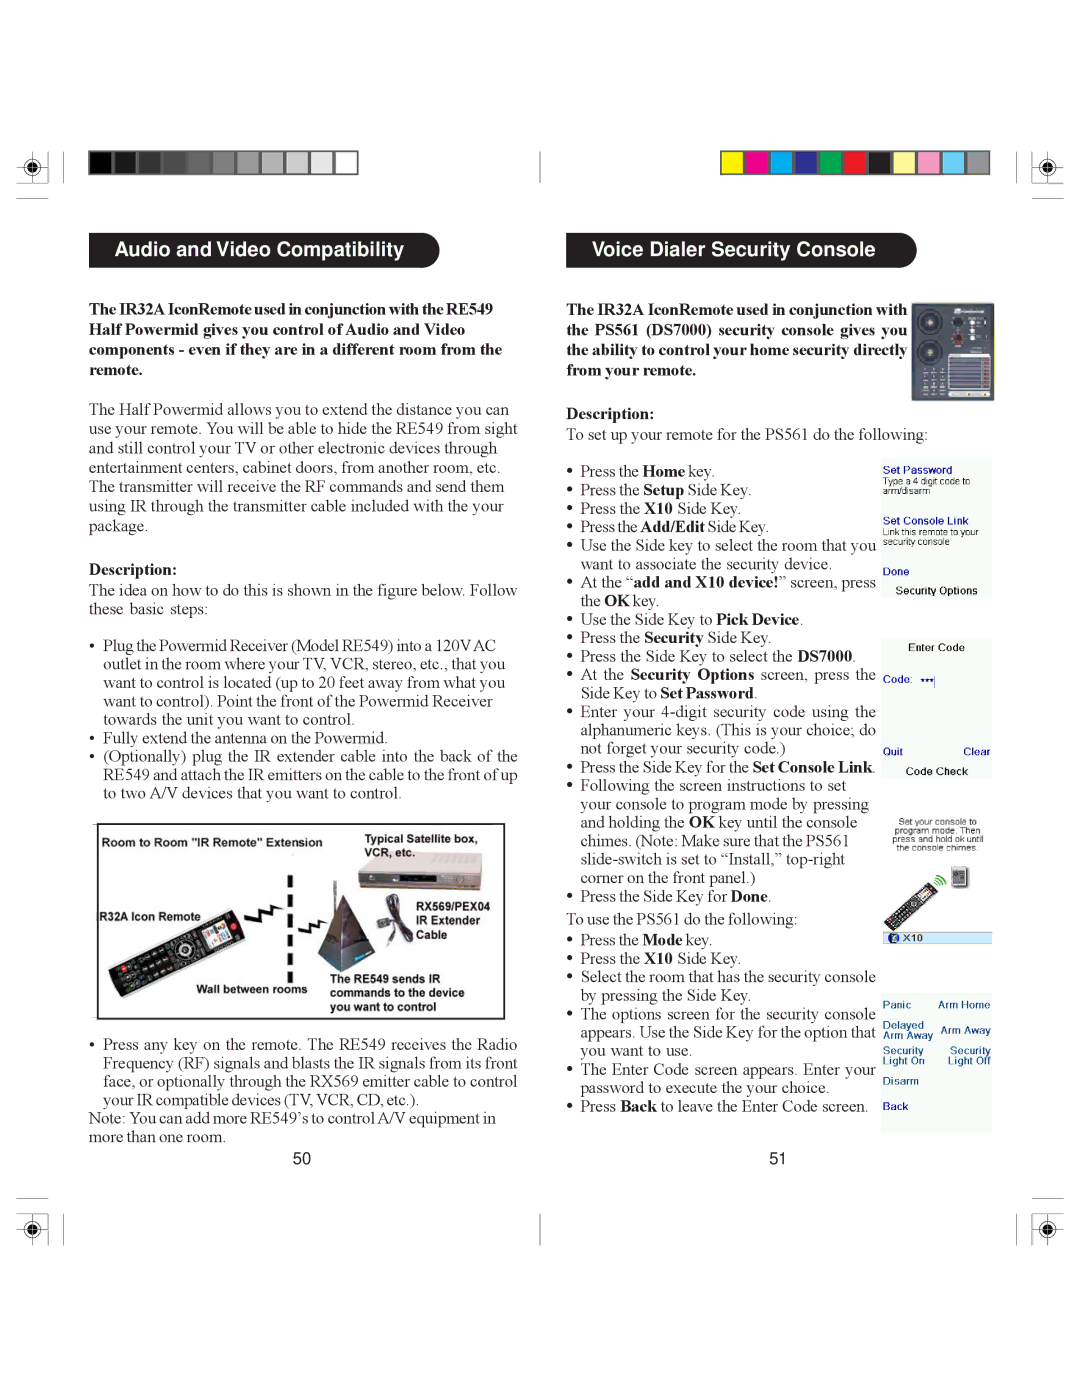
The idea on how to do this is shown in the figure below. Follow these basic steps:
•Plug the Powermid Receiver (Model RE549) into a 120VAC outlet in the room where your TV, VCR, stereo, etc., that you want to control is located (up to 20 feet away from what you want to control). Point the front of the Powermid Receiver towards the unit you want to control.
•Fully extend the antenna on the Powermid.
•(Optionally) plug the IR extender cable into the back of the RE549 and attach the IR emitters on the cable to the front of up to two A/V devices that you want to control.
•Press any key on the remote. The RE549 receives the Radio Frequency (RF) signals and blasts the IR signals from its front face, or optionally through the RX569 emitter cable to control
your IR compatible devices (TV, VCR, CD, etc.).
Note: You can add more RE549’s to control A/V equipment in more than one room.
50
Voice Dialer Security Console 
The IR32A IconRemote used in conjunction with the PS561 (DS7000) security console gives you the ability to control your home security directly from your remote.
Description:
To set up your remote for the PS561 do the following:
•Press the Home key.
•Press the Setup Side Key.
•Press the X10 Side Key.
•Press the Add/Edit Side Key.
•Use the Side key to select the room that you want to associate the security device.
•At the “add and X10 device!” screen, press the OK key.
•Use the Side Key to Pick Device.
•Press the Security Side Key.
•Press the Side Key to select the DS7000.
•At the Security Options screen, press the Side Key to Set Password.
•Enter your
•Press the Side Key for the Set Console Link.
•Following the screen instructions to set your console to program mode by pressing and holding the OK key until the console chimes. (Note: Make sure that the PS561
•Press the Side Key for Done.
To use the PS561 do the following:
•Press the Mode key.
•Press the X10 Side Key.
•Select the room that has the security console by pressing the Side Key.
•The options screen for the security console appears. Use the Side Key for the option that you want to use.
•The Enter Code screen appears. Enter your password to execute the your choice.
•Press Back to leave the Enter Code screen.
51