Trademarks
EMC directive
Safety Notice
Table of Contents
PCL
Appendix a Supported Setup Functions
PC Support Virtual Printer Error Messages
Programming via Shareport
Introduction to the Xerox FS
What is the Xerox FS 5250?
Printer Driver Selection
XES mode selection handles Xdpm and Xppm data streams
Items Supplied
IPC Upgrade Kit
Non-IPC
Product Features
If equipped with the optional IPC module
Supported Control Units
Pre-Installation Requirements
Installation Requirements
National Language
Via the Line
Working Environment
EU or US Settings
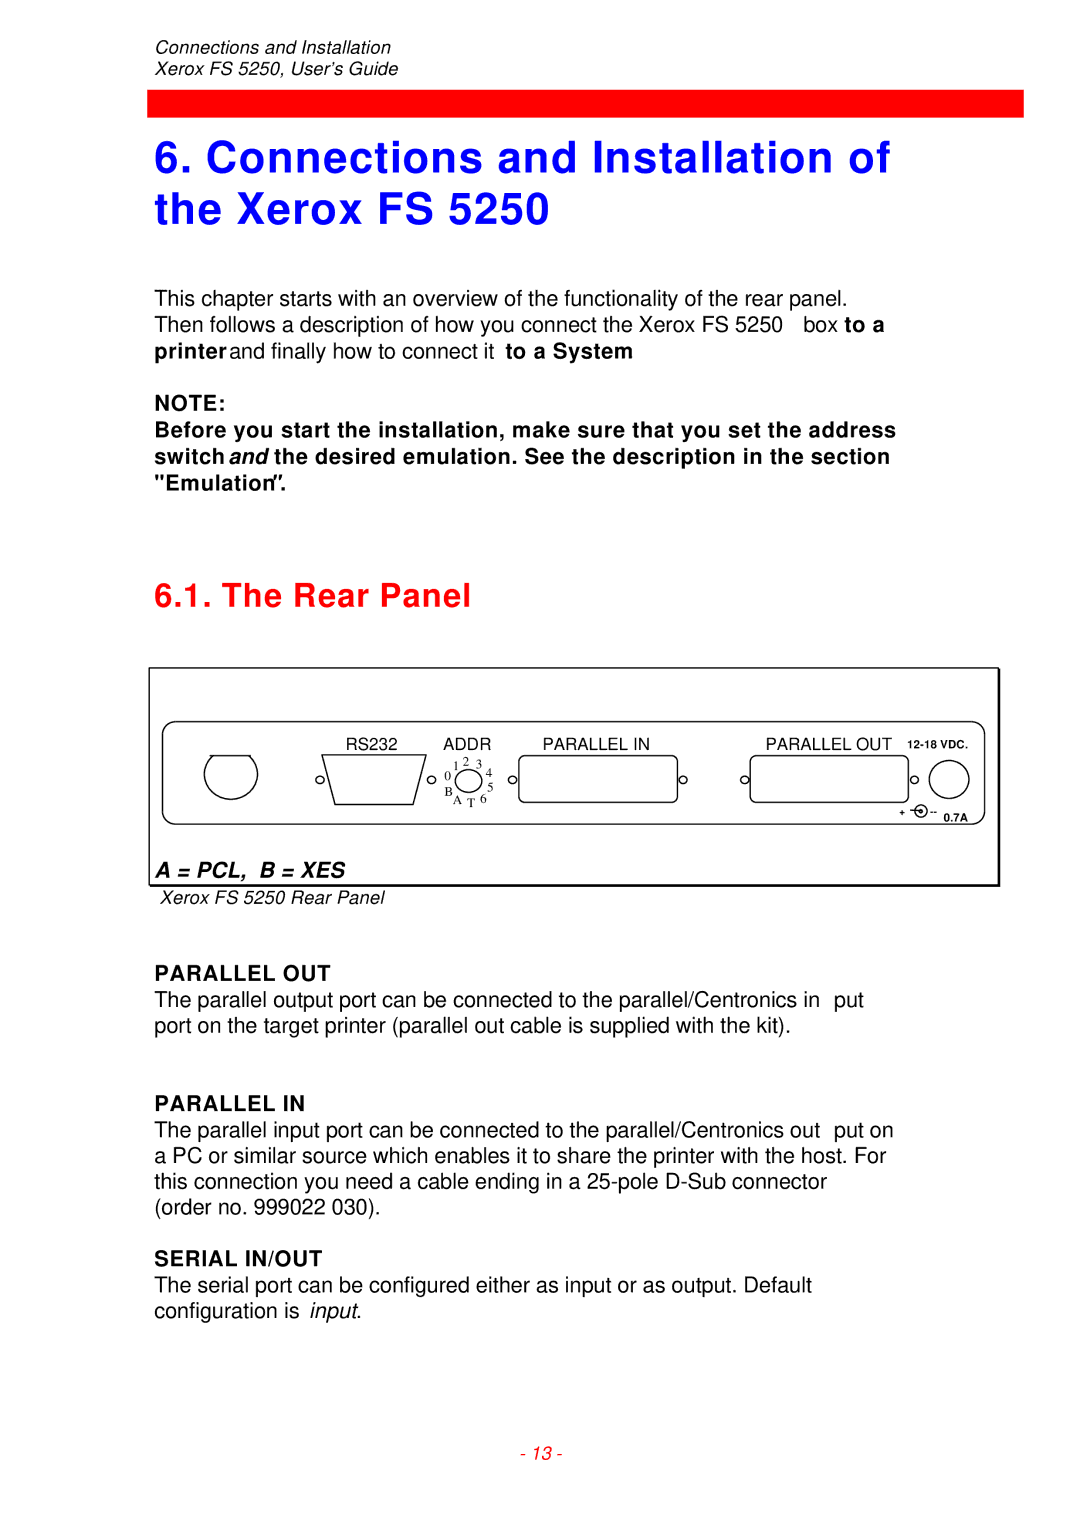
Rear Panel
Connections and Installation of the Xerox FS
= PCL, B = XES
Twinax Connector
Changing the Driver
Emulation
Via the Line
Selecting emulation via the line can be done inPCL only
%Y37,5224%
Via the Address Switch
Non-IPDS Y37,n1 Write Emulation
Y37,n1 Write Emulation
Non-IPDS Selection Emulation
Current emulation is
Selection Emulation
Via the address switch
Address Setting
Dual Printer Emulation PCL only
Ipds as primary emulation
Non-IPDS as primary emulation
Upgrading to Ipds
Connecting via Centronics output
Connecting the Xerox FS 5250to the Printer
What if the CU Indicator fails to turn on?
Connecting the Xerox FS 5250to the System
Test Function
Test via the address switch
Timeout
Top Panel of the Xerox FS
Operation of the Xerox FS
1 CU
PAR Parallel input
Ready Printer Ready
SER Serial input/output
State Indication
Syntax of an FSL Function
Function Selection via the Line
Yfunction number,parameters%
Escape Character
Removing Temporary Escape Character
Defining a Temporary Escape Character
??%
??blank
Removing Permanent Escape Character
Defining a Permanent Escape Character
Y48,00 ??%
Command Description Example
Commands for Storing and Restoring Settings
??% %X1
??% %X3
PCL only
Pass-Through Mode
%1B
%%1B%
Pass-through mode XES
For details refer to the programmers guide, doc. D62081
Transparency Mode Limitations
IdaSetup Ipds Programming
Programming the Xerox FS 5250 Non-IPDS
Paper Size
Selected FSL Functions
Trays
Changing paper size
Value Paper Size
??% %Y12,n1,n2% &&??space
Value Paper Tray
Other commands
Saving the command
This command also erases the escape character
Changing paper size example
Basic printer set-up
Paper Trays
Changing paper trays
Format
Value n1 Format Characteristics
Formats
Function Y10 Page Format
??% %Y10,n1,n2% &&??space
Changing Page Format
Value n2 Tray
??% %Y10,2,3% %X1
Changing page format example
Function Y98 Automatic Page Orientation
Automatic Page Orientation
Y98 Syntax Y98,n1,n2%
Example Y98, 0,3%
Automatic Page Orientation
Automatic Page Orientation Chart
Y98 Enabled factory default
Explanation to the chart on Automatic Page Orientation
Fonts
Y98 Disabled
Selecting Fonts PCL
System /36 OCL Text -YES
??% %Y96,n1% &&??space
Changing font
Symbol SET and Translate
Default Gfid Table
Gfid
Only applies to printers running PCL Level
Scaleable Fonts
Typeface ID PCL No Name of Typeface
Defining Fonts PCL
Style Strokeweight
Value Symbol set
Symbol set of the font
What you need to know
Proportional spacing, bold
This is Helvetica
Italic
Selected FSL Functions Xerox FS 5250, User’s Guide
ValueTypeface
Typeface of the font Value Typeface
Selecting Fonts XES
Other commands
Font definition example
??% %Y91,521,6,5,1,18,1% %X1
Changing font example
This function cannot be saved in the permanent memory
??% %Y96,41% &&??
Font definition
Defining Fonts XES
Font strings sent Orientation
XES Gfid
Gfid
Gfid
CPI / Gfid Relation
Optional Scaling
COR CPI / Gfid Relation
Font definition example
System or interface?
Duplex Printing
What to consider
??% X4 &&??
Binding option
??% Y19,0% &&??
You cannot save the duplex command in the permanent memory
Setting Description
Selecting duplex printing
Orientation
??% %Y19,2% %Y10,1,3% &&??
Duplex selection example, PCL
Duplex selection example, XES
??% %Y19,2% %Y96,nn% &&??
Xdpm ISO Xdpm Ebcdic Xppm Ebcdic Xppm Ascii
Output Data
Y70 Y36
Data Stream Translation Mode Function Settings Output
Function 100 Port Share Option
Port Share Option
??character
Y100 =
Y100,timeout,user string%
Y100
Example ??%%Y100,20,1B,45%%X1
Sending the commands from the system
Printer sharing example
Sending the commands from the PC
??% %Y100,30,1B 45 1B 28 32 53%
??% %Y100,35,1BzlH%%X1
Activating the Y249 Engineering Function
Programming via Shareport
Deactivating the Y249 Engineering Function
Limitations when Y249 is active
Updating firmware
Escape sequences must be in HEX
PC Support Virtual Printer
Recoverable Errors
Error Messages
Multistrike String is TOO Long
Code Error Type Code Description
Non-Recoverable Hardware Errors
XES Mode
Appendix a Supported Setup Functions
Description
No. Description
ESC Transparency Features
PCL Mode
ESC Features
Quick Reference Guideto the Supported FSL Functions
Default depends
N1 Physical paper
Name Syntax Parameters
Ly write
PCL
String
Translate Table
Ebcdic
Name Syntax Parameters
IBM Gfid
APO
Name Syntax Parameters Deviation
Nvram
Appendix B Test Printout
101
Appendix C Use of Xerox FS 5250 Serial Port Out
Laser 5250, Programmers Guide Document no. D62081
Appendix D Related Manuals
IPDS, Programmer’s Guide Document no. D60253
Lead-in/lead-out sequences
Index

