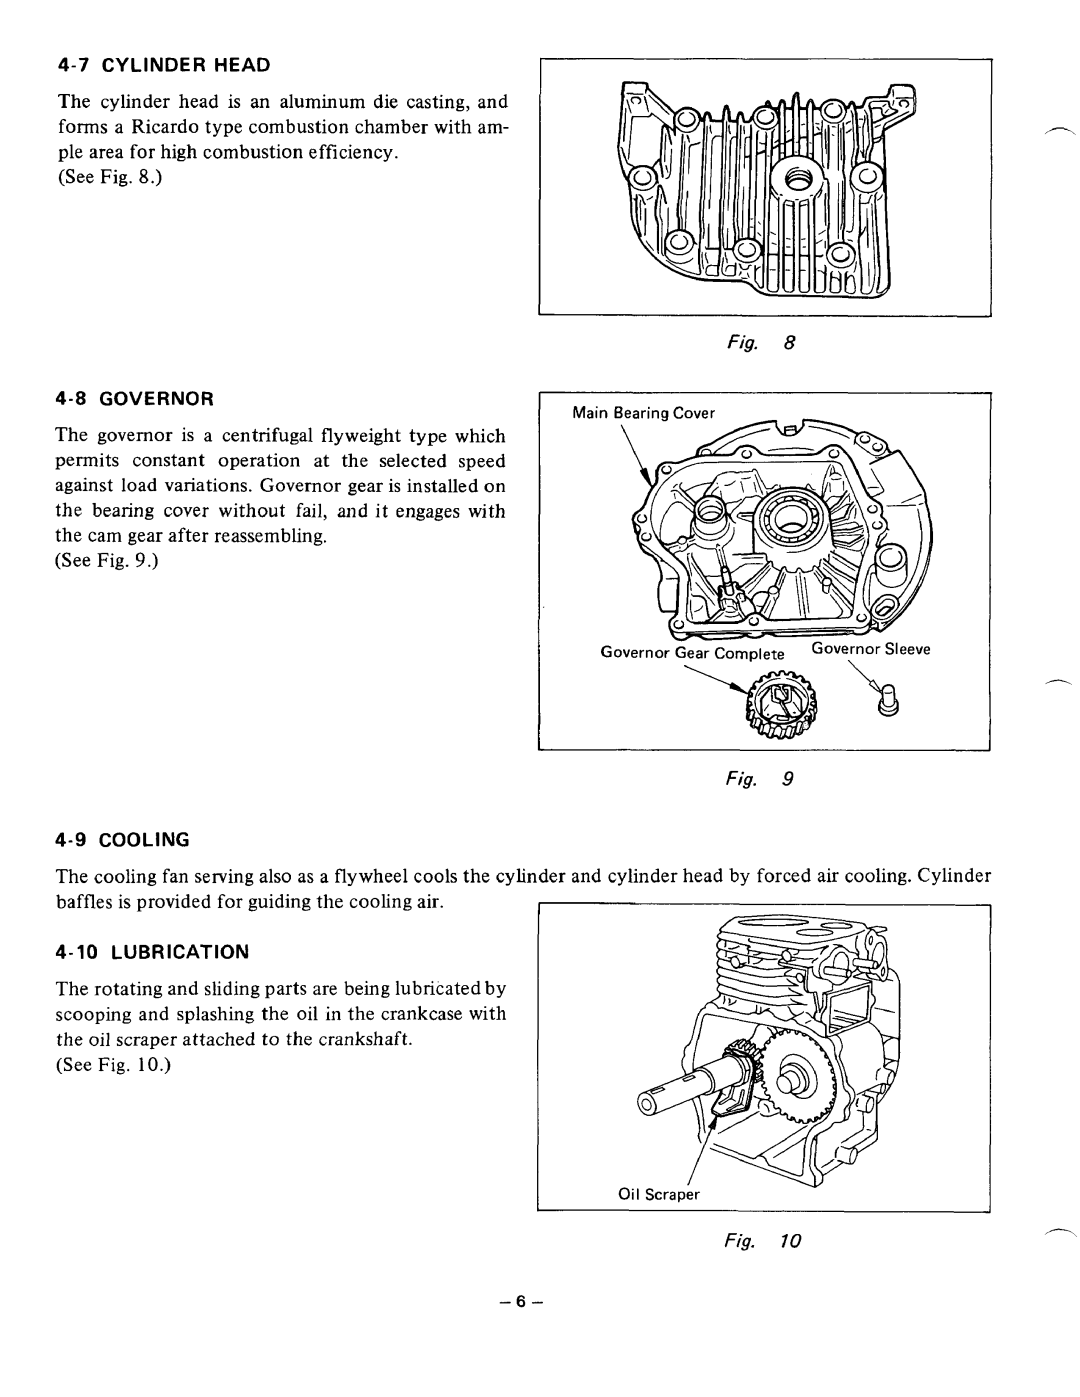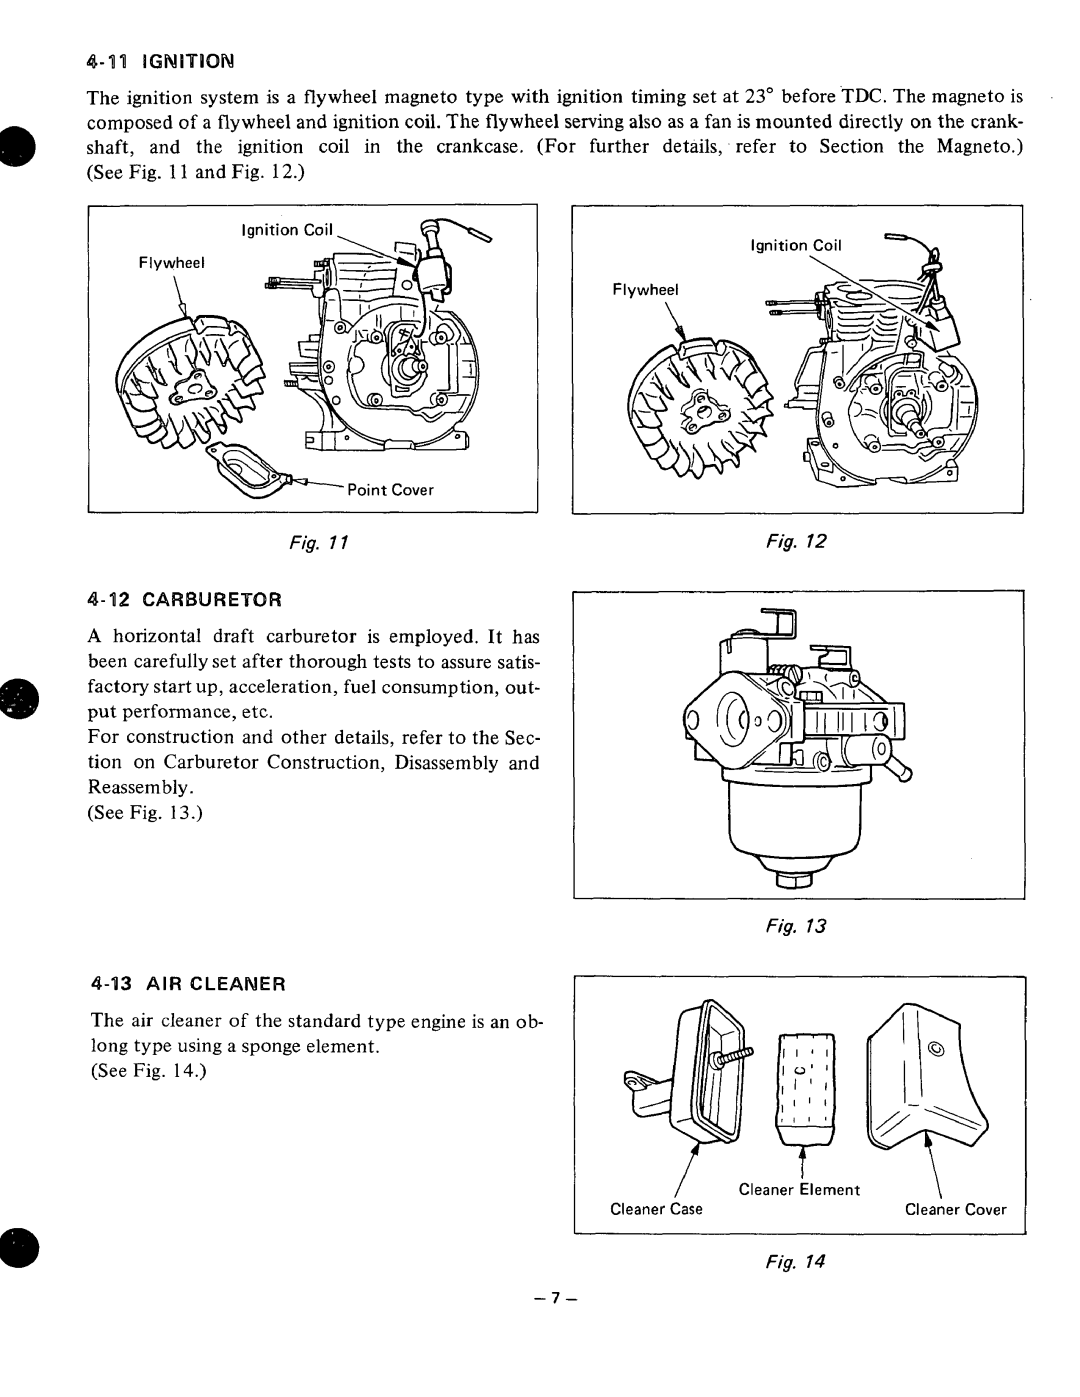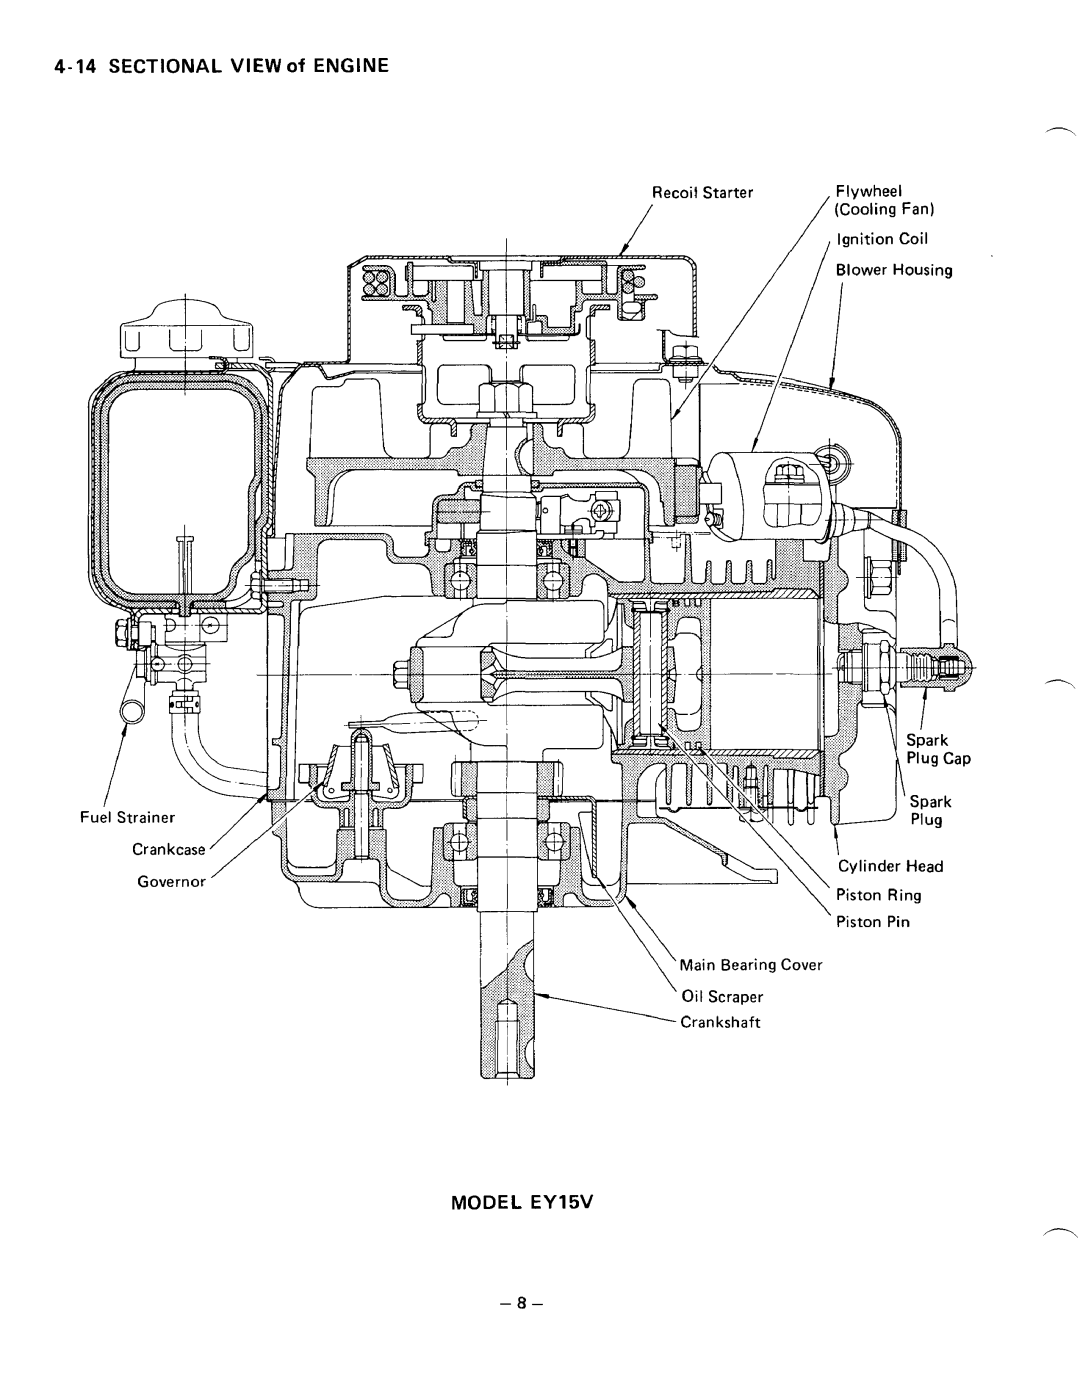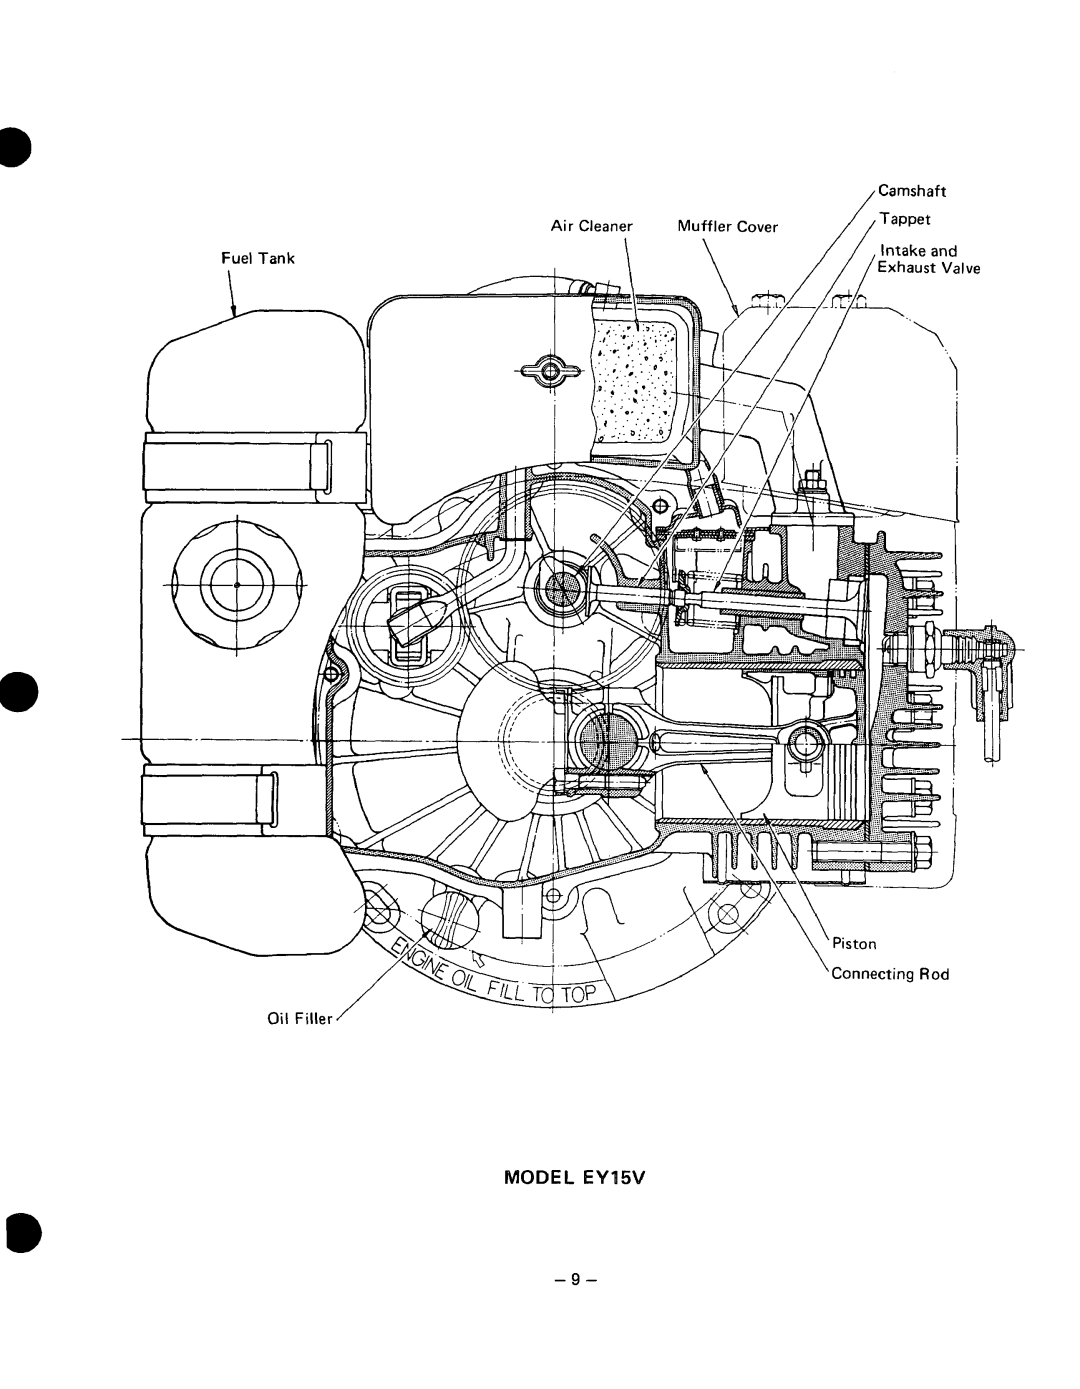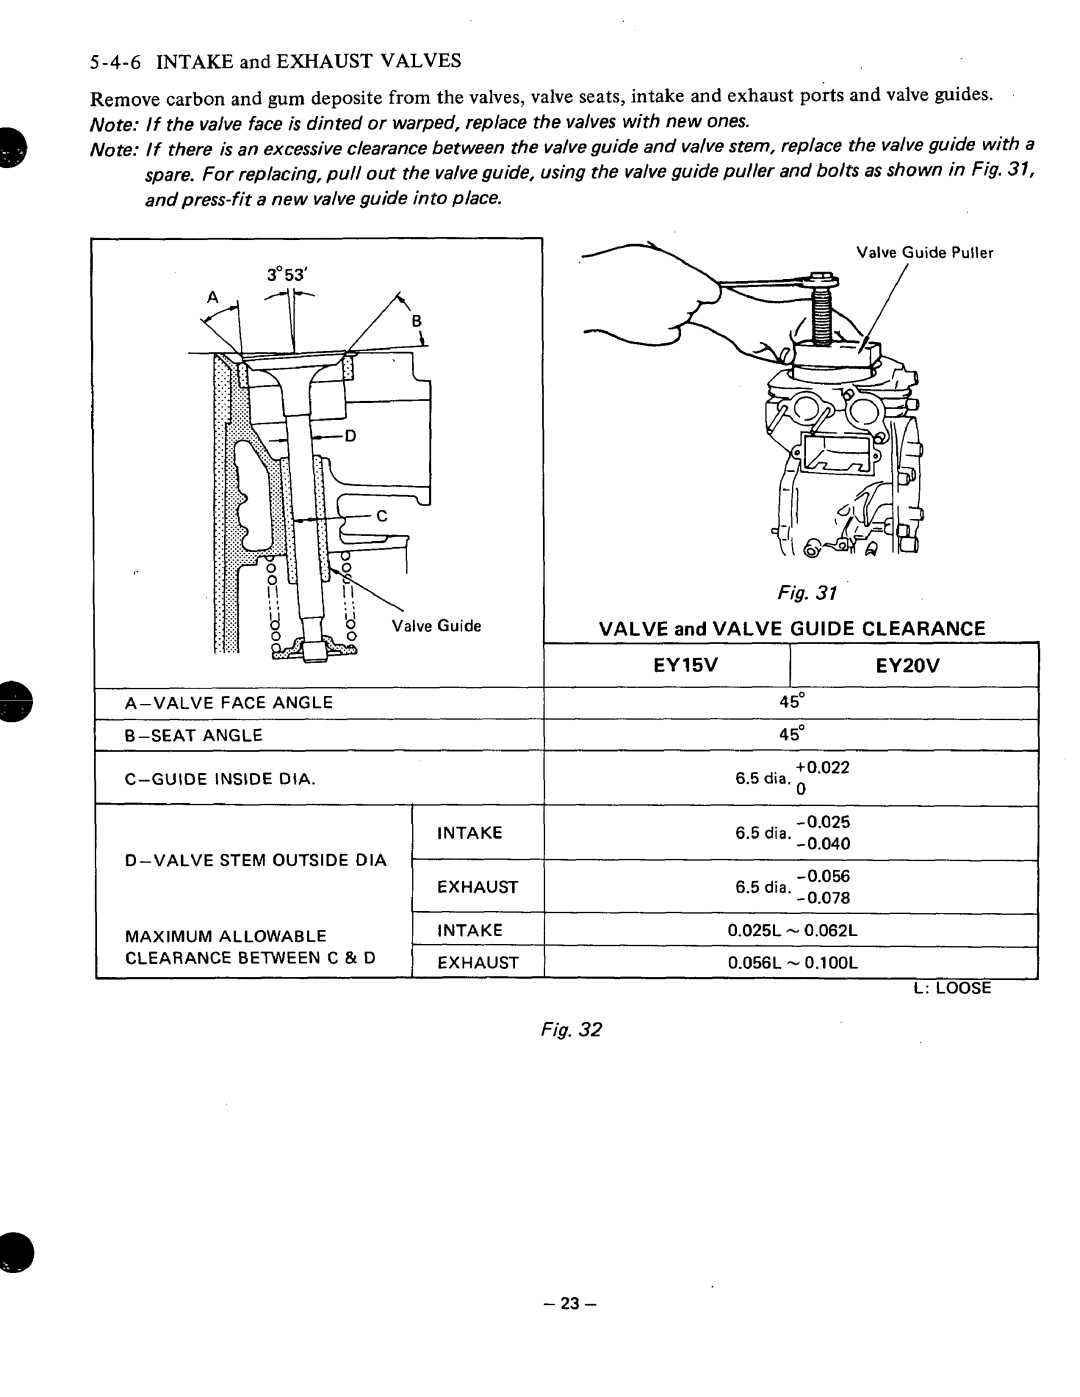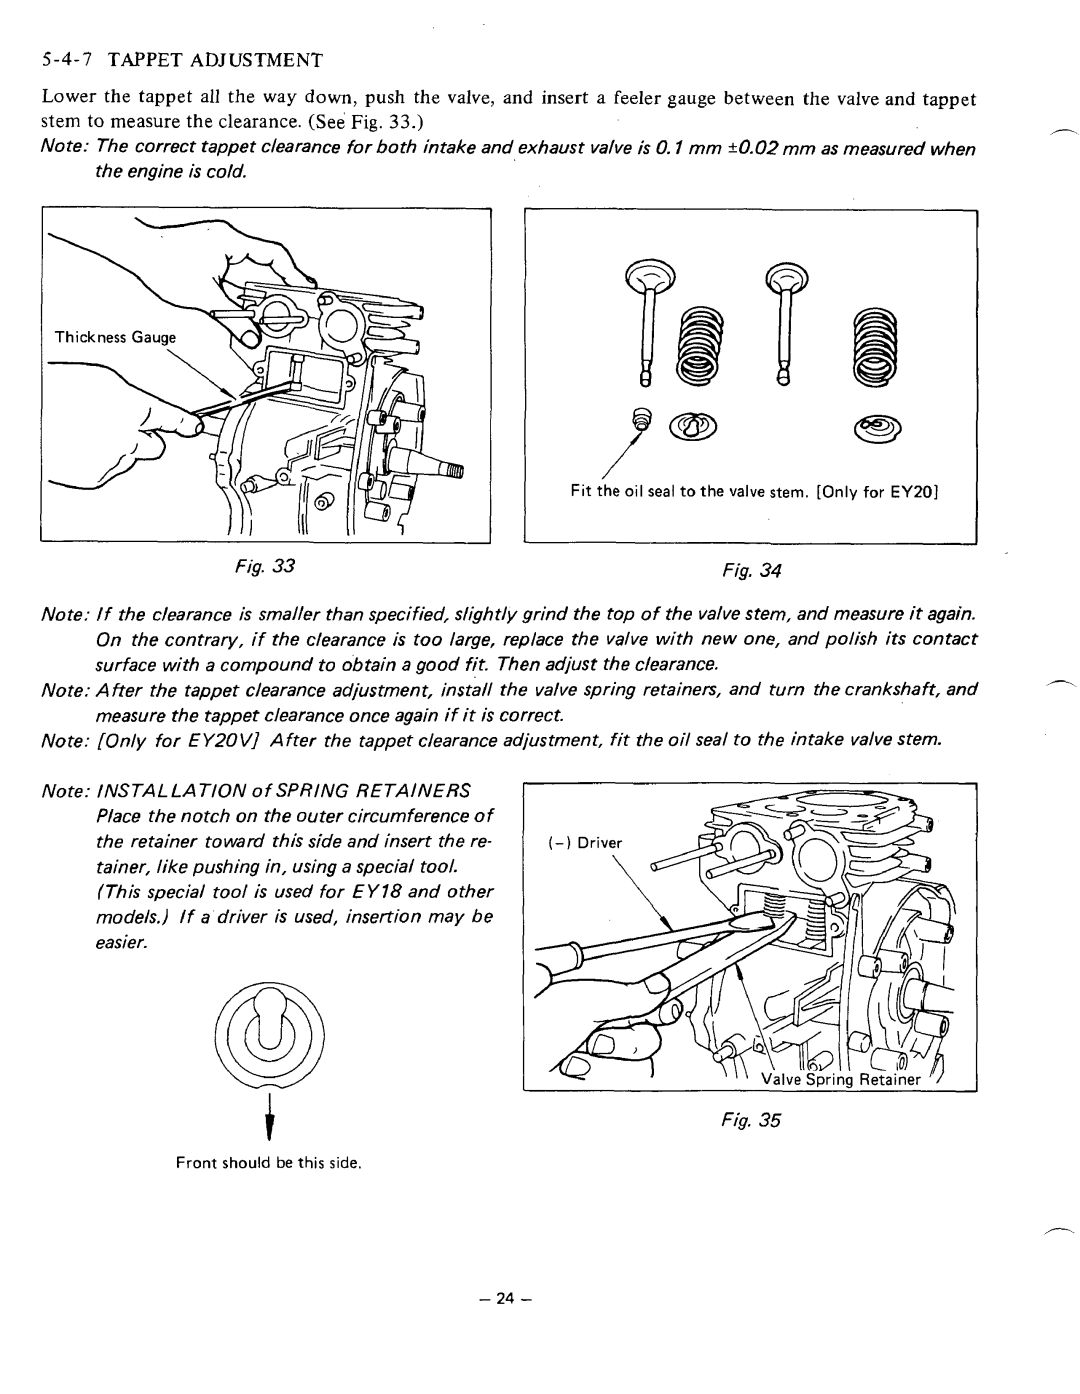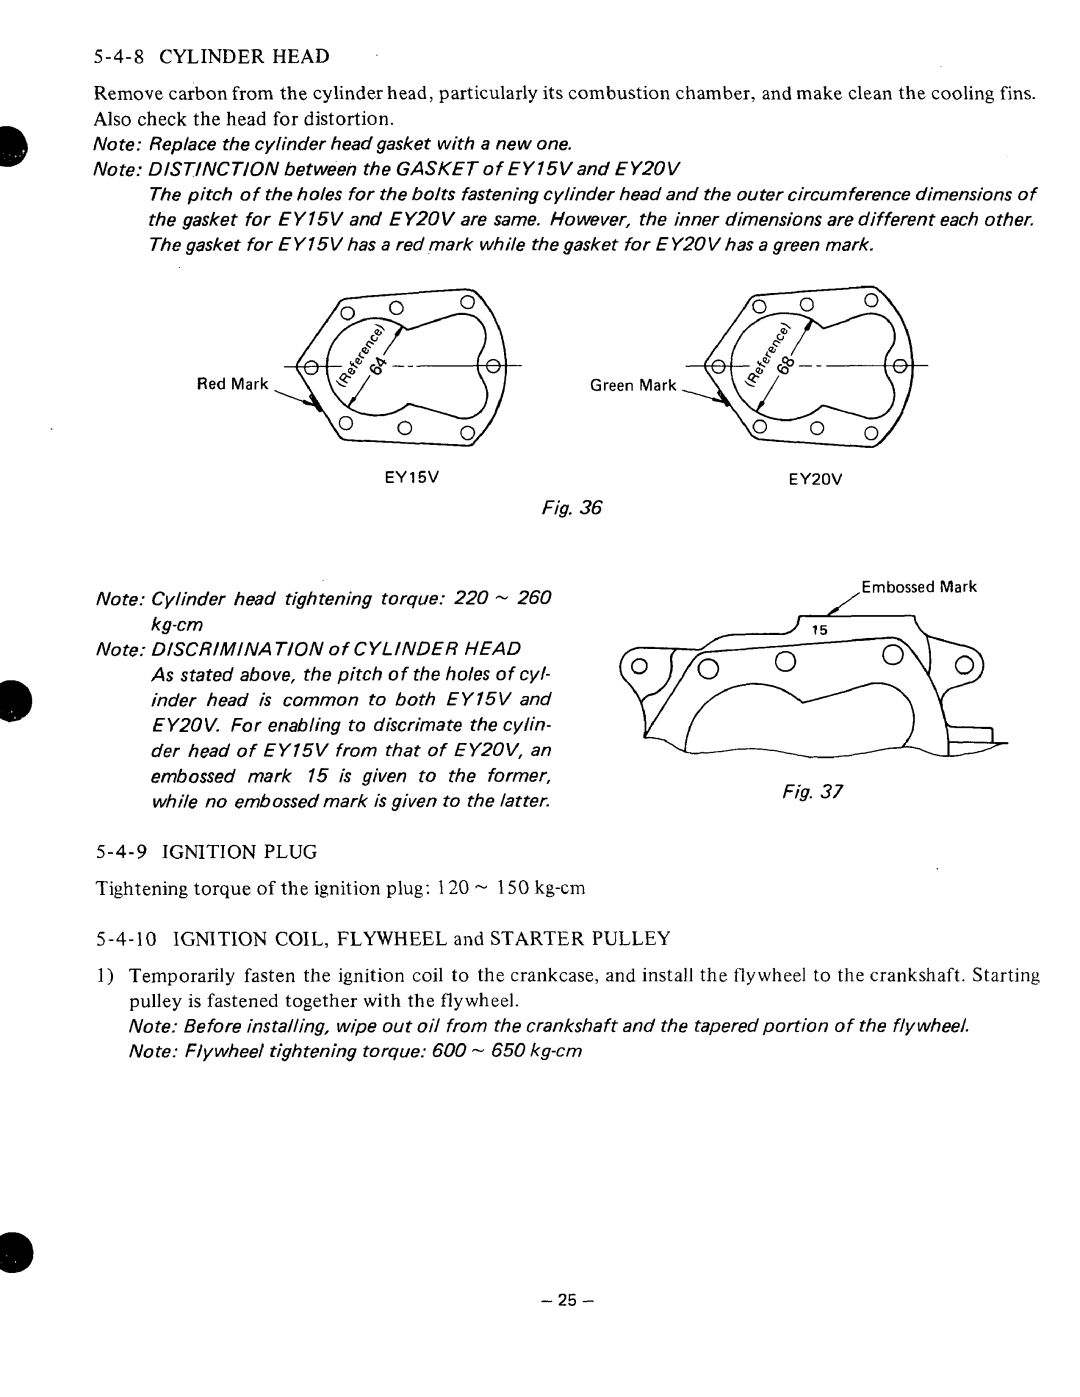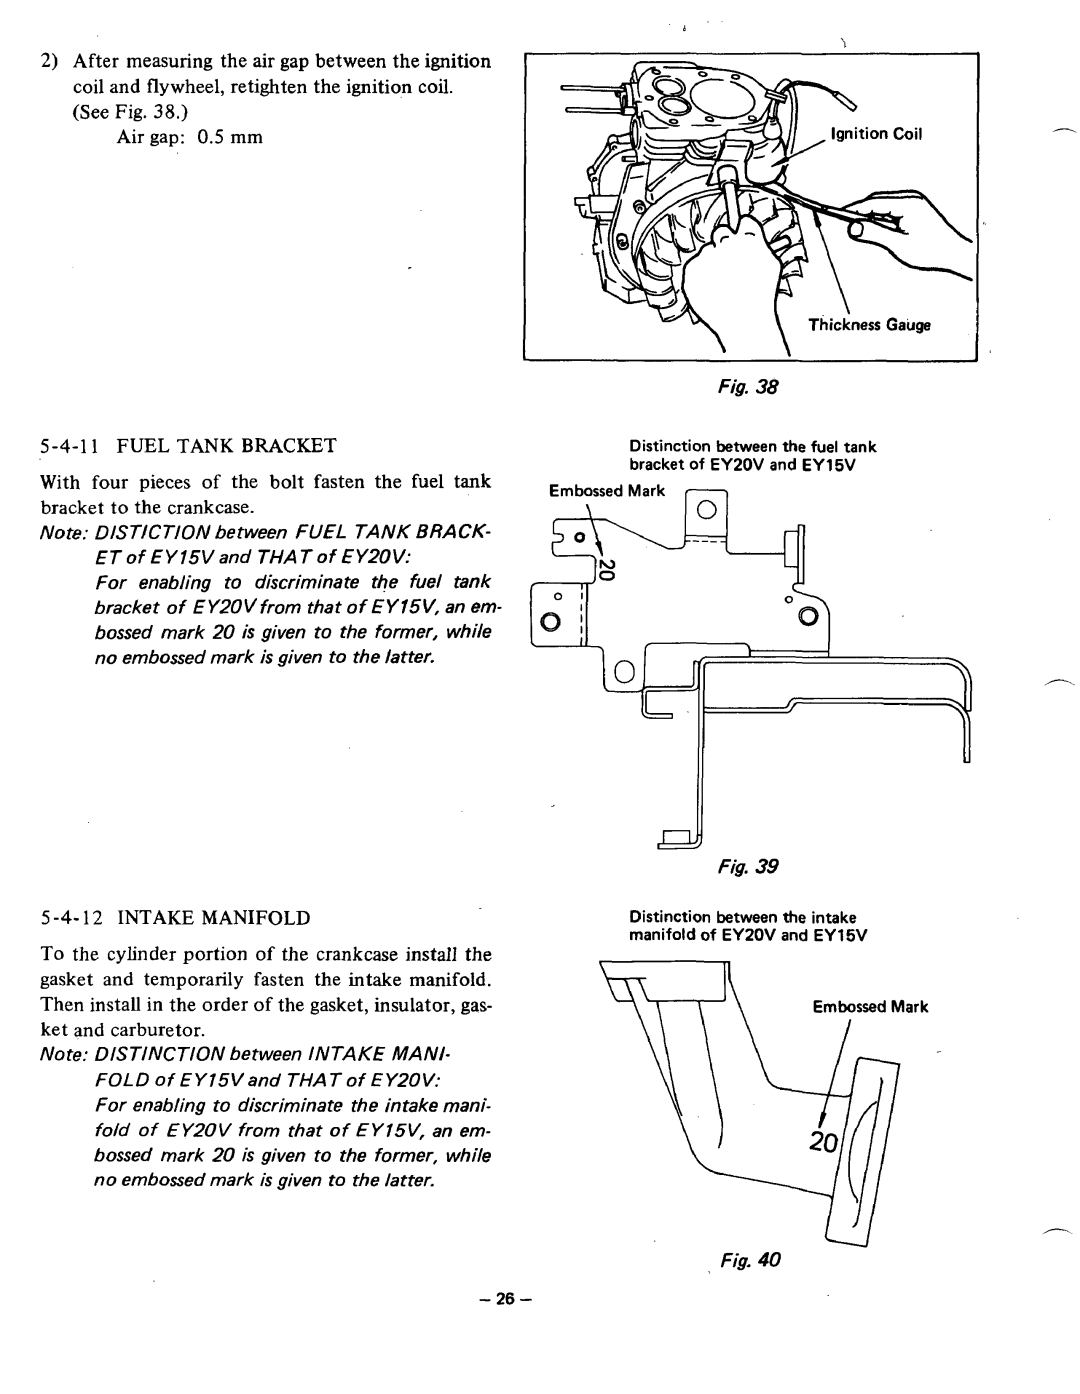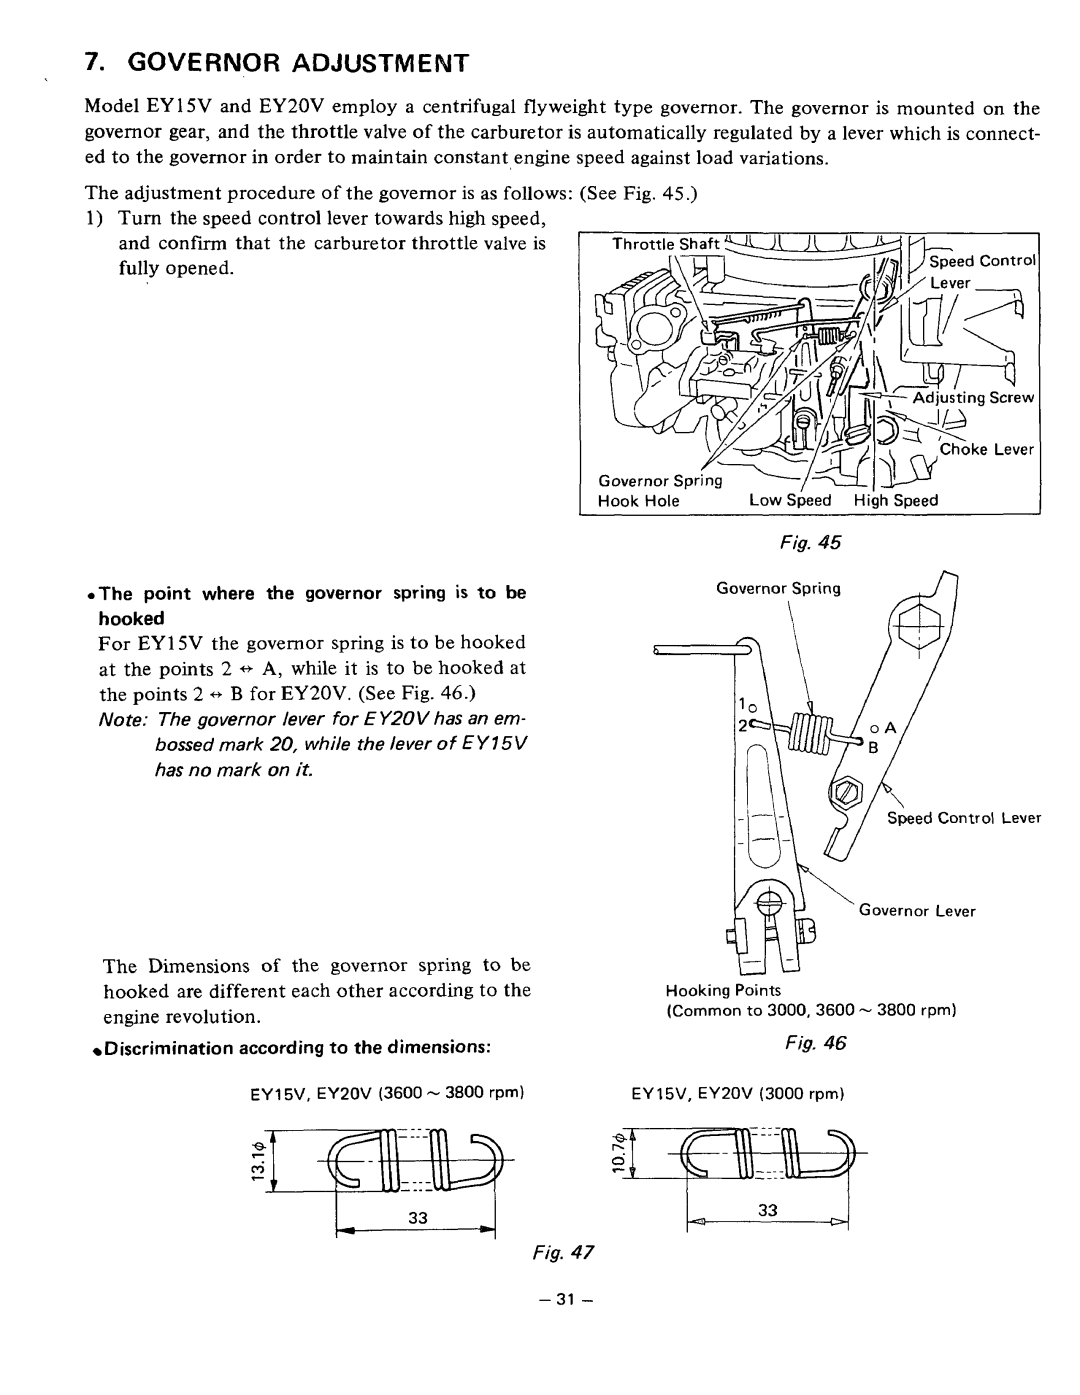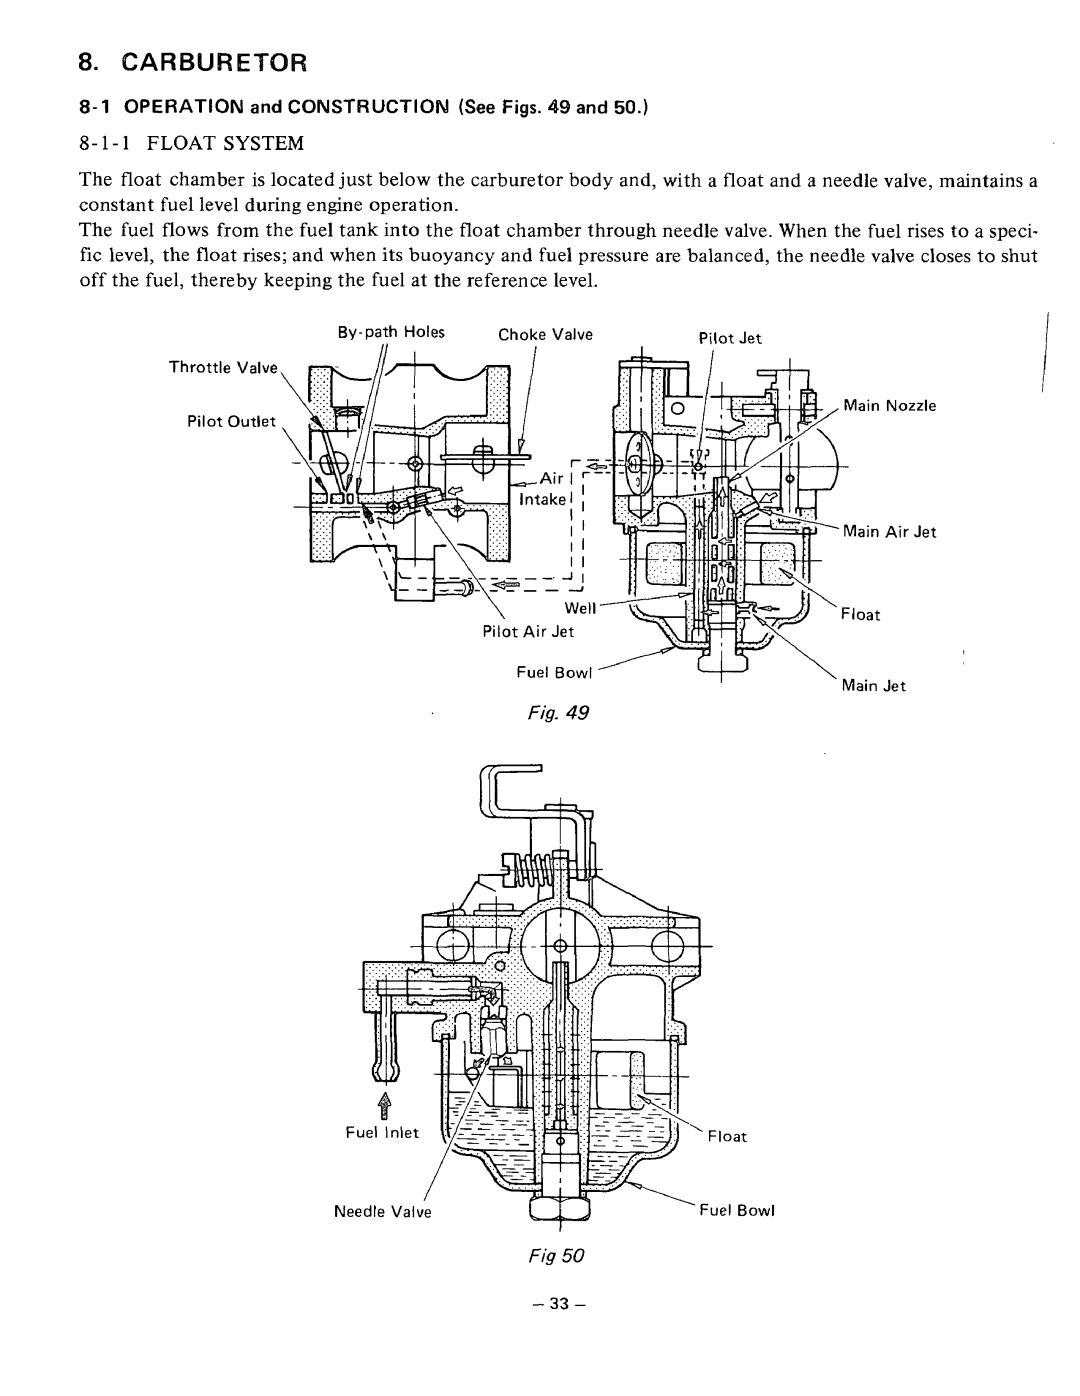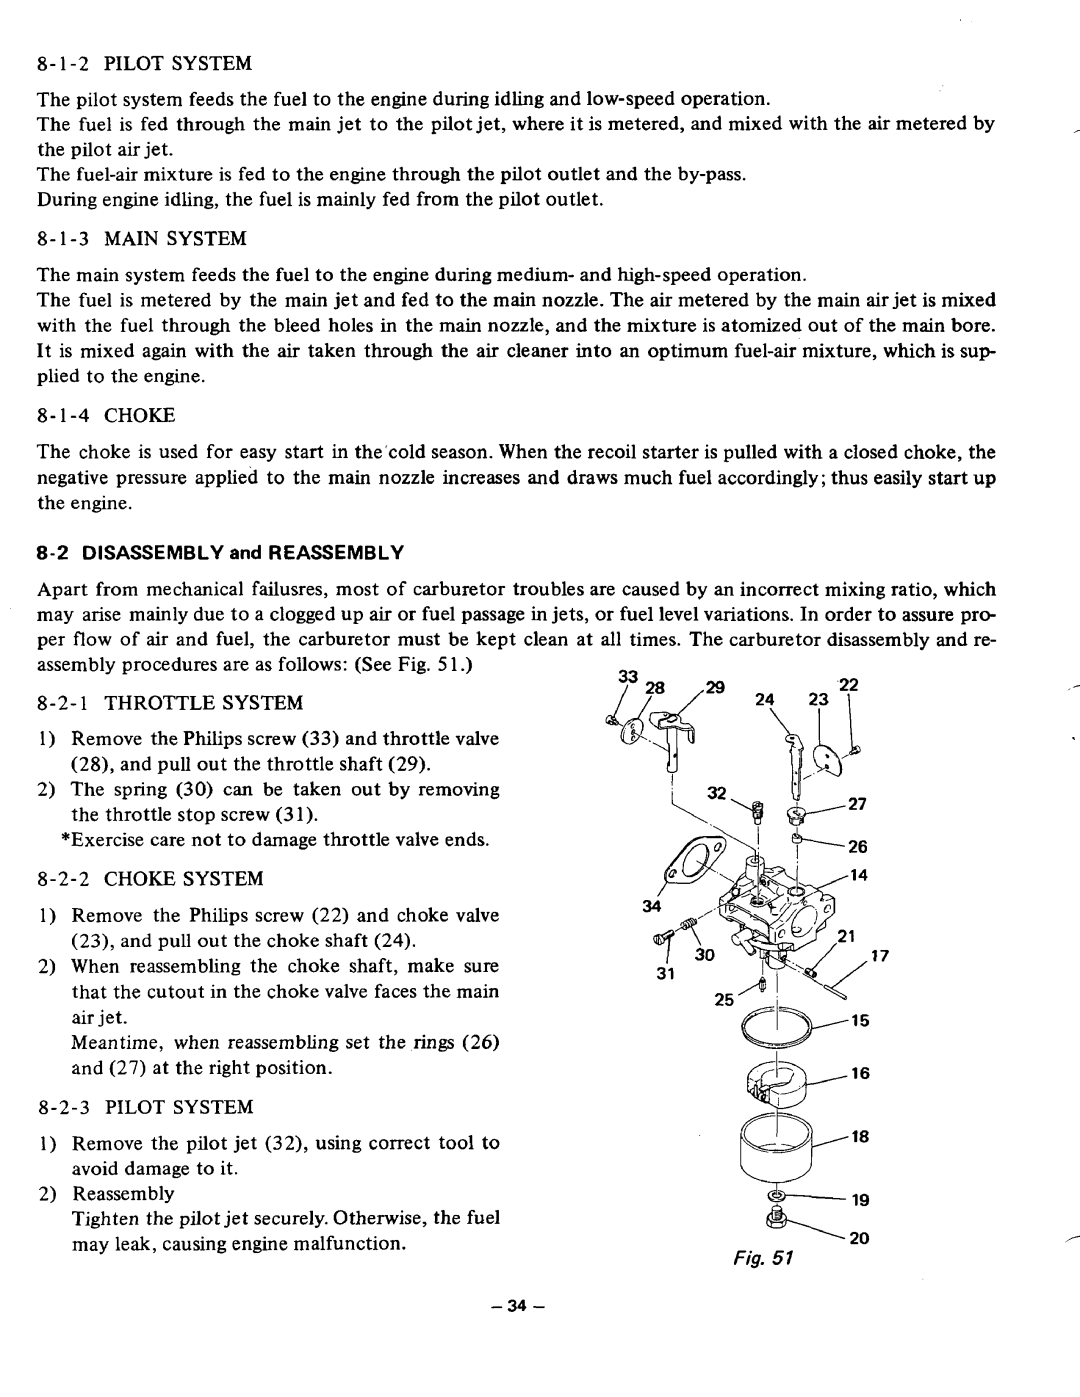
5-3 HOW TO DISASSEMBLE
|
|
| *Length of the bolt indicates the lengthfrom the bolt head bottom surfaceto the threaded end. |
| ||||||
Order |
| Item |
|
| Procedures |
| Remarks | Tool | ||
1 | Recoil starter | (1) | Removetherecoilstarter. |
|
| 10 mm box spanner |
| |||
|
|
|
| 64 x 8 mm bolt: 4 pcs. |
|
|
|
| ||
2 | FueI tank | (1) | Close the fuel cock. |
|
| 10 mm box spanner |
| |||
|
|
| (2) From the carburetor disconnect the fuel |
| 10 mm box spanner |
| ||||
|
|
|
| pipe between the fuel strainer and carbu- |
|
|
| |||
|
|
|
| retor on the sideof the carburetor. |
|
|
| |||
|
|
| (3) Remove the tank band and fuel tank from |
|
|
| ||||
|
|
|
| the fuel tank bracket. |
|
|
|
| ||
|
|
|
| 6@x 12 mm bolt: 2 pcs. |
|
|
|
| ||
| ~ | ~~ | ~~ |
|
|
|
|
|
|
|
3 | Muffler and | (1) Remove the muffler and muffler cover from | Note that the EY20V | 12mmboxspanner |
| |||||
| muffler cover |
| the cylinder portionof the crankcase. | has 2 sheets of gasket | or 12 mm spanner |
| ||||
|
|
|
| 8@x 100 mm bolt: | 2 pcs. (EY 15V) | and 1 sheet of flange |
|
| ||
|
|
|
| 8@x 106 mm bolt: | 2 pcs.(EY2OV) | between the muffler |
|
| ||
|
|
|
|
|
|
|
| and cylinder. |
|
|
|
|
|
| ~~~ | ~~ | ~ | ~ |
|
|
|
4 | Air cleaner | (1) Remove the air cleaner cover and element. | Air cleaner is fastened | 10 mm box spanner |
| |||||
|
|
| ( 2 ) Loosen the intake manifold mounting nut. | together with the car- |
|
| ||||
|
|
|
| 69 nut: 2 pcs. |
|
| buretor. |
|
| |
|
|
| (3) Remove the air cleaner case from the car- |
|
|
| ||||
|
|
|
| buretor and fuel tank bracket. |
|
|
| |||
|
|
|
| 6 9 n u t : 2 pcs. 6$ x 14 mm bolt: 1 pce. |
|
|
| |||
|
|
| (4) | Disconnectthebreatherpipe. |
|
|
|
| ||
| Governor lever | (1) Remove the choke | lever from the fuel tank | Special bolt | 14 mm box spanner |
| ||||
| and the relative |
| bracket and remove the choke rod from |
| or 14 mm spanner |
| ||||
| parts |
|
| the carburetor, |
|
|
|
|
| |
|
|
|
| Specialbolt: | 1 pce. |
|
| Just loosen the bolt, | 10 mm box spanner |
|
|
|
| (2) Remove the governor lever from the |
| ||||||
|
|
|
| governor lever shaft. |
| unnecessary to the |
|
| ||
|
|
|
| 64 x 2 5 mmbolt:1pce. |
|
|
|
| ||
|
|
| (3) Remove the governor rod and rod spring |
|
|
| ||||
|
|
|
| from the carburetor. |
|
|
|
| ||
|
|
| (4) Remove the governor spring from the |
|
|
| ||||
|
|
|
| speed control lever. |
|
|
|
| ||
| Carburetor | (1) Remove the carburetor from the intake |
|
|
| |||||
|
|
|
| manifold. |
|
|
|
|
|
|
|
|
| ~ | ~~ |
|
|
|
|
|
|
7 | Intake manifold | (1) Remove the intake manifold from the |
| 10 mm box spanner |
| |||||
|
|
|
| cylinder portion of the crankcase. |
|
|
| |||
|
|
|
| 6q5 nut: 2 pcs. |
|
|
|
|
| |
8 | Fuel | tank | (1) Remove the fuel tank bracket from the |
| 10 mrn box spanner |
| ||||
| bracket |
| crankcase. |
|
|
|
|
|
| |
|
|
|
| 64 x 14 mm |
|
|
| |||
|
|
|
| 64 x 10 mmbolt:2pcs. |
|
|
|
| ||
|
|
|
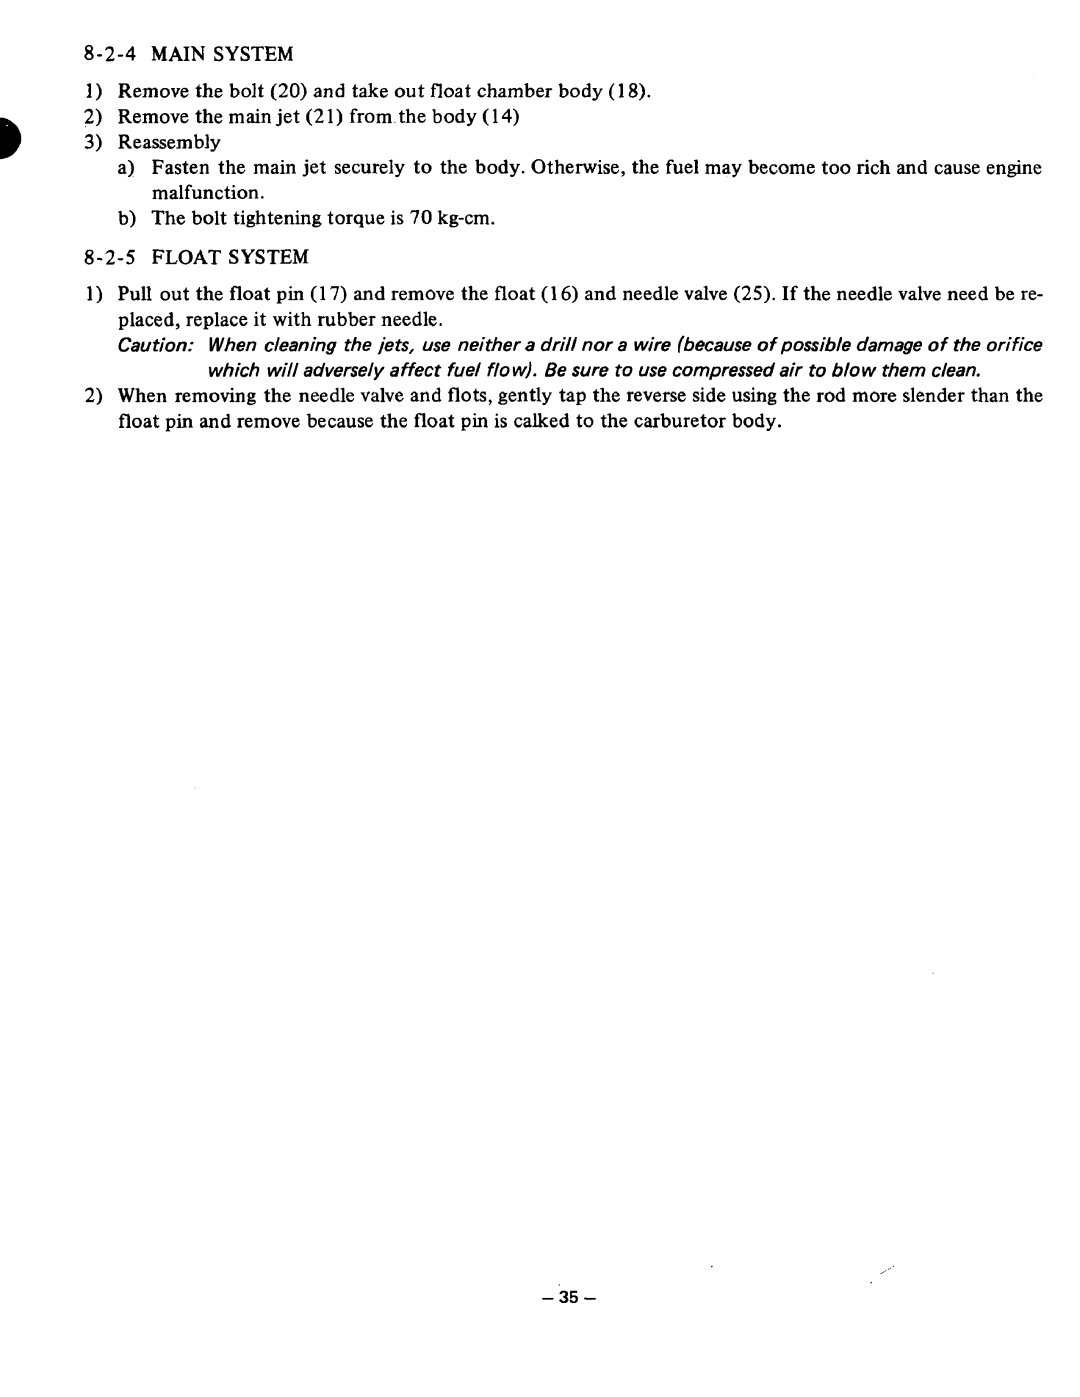
| \ Rod Spring \ | Choke Rod | SpeedControl Lever |
|
| ||
|
|
|
|
|
|
|
| Fuel Tank Bracket |
|
|
Governor Lever / Governor Shaft |
|
Fig. 75
- 14-
