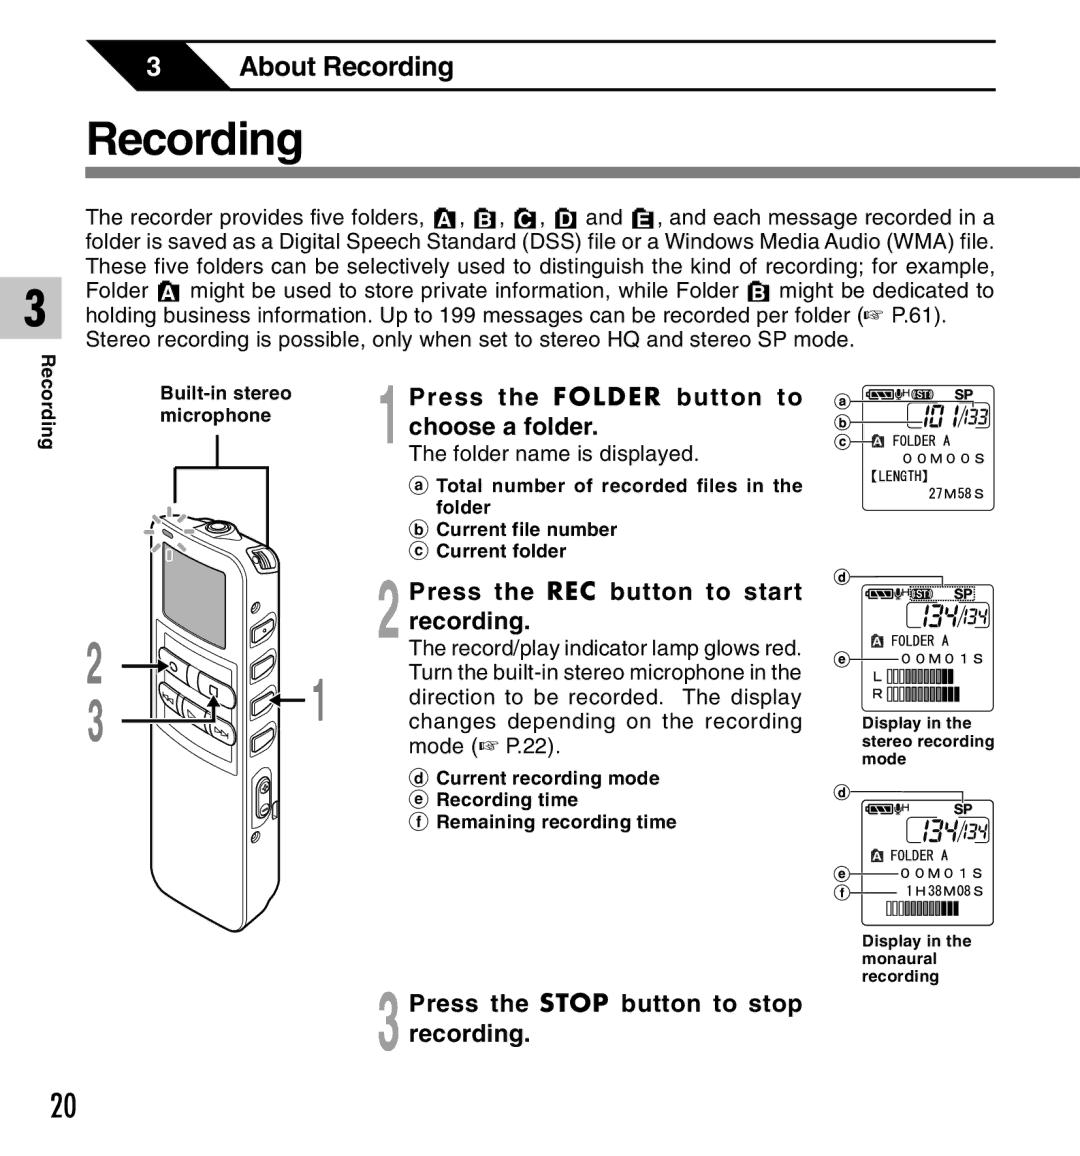
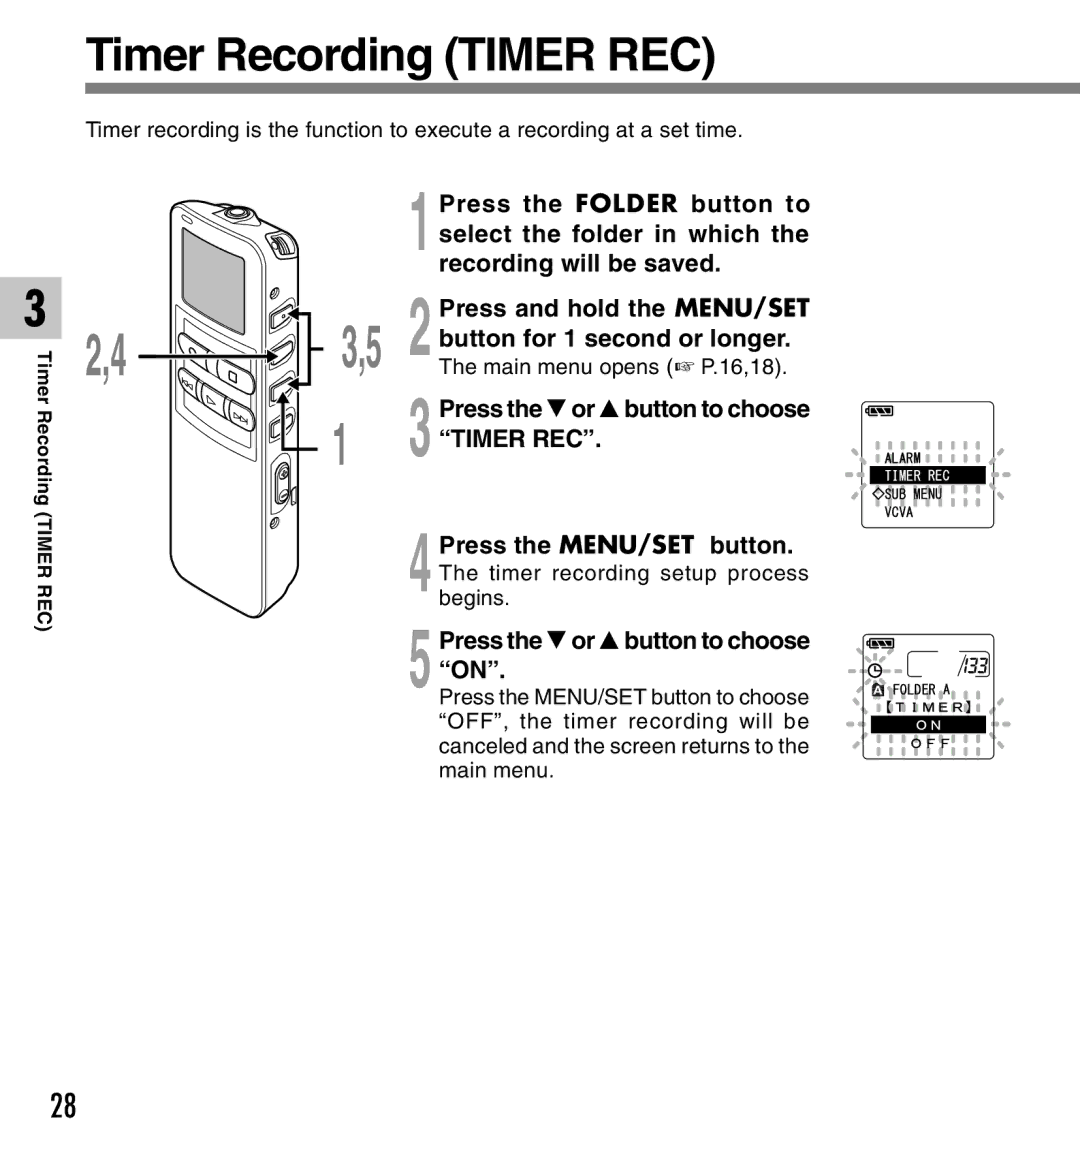
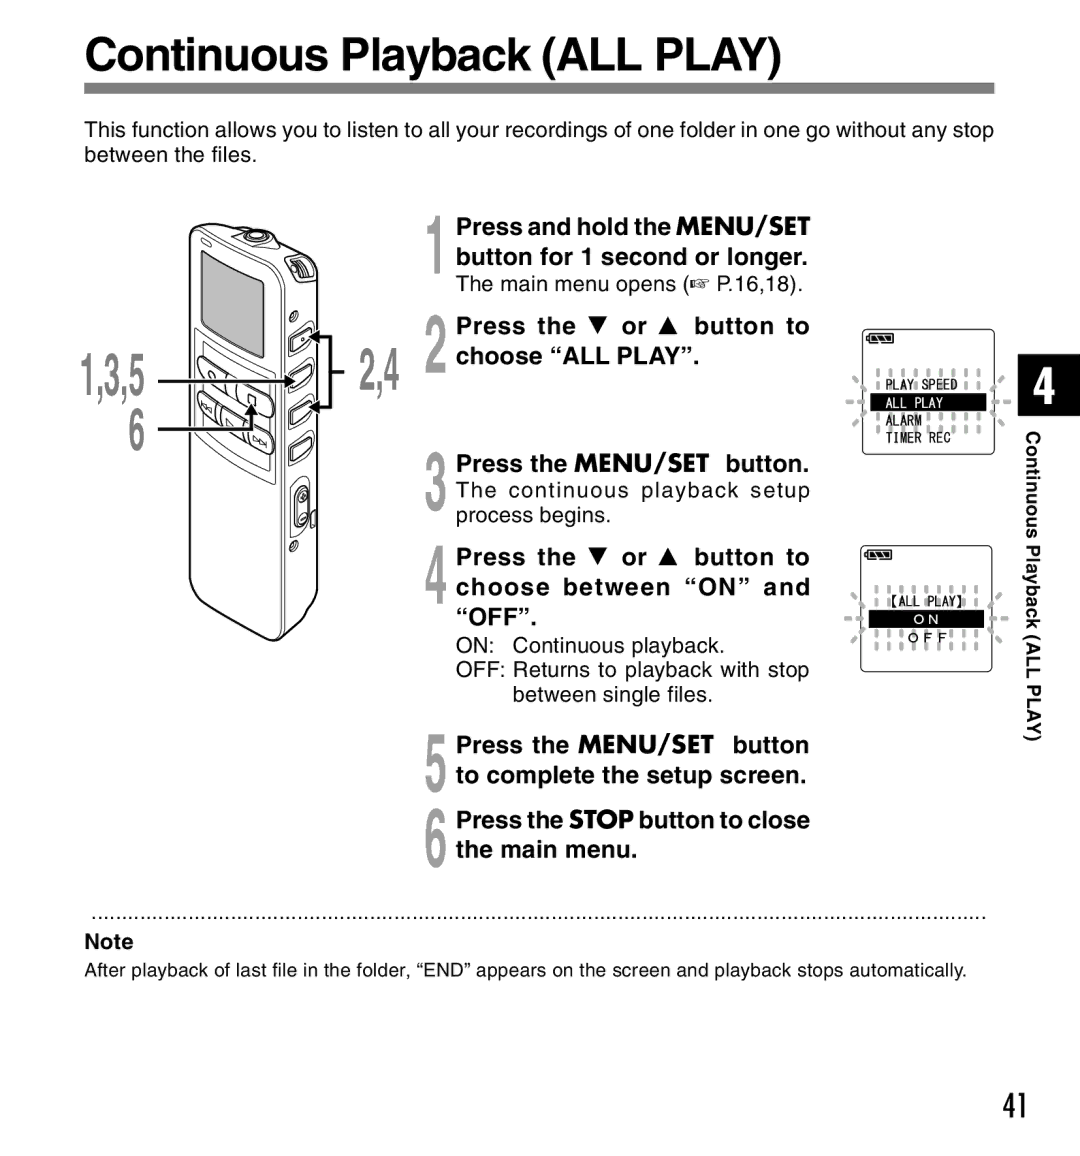
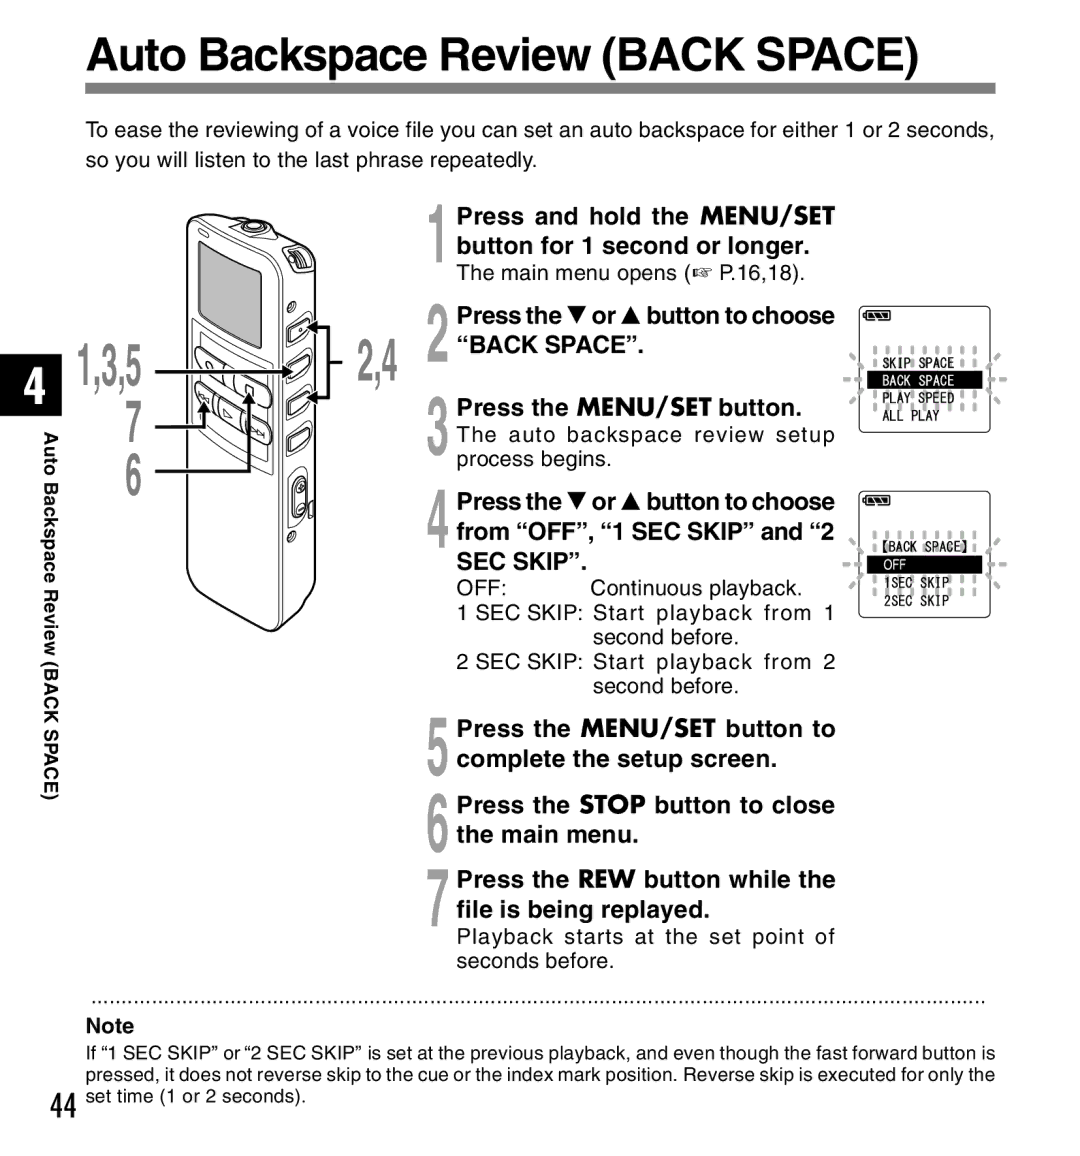
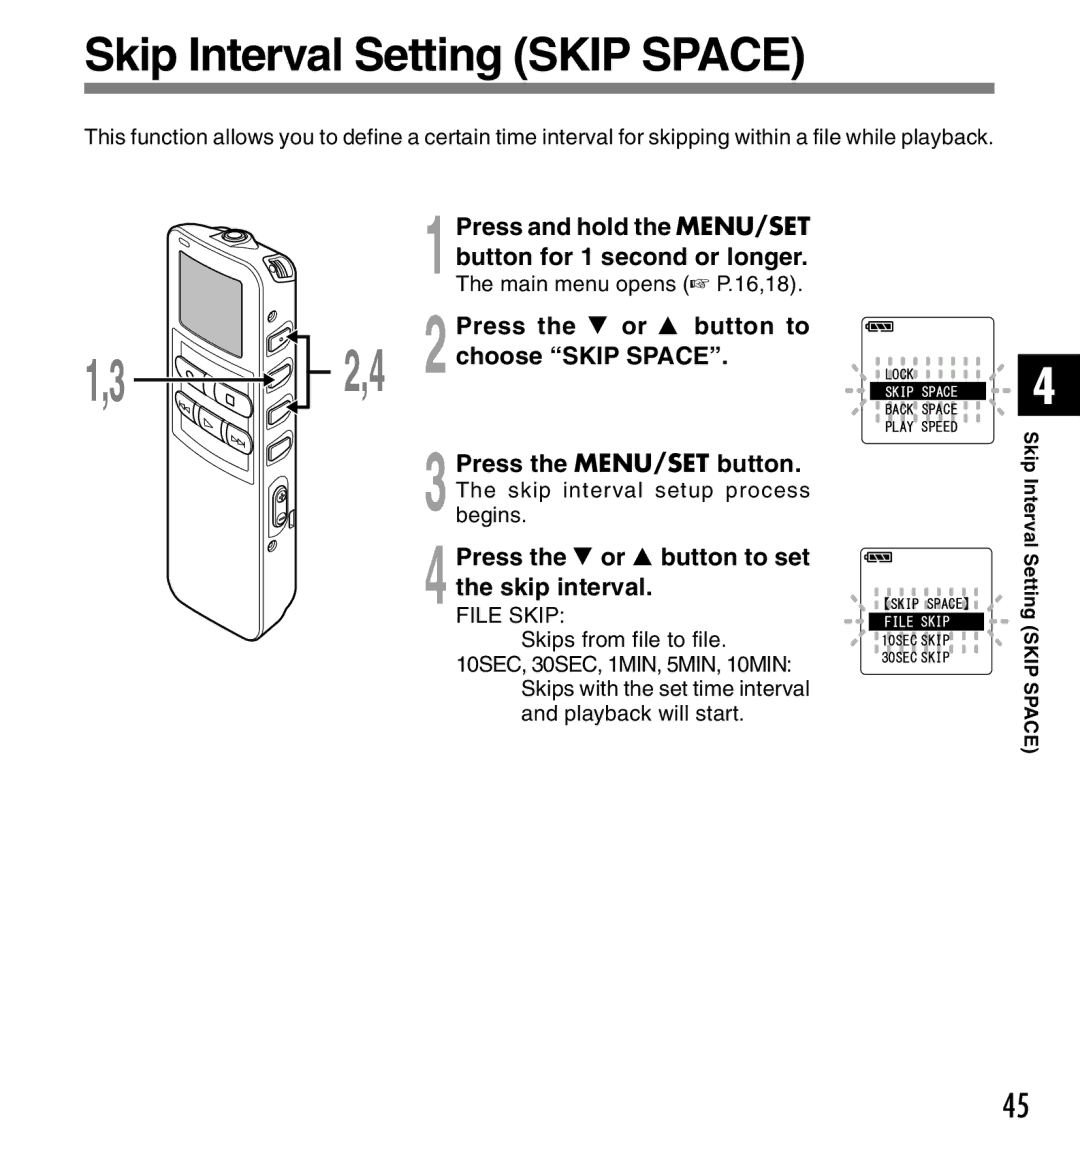
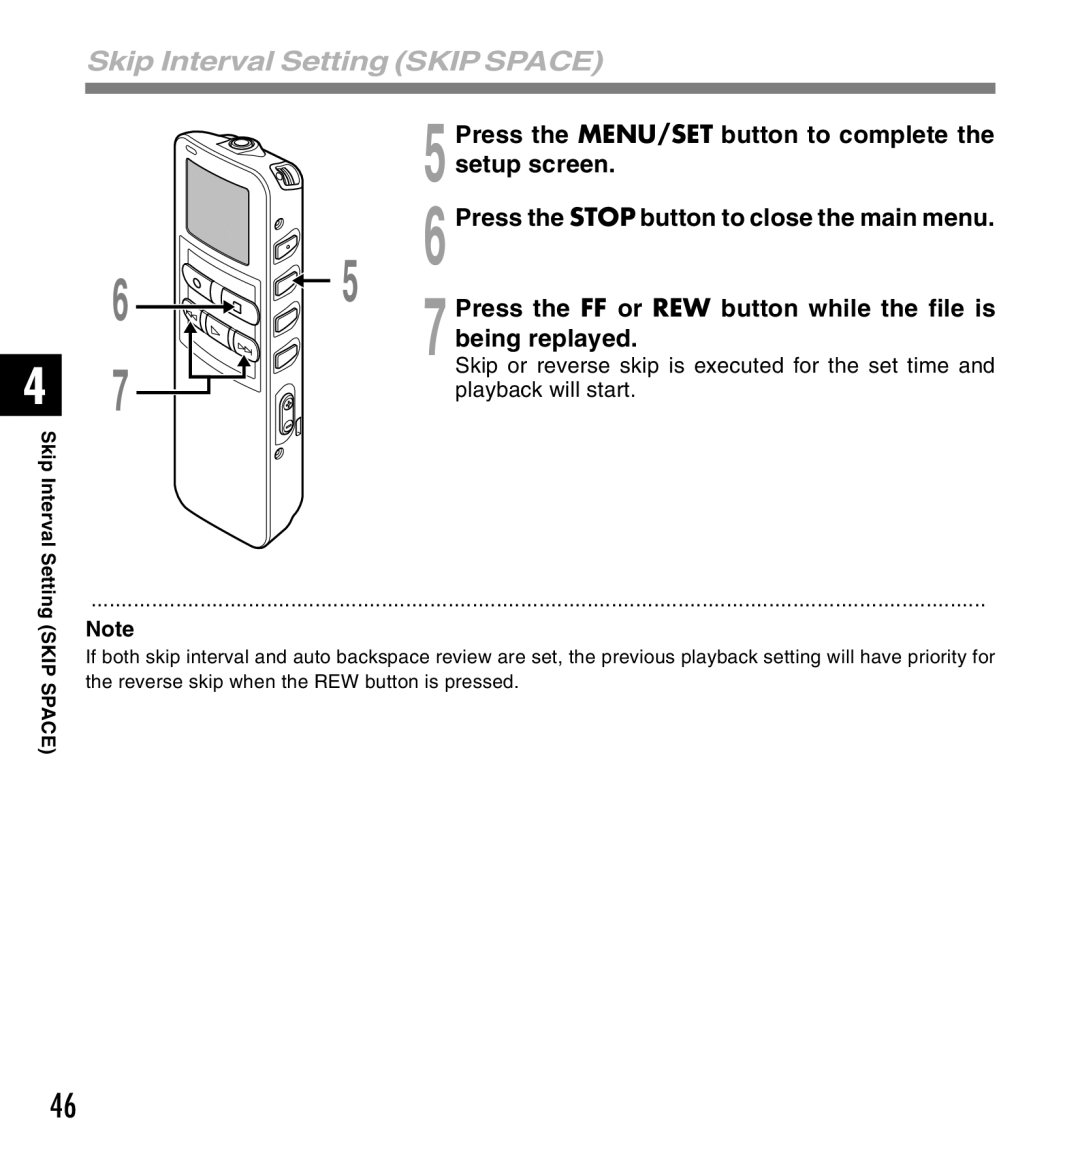
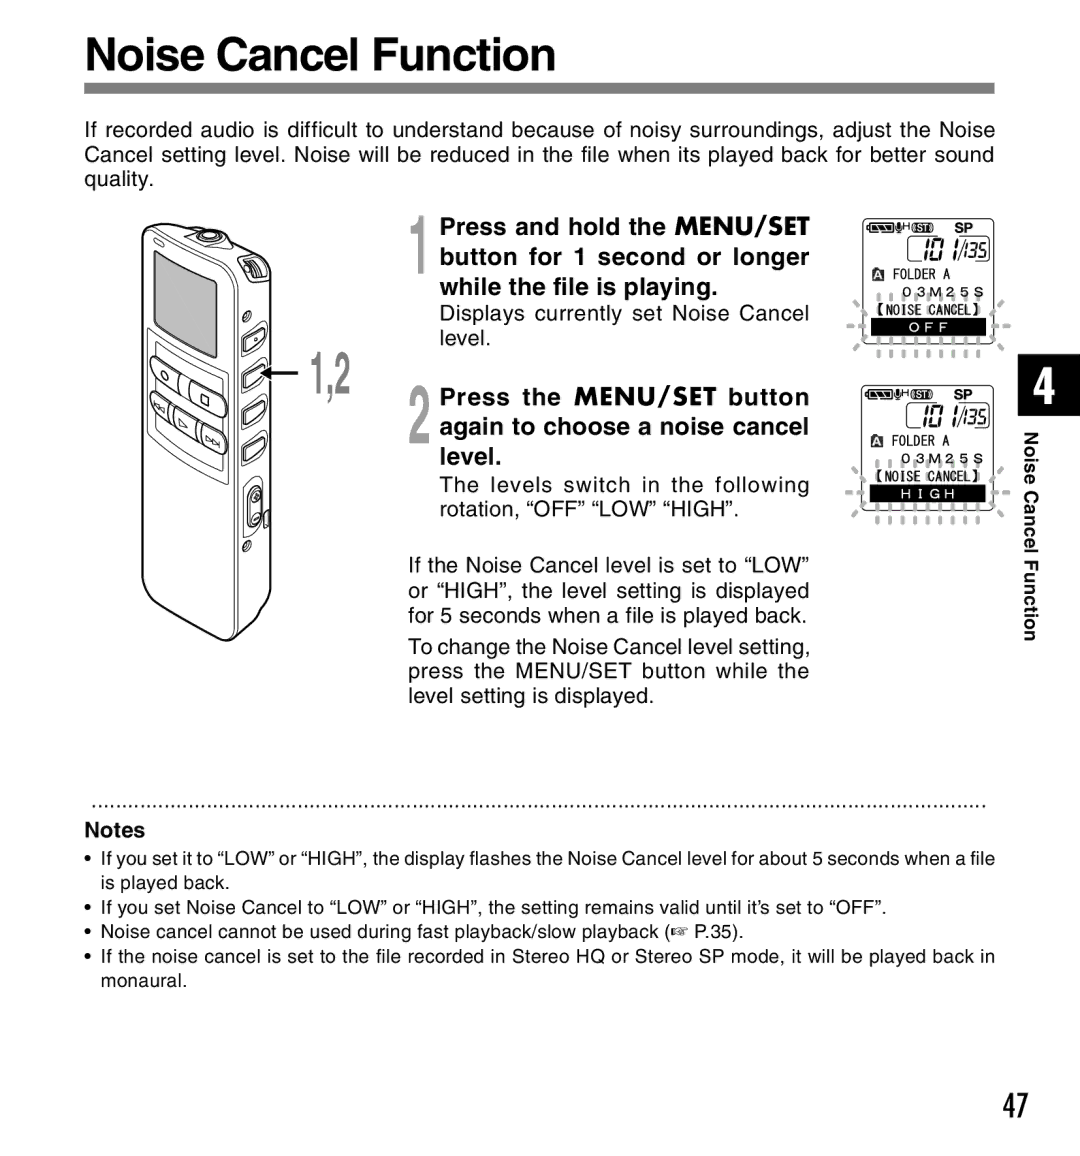
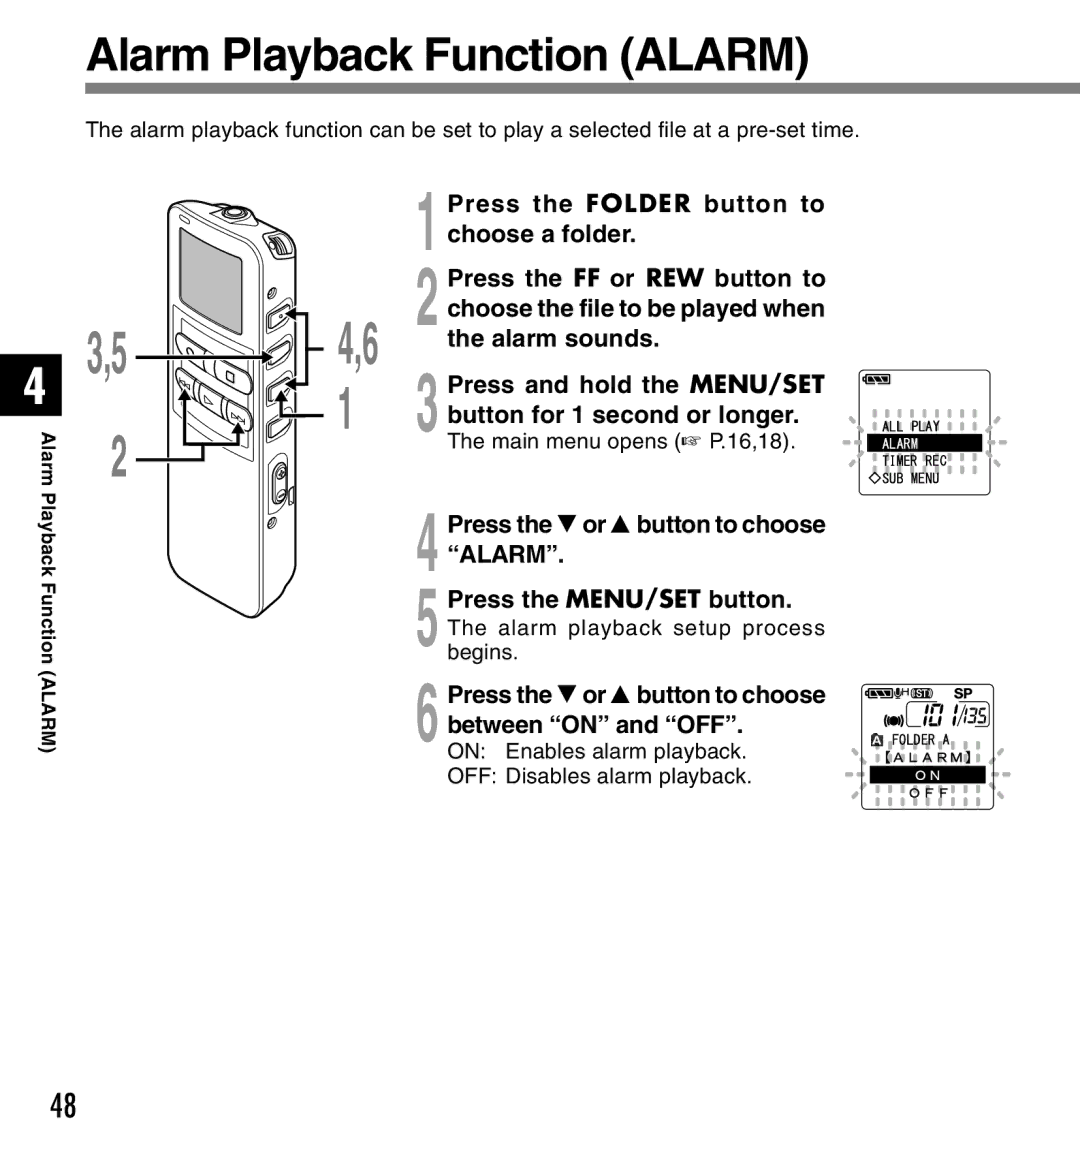


3
Listening While
Audio is
Recorded (Recording
Monitor)
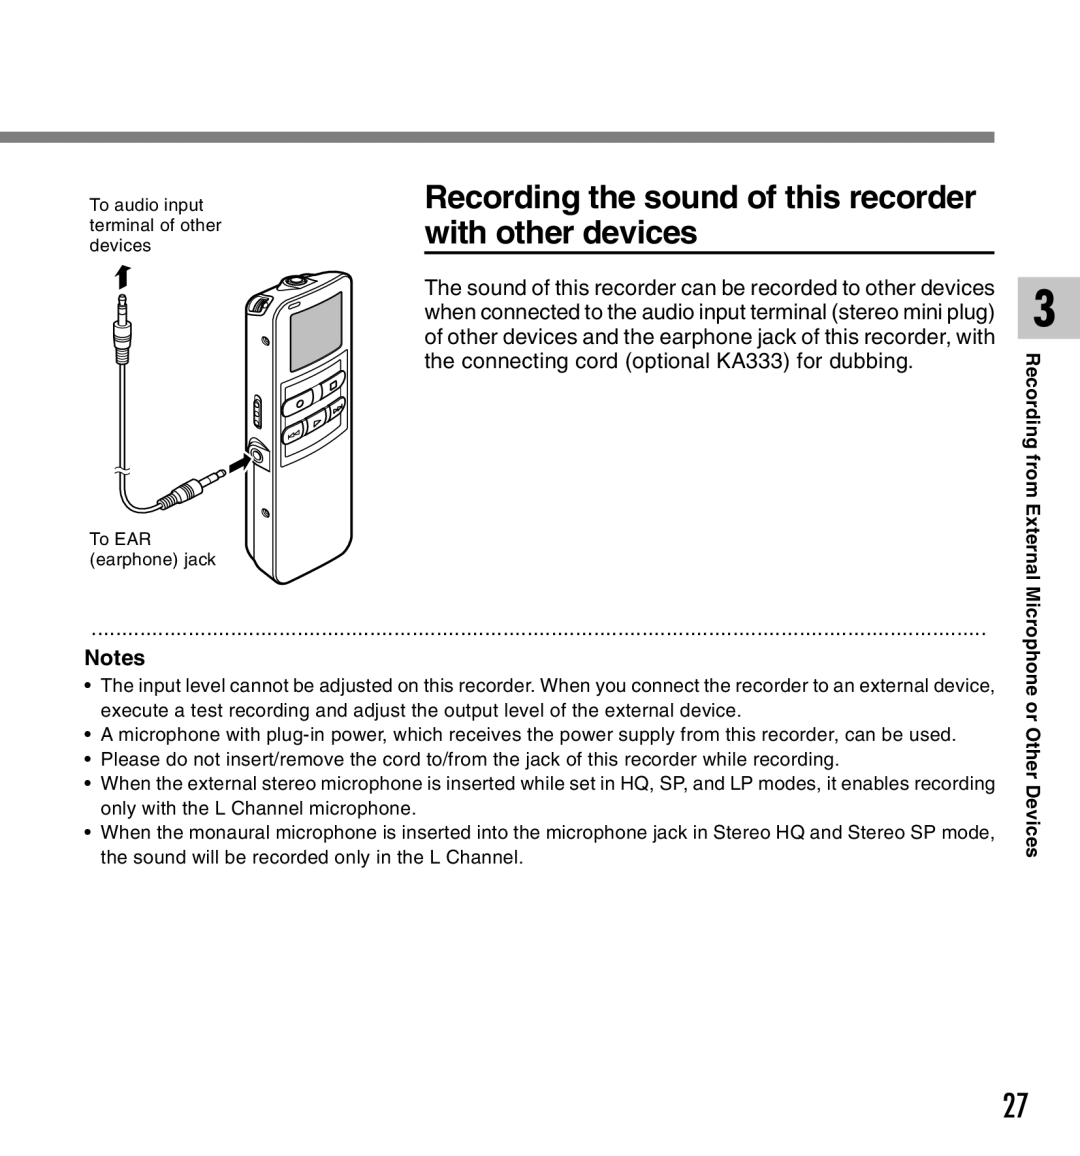
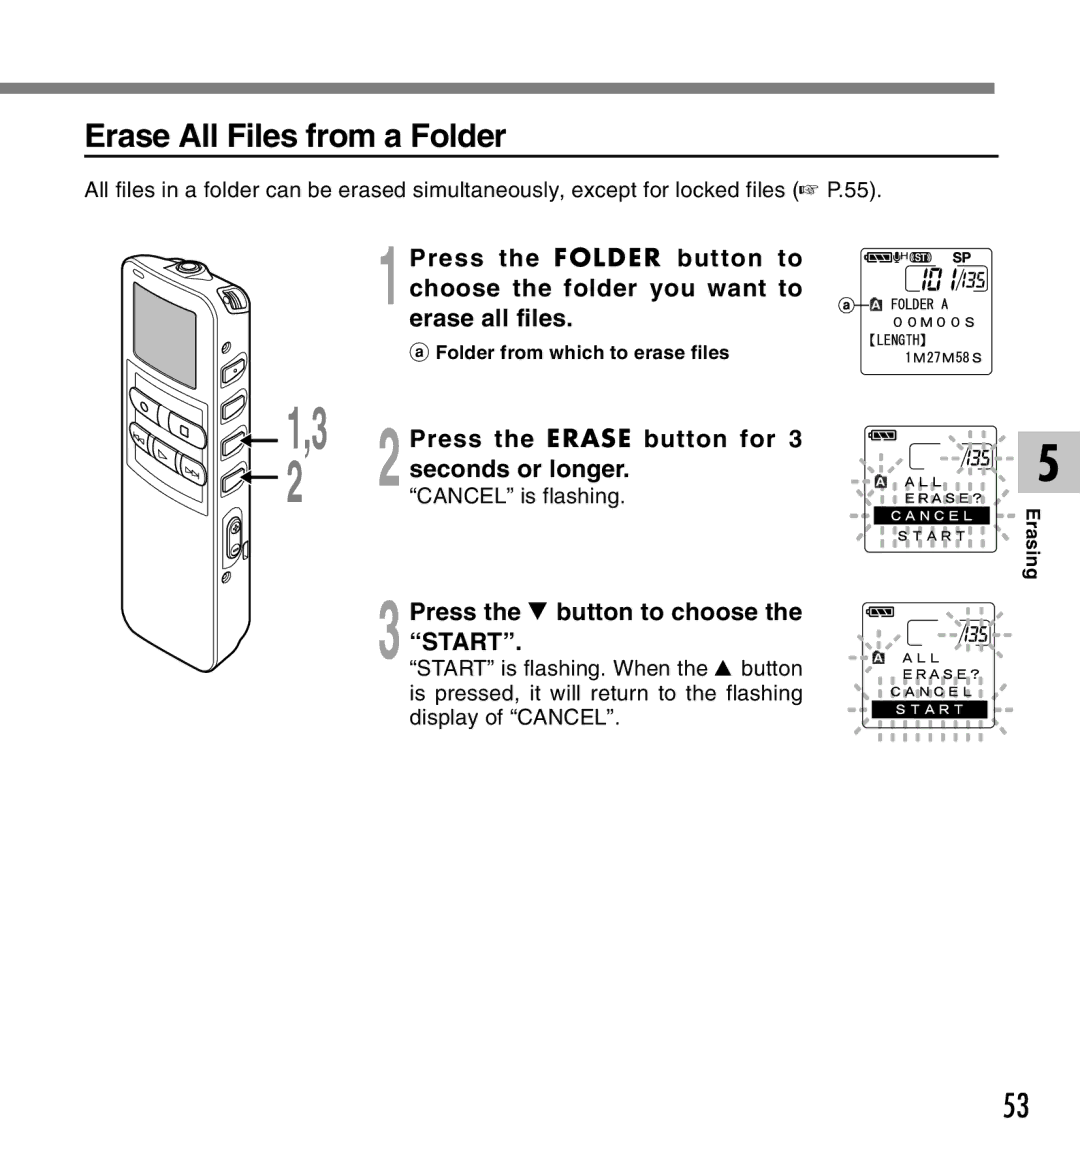
Listening While Audio is Recorded (Recording Monitor)
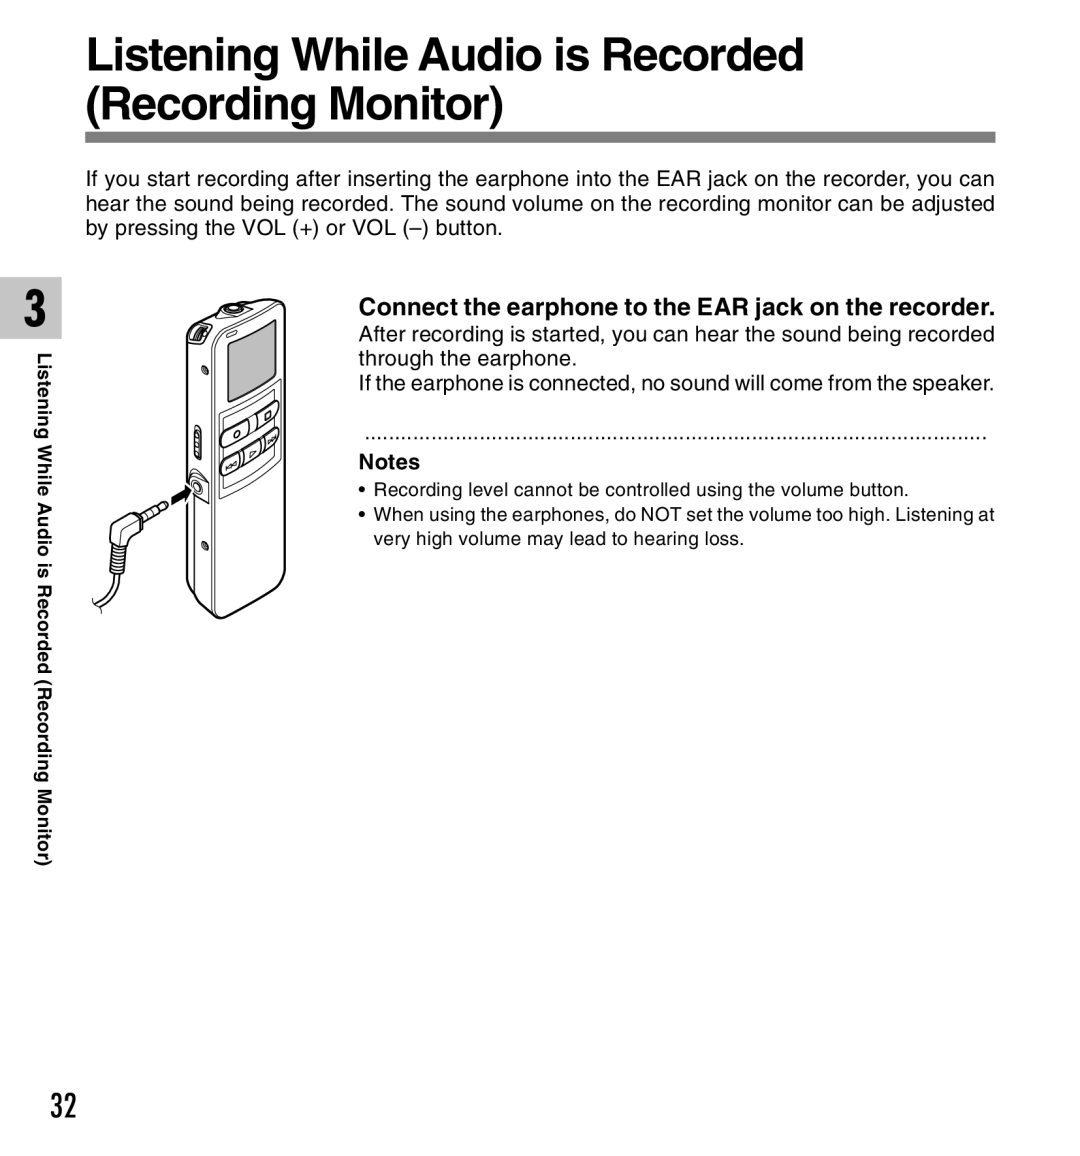
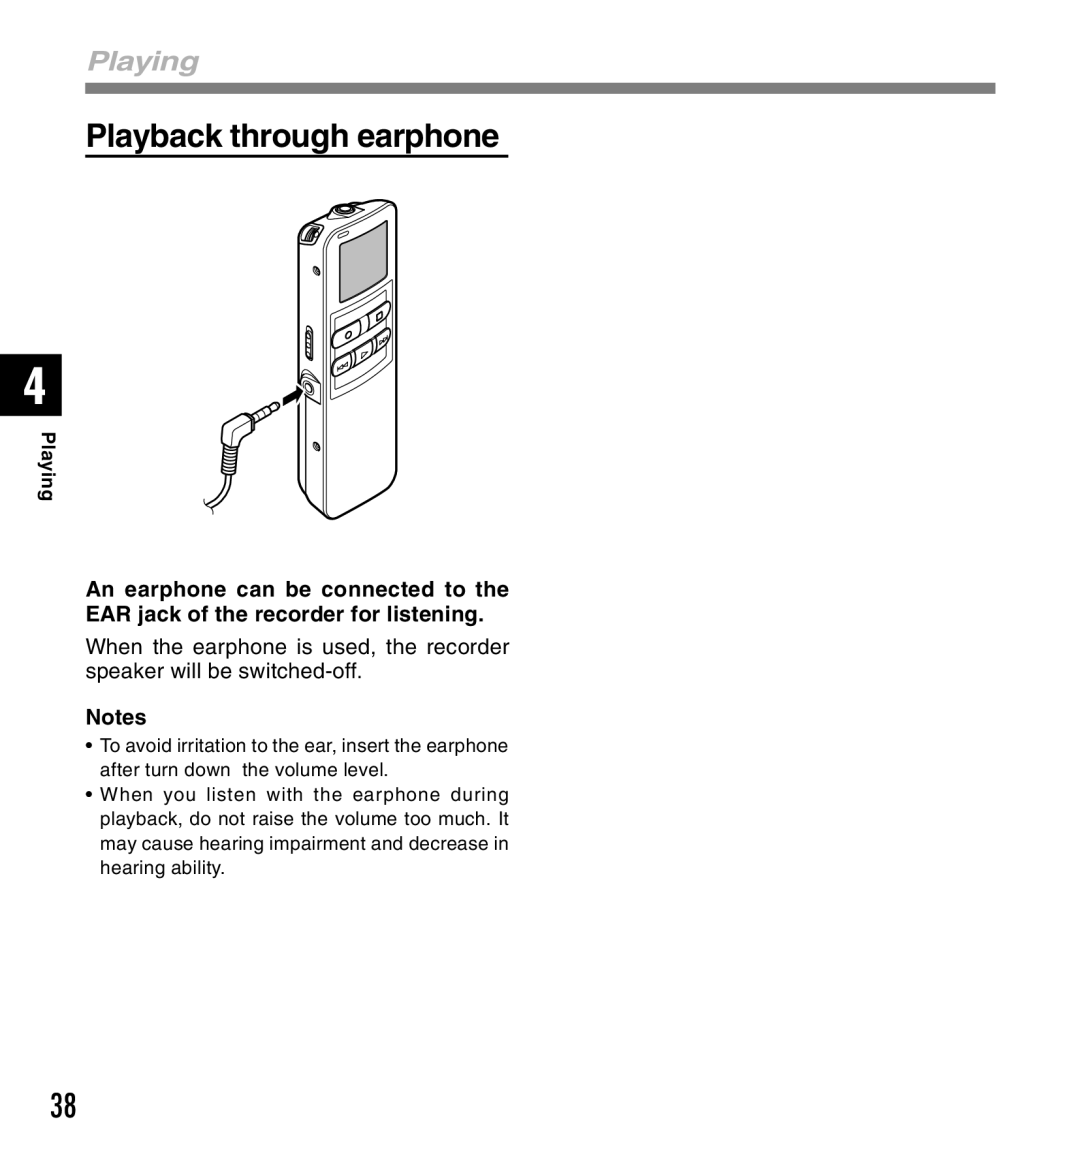
If you start recording after inserting the earphone into the EAR jack on the recorder, you can hear the sound being recorded. The sound volume on the recording monitor can be adjusted by pressing the VOL (+) or VOL
Connect the earphone to the EAR jack on the recorder.
After recording is started, you can hear the sound being recorded through the earphone.
If the earphone is connected, no sound will come from the speaker.
.......................................................................................................
Notes
• Recording level cannot be controlled using the volume button.
• When using the earphones, do NOT set the volume too high. Listening at very high volume may lead to hearing loss.
32