Onkyo DR-S2.0 instruction manual Important Safeguards, Avis

Page 2

WARNING:

TO REDUCE THE RISK OF FIRE OR ELECTRIC SHOCK, DO NOT EXPOSE THIS APPLIANCE TO RAIN OR MOISTURE.

CAUTION:

TO REDUCE THE RISK OF ELECTRIC SHOCK, DO NOT REMOVE COVER (OR BACK).

NO USER-SERVICEABLE PARTS INSIDE. REFER SERVICING TO QUALIFIED SERVICE PERSONNEL.

WARNING

RISK OF ELECTRIC SHOCK

DO NOT OPEN

AVIS

RISQUE DE CHOC ELECTRIQUE

NE PAS OUVRIR

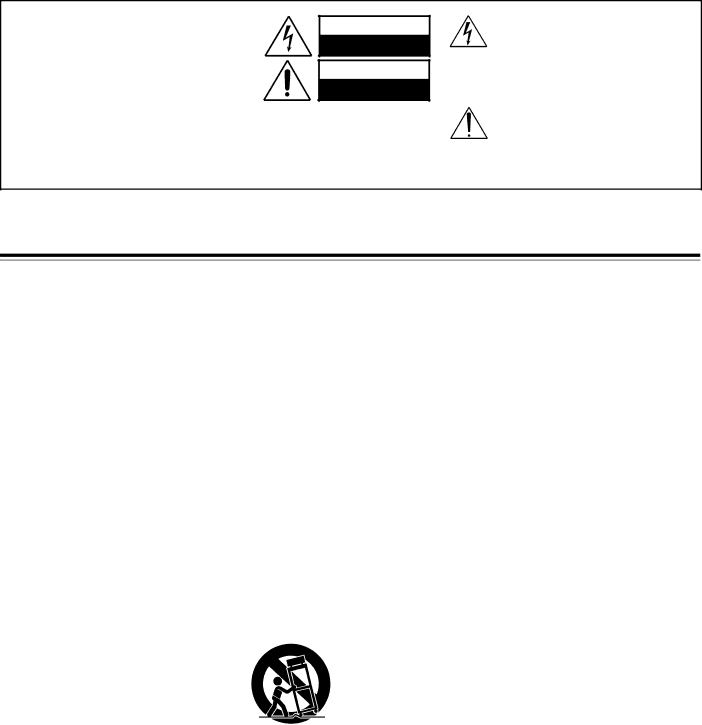
The lightning flash with arrowhead symbol, within an equilateral triangle, is intended to alert the user to the presence of uninsulated “dangerous voltage” within the product’s enclosure that may be of sufficient magnitude to constitute a risk of electric shock to persons.

The exclamation point within an equilateral triangle is intended to alert the user to the presence of important operating and maintenance (servicing) instructions in the literature accompanying the appliance.

Important Safeguards

1.Read Instructions – All the safety and operating instructions should be read before the appliance is operated.

2.Retain Instructions – The safety and operating instructions should be retained for future reference.

3.Heed Warnings – All warnings on the appliance and in the operating instructions should be adhered to.

4.Follow Instructions – All operating and use instructions should be followed.

5.Cleaning – Unplug the appliance from the wall outlet (the mains) before cleaning. The appliance should be cleaned only as recommended by the manufacturer.

6.Attachments – Do not use attachments not recommended by the appliance manufacturer as they may cause hazards.

7.Water and Moisture – Do not use the appliance near water –for example, near a bath tub, wash bowl, kitchen sink, or laundry tub; in a wet basement; or near a swimming pool; and the like.

8.Accessories – Do not place the appliance on an unstable cart, stand, tripod, bracket, or table. The appliance may fall, causing serious injury to a child or adult, and serious damage to the appliance. Use only with a cart, stand, tripod, bracket, or table recommended by the manufacturer, or sold with the appliance. Any mounting of the appliance should follow the manufacturer’s instructions, and should use a mounting accessory recommended by the manufacturer.

9. An appliance and cart combination should

PORTABLE CART WARNING

be moved with care. Quick stops,


excessive force, and uneven surfaces


may cause the appliance and cart


combination to overturn.


S3125A

10.Ventilation – Slots and openings in the cabinet are provided for ventilation and to ensure reliable operation of the appliance and to protect it from overheating, and these openings must not be blocked or covered. The openings should never be blocked by placing the appliance on a bed, sofa, rug, or other similar surface. The appliance should not be placed in a built-in installation such as a bookcase or rack unless proper ventilation is provided. There should be free space of at least 20 cm (8 in.) and an opening behind the appliance.

11.Power Sources – The appliance should be operated only from the type of power source indicated on the marking label. If you are not sure of the type of power supply to your home, consult your appliance dealer or local power company.

12.Grounding or Polarization – The appliance may be equipped with a polarized alternating current line plug (a plug having one blade wider than the other). This plug will fit into the power outlet only one way. This is a safety feature. If you are unable to insert the plug fully into the outlet, try reversing the plug. If the plug should still fail to fit, contact your electrician to replace your obsolete outlet. Do not defeat the safety purpose of the polarized plug.

2

13.Power-Cord Protection Power-supply cords (mains leads) should be routed so that they are not likely to be walked on or pinched by items placed upon or against them, paying particular attention to cords (leads) at plugs, convenience receptacles, and the point where they exit from the appliance.

14.Outdoor Antenna (Aerial) Grounding – If an outside antenna (aerial) or cable system is connected to the appliance, be sure the antenna (aerial) or cable system is grounded so as to provide some protection against voltage surges and built-up static charges. Article 810 of the National Electrical Code, ANSI/NFPA 70, provides information with regard to proper grounding of the mast and supporting structure, grounding of the lead-in wire to an antenna- (aerial-) discharge unit, size of grounding conductors, location of antenna- (aerial-) discharge unit, connection to grounding electrodes, and requirements for the grounding electrode. See FIGURE 1.

15.Lightning – For added protection for the appliance during a lightning storm, or when it is left unattended and unused for long periods of time, unplug it from the wall outlet (the mains) and disconnect the antenna (aerial) or cable system. This will prevent damage to the appliance due to lightning and power-line surges.

16.Power Lines – An outside antenna (aerial) system should not be located in the vicinity of overhead power lines or other electric light or power circuits, or where it can fall into such power lines or circuits. When installing an outside antenna (aerial) system, extreme care should be taken to keep from touching such power lines or circuits as contact with them might be fatal.

17.Overloading – Do not overload wall outlets, extension cords (leads), or integral convenience receptacles as this can result in a risk of fire or electric shock.

18.Object and Liquid Entry – Never push objects of any kind into the appliance through openings as they may touch dangerous voltage points or short-out parts that could result in a fire or electric shock. Never spill liquid of any kind on the appliance.

19.Servicing – Do not attempt to service the appliance yourself as opening or removing covers may expose you to dangerous voltage or other hazards. Refer all servicing to qualified service personnel.

20.Damage Requiring Service – Unplug the appliance form the wall outlet (the mains) and refer servicing to qualified service personnel under the following conditions:

A.When the power-supply cord (mains lead) or plug is damaged,

B.If liquid has been spilled, or objects have fallen into the appliance,

C.If the appliance has been exposed to rain or water,

D.If the appliance does not operate normally by following the operating instructions. Adjust only those controls that are covered by the operating instructions as an improper adjustment of other controls may result in damage and will often require extensive work by a qualified technician to restore the appliance to its normal operation,

E.If the appliance has been dropped or damaged in any way, and

F.When the appliance exhibits a distinct change in performance – this indicates a need for service.

Image 2
Contents Contents DVD ReceiverImportant Safeguards AvisPrecautions For British modelRegional Restriction Codes Region Number Warranty ClaimPower About This ManualTable of Contents DVD/CD Player Features FeaturesReceiver Features Memory PreservationSupplied Accessories Pointing the remote controller in the right direction Preparing the Remote ControllerUsing the Remote Controller Switching the remote controller function modesStoring Discs Cleaning DiscsPlayable Discs About Video CDsConnecting to a TV MD Recorder, DAT Connecting to Audio/Video EquipmentAbout the Video 1 and Video 2 jacks/connectors CD Recorder, etcPositioning Speakers How to connect to the speaker connectors Connecting SpeakersConnecting to Speakers a Front speakers SpeakerAdjusting the position of the FM indoor antenna aerial Connecting the Supplied FM and AM Indoor Antennas AerialsConnecting an AM Outdoor Antenna Aerial Adjusting the position of the AM indoor antenna aerialOnkyo cassette tape deck Connecting an FM Outdoor Antenna AerialDirectional Iinkage Directional linkage type splitter To DVD ReceiverStandby indicator lights up Connecting the Power/Turning on the DVD ReceiverDVD Receiver enters standby mode Standby indicator goes offSetting the Subwoofer Mode Speaker SetupSetting up the Speaker Configuration Before operating the remote controllerSpeaker Setup Press Test Tone Adjusting Each Speakers Relative Volume Balance Test ToneDown to adjust the volume level Press CH SEL repeatedly to selectBasic Operation Basic PlaybackTo stop playback To pause playback still modeTo remove the disc To play in slow-motion Playing DVD Videos / Video CDs / Audio CDsTo play in fast forward or fast reverse Locating a title using the title menu Locating a Specific Title/Chapter/Track/LocationPlaying DVD Videos/VIDEO CDs/Audio CDs Locating a specific track directlyLocating a specific location by Locating a specific chapter or trackConsecutively Entering the timeListening to the Radio Tuning ManuallyPresetting Radio Stations Receiving RDS Selecting Preset StationsErasing a Preset Station Various Functions While Listening to Radio ProgramsAbout digital sound Playing the Connected SourceVarious Functions While Playing the Connected Source Enjoying the picture with the sound of another sourceOperate your TV Press Mode TV firstPress Mode TA/MD first MD recorderMuting the Sound Adjusting the VolumeTurning on/off the Speakers A/ Speakers B Systems Canceling the Sleep Timer Listening Through HeadphonesUsing the Sleep Timer Controlling the Brightness Lights on the DVD ReceiverDolby PRO Logic Surround Onkyo’s original Digital Signal Processing DSP modesEnjoying the Sound Effects Input Sources and Available Theater-Dimensional T-D* modeImportance of the speaker setup Listening ModesChoosing Theater-Dimensional Mode Enjoying the Sound EffectsActivating Theater-Dimensional mode Adjusting Theater-Dimensional modeChanging the Sound to Stereo Using Dolby Pro Logic Onkyo’s Original DSP ModesStereo indicator lights up Press StereoRemote controller Press Test TONE. only Adjusting Each Speakers Relative Volume Balance TemporarilySaving the adjusted values Press Late Night Using the Late NIGHT/FRONT Effect FunctionBoosting the Super Bass Sounds/High Frequency Sounds To resume normal playback Playing RepeatedlyAdvanced DVD/VIDEO CD/Audio CD Operation Playing in a Favorite Order Setting Titles, Chapters, or Tracks in a Favorite OrderTo change or cancel the entered program To program during playbackPlaying in Random Order Press Zoom during normal, slow, or still playback Zooming in on a PictureZooming in on a Picture and Shifting the Zoom Point You can magnify areas within a pictureChanging the Camera Angle To disable the angle icon display on the TVSelecting the Camera Angle To turn off the angle number displaySelecting a Subtitle Language To turn off the subtitle setting displayTurning Subtitles on/off Selecting Sound Channels on Video CDs Selecting a Playback Audio SettingTo turn off the audio setting display About recording systemsChanging the Sound Signal Conversion Method Changing the Sound Signal Conversion Method TemporarilyOutput sound conversion tables Symbols in the tablesReproducing MPEG2 Sounds from DVD Videos Sound from the speakersDVD video Video CD/Audio CD When the disc is inserted in the DVD ReceiverRemote controller Press Display while the disc is stopped Press Display during playback DVD video e.gPress / to change the setting, the press Enter Setting StepsPress Setup To return to the previously displayed menuReference Table of the Setting Menu Category Symbol Menu item Related to DetailsChoosing Another Language Customizing the Function SettingsExplanation of Each Item in the Language Category Explanation of Each Item in the Picture Category TV ShapeBitstream Normally use this settingExplanation of Each Item in the Audio Category 96k SoundOSD Background Color To change the parental lock level When you selectExplanation of Each Item in the Operation Category Further StepsTitle Stop To change your 4-digit security codeTable of Languages Table of Languages and Their AbbreviationsAdditional Operation Recording Using the Connected EquipmentBasic Recording Procedure Recording Using the Connected Equipment Before programming the remote controller Programming the Remote ControllerSEND/LEARN indicator CH +Press and hold Mode TV, then press Search twice Programming the Remote Controller to Your TVUsing the Programmed Buttons Press Mode TVTroubleshooting Symptoms Causes Remedies PagesTuner Remote controller Recording TroubleshootingSymptoms Causes Remedies Specifications Display Index to Parts and ControlsFront panel and its display Remote controller Onkyo Europe Electronics GmbH T0008-1