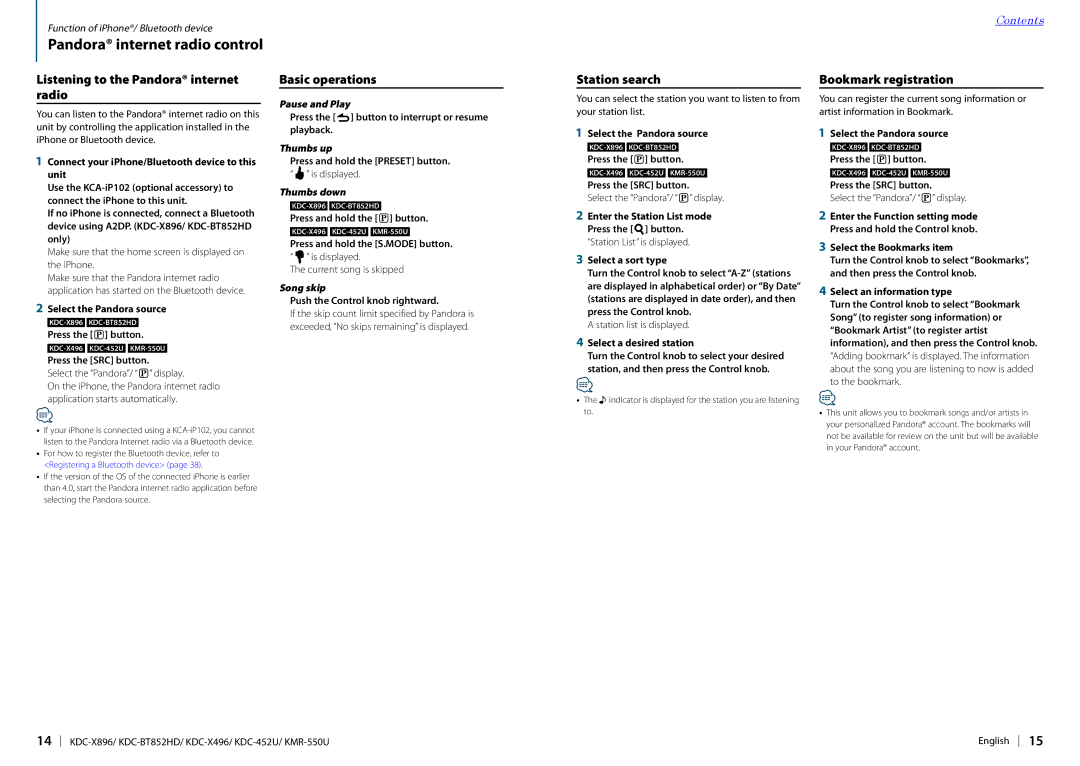
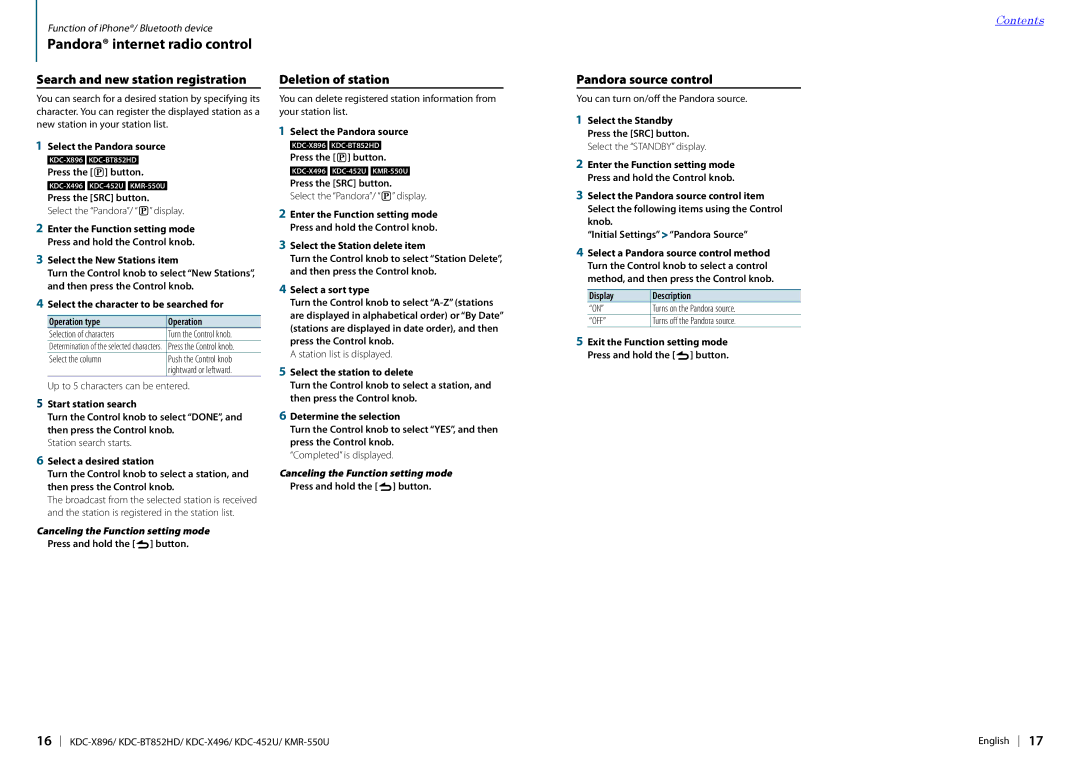
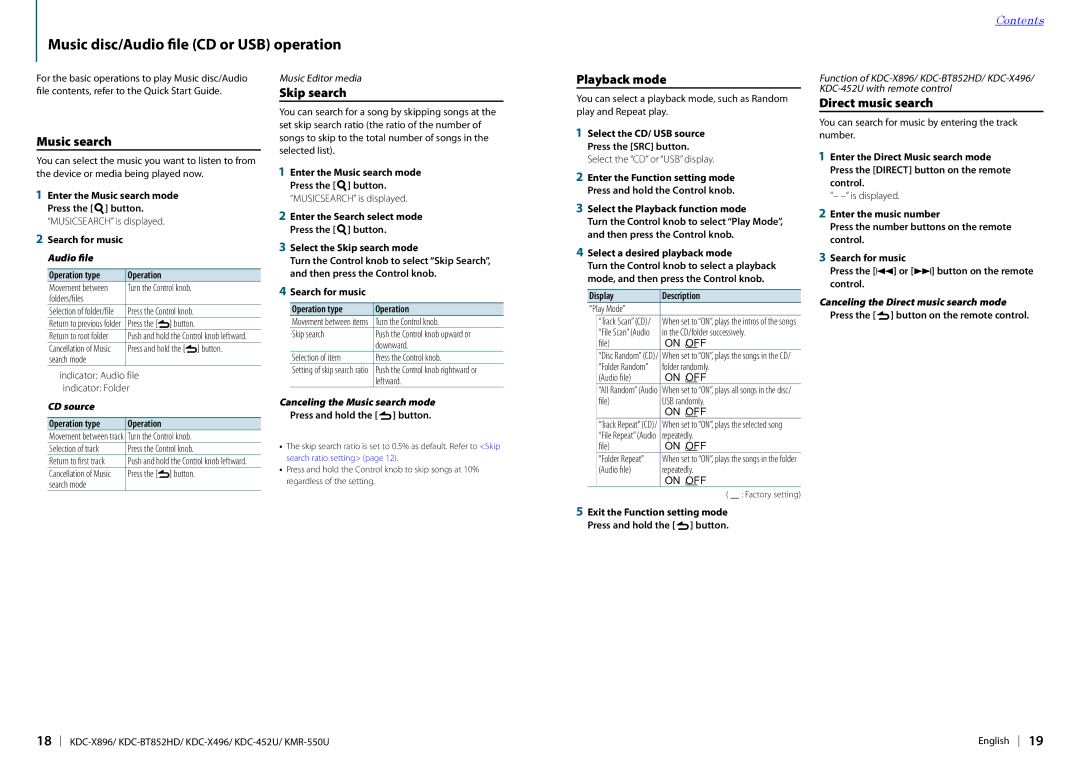
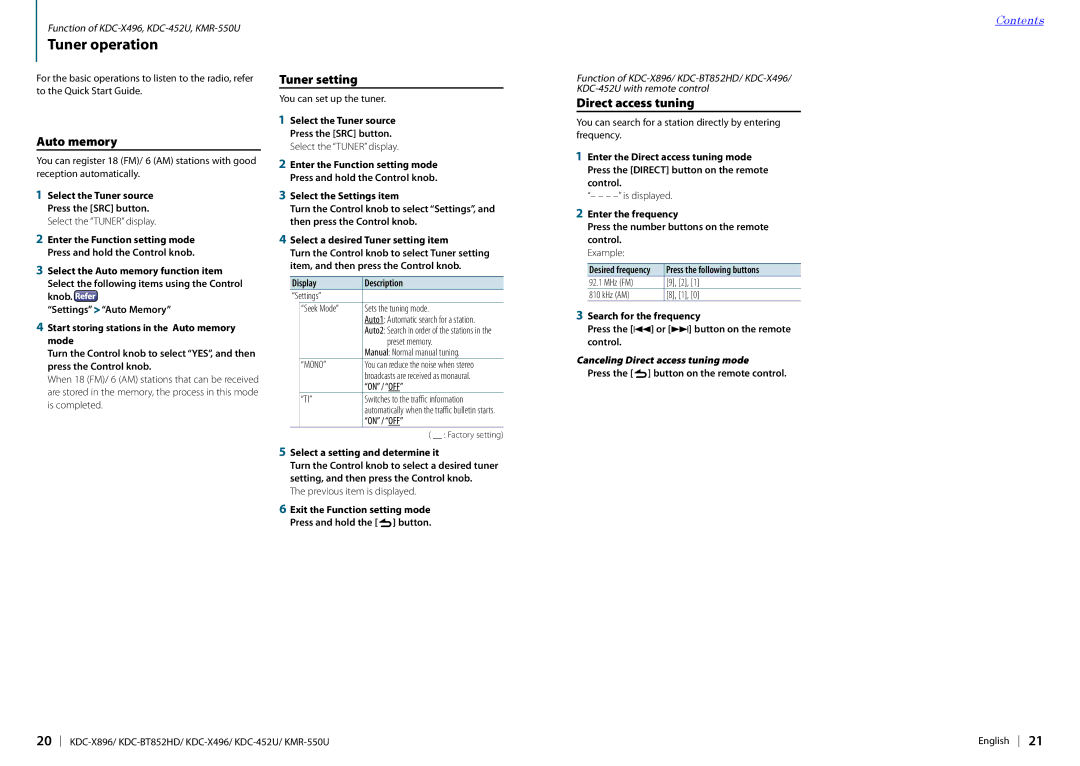
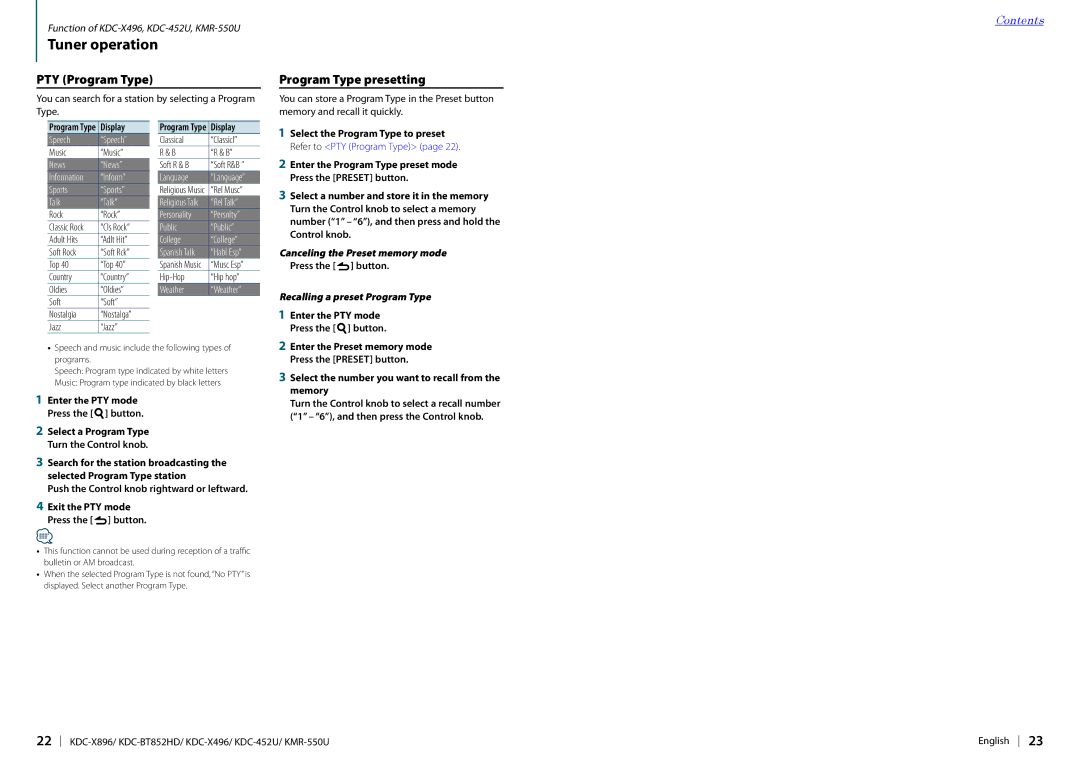
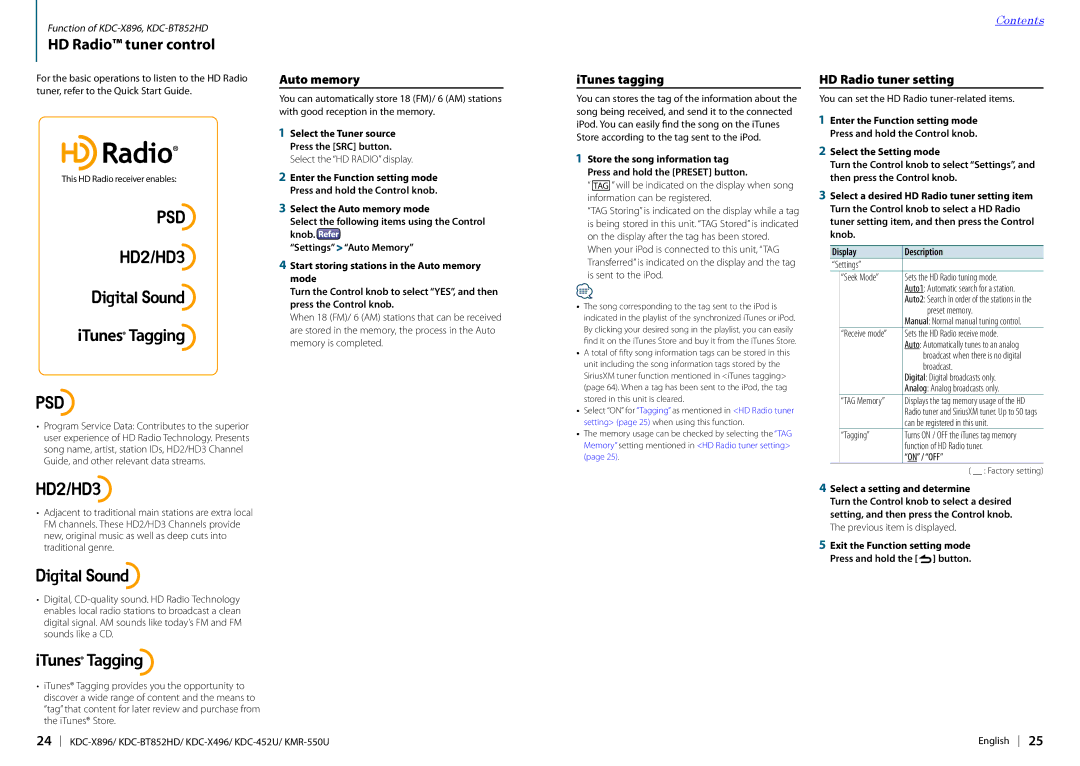
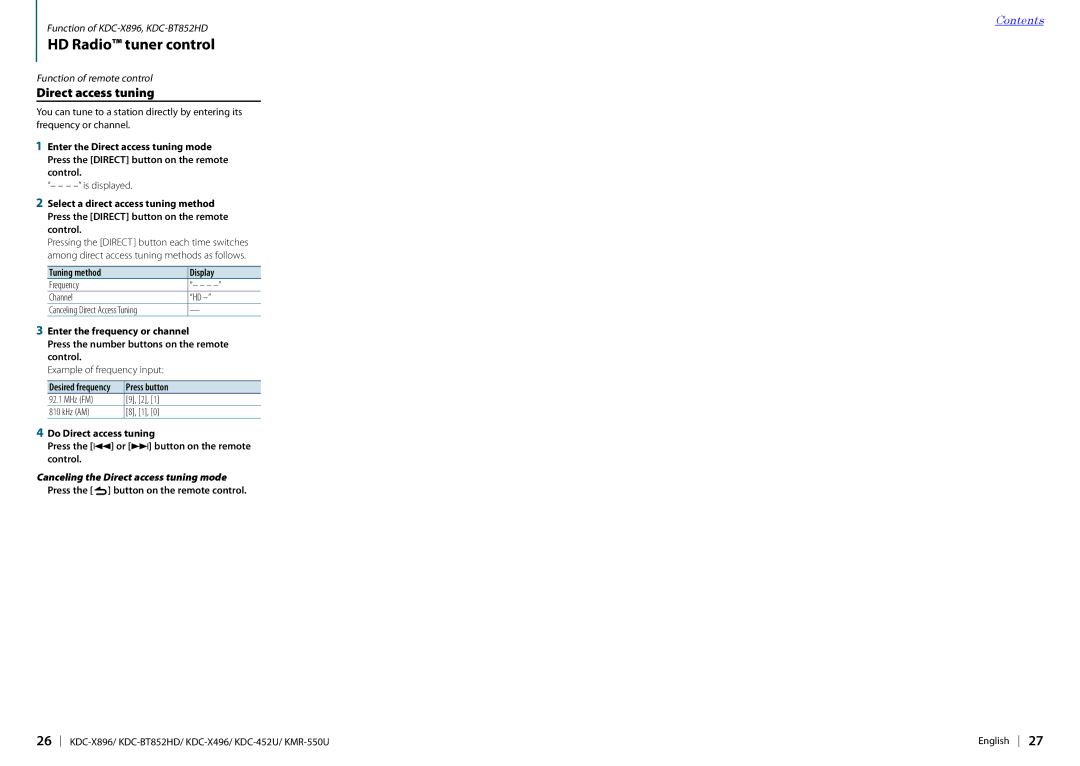
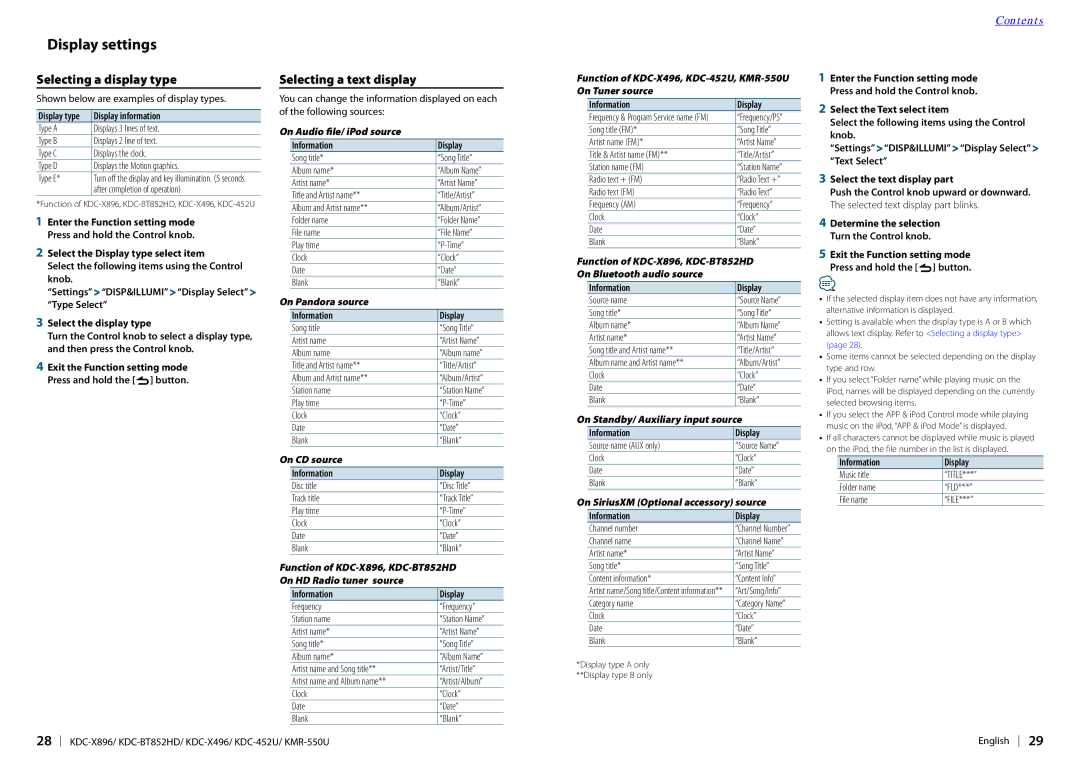
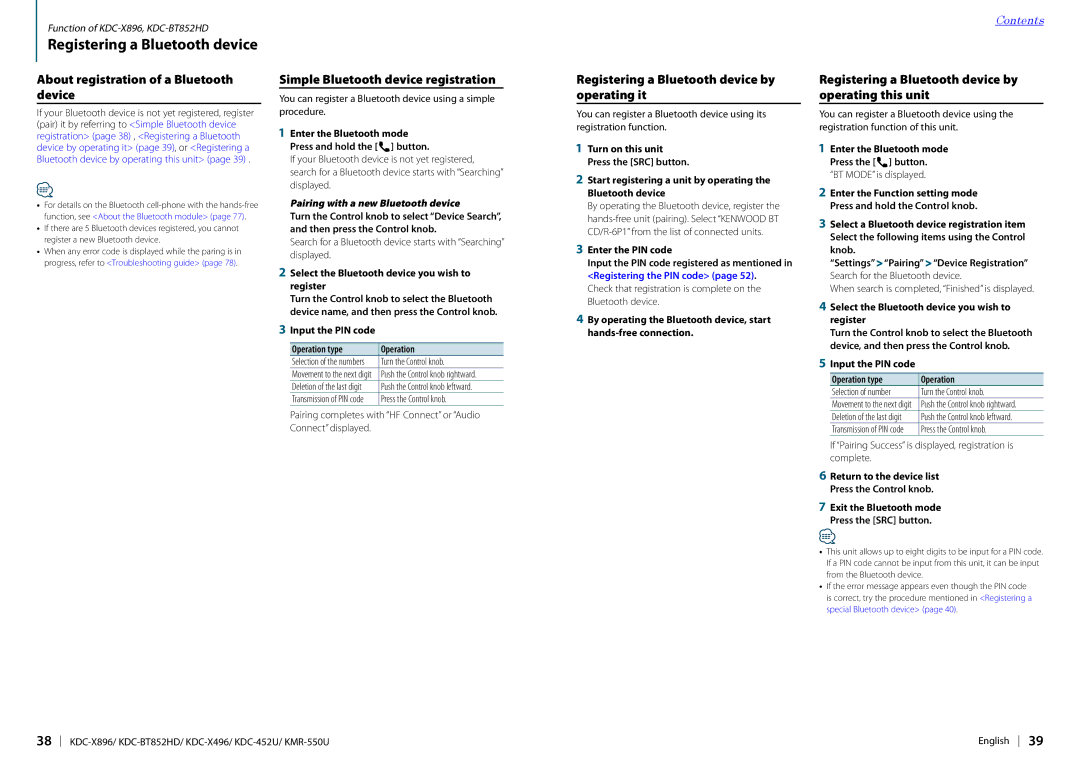
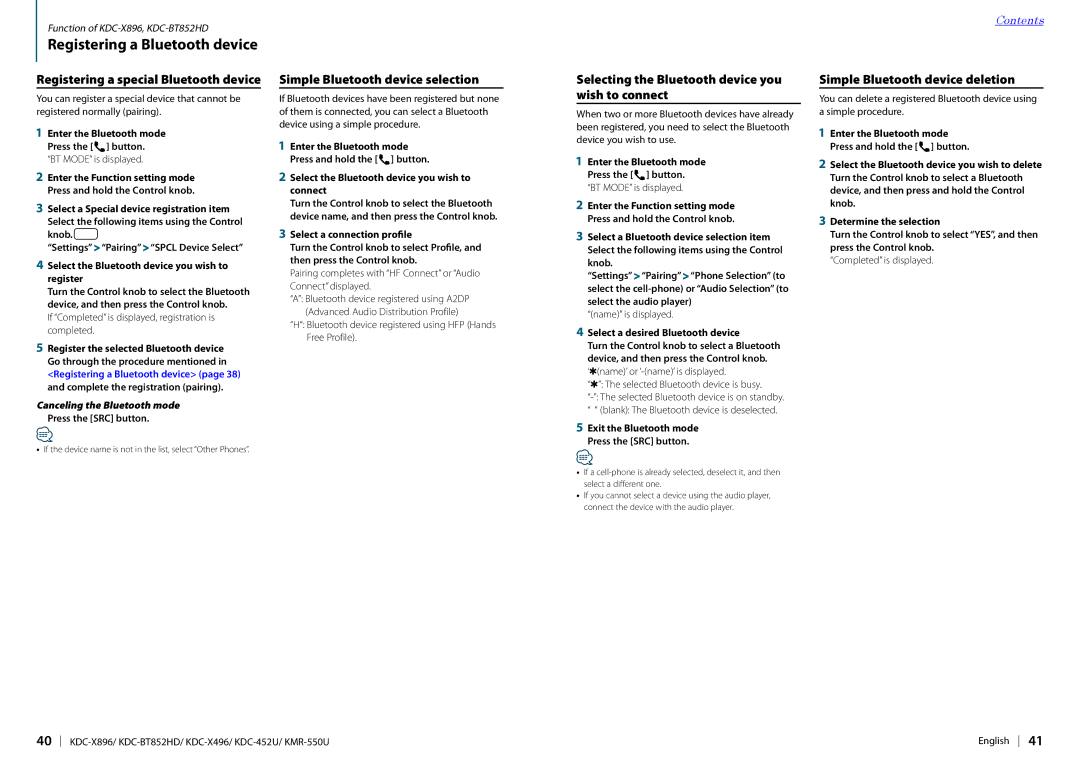
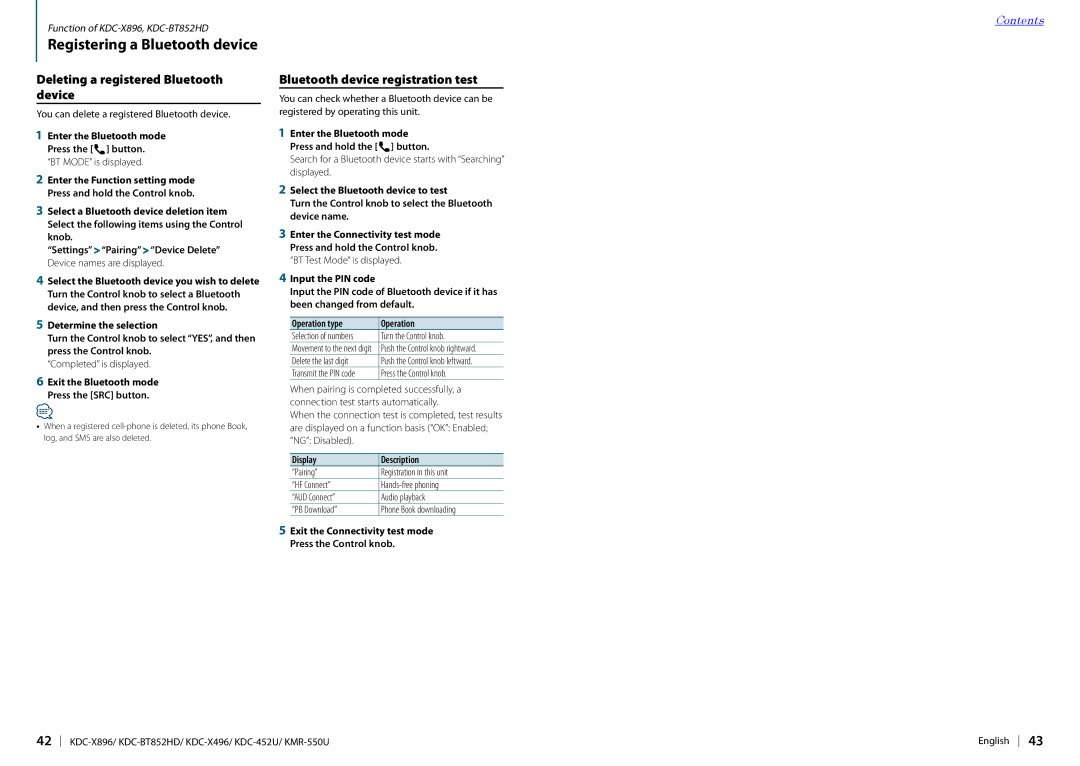
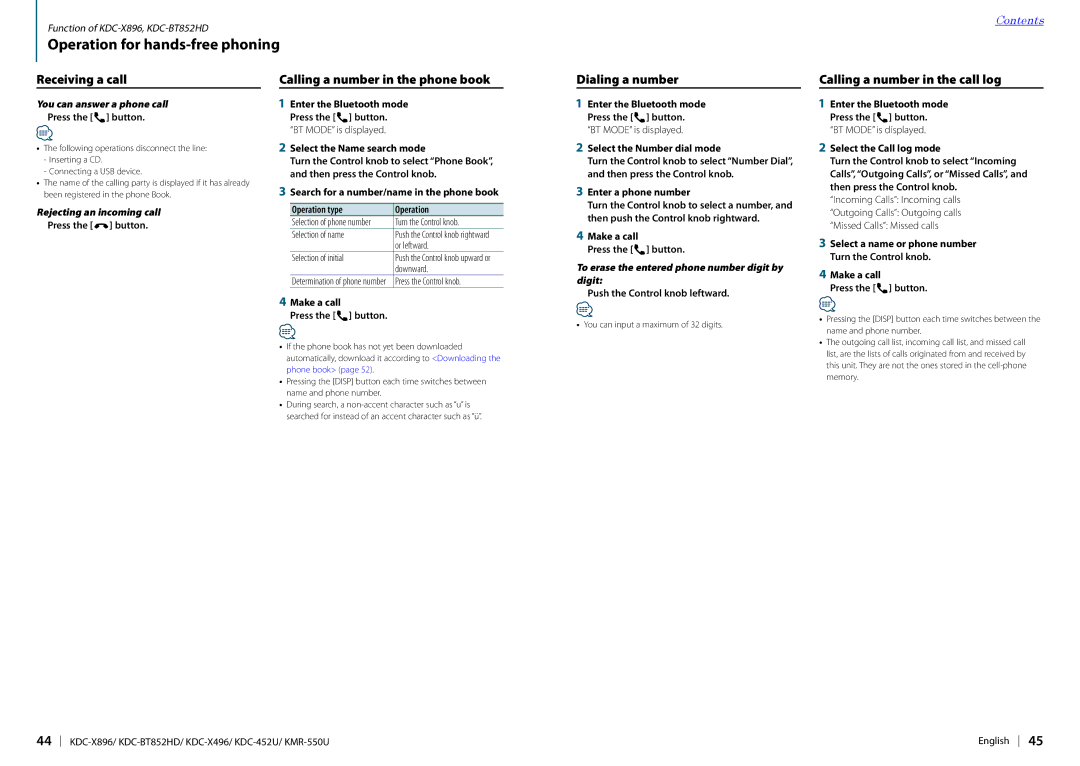
Kenwood KDC-452U, KDC-X896, KDC-BT852HD Information display setting, Illumination color selection

Page 16

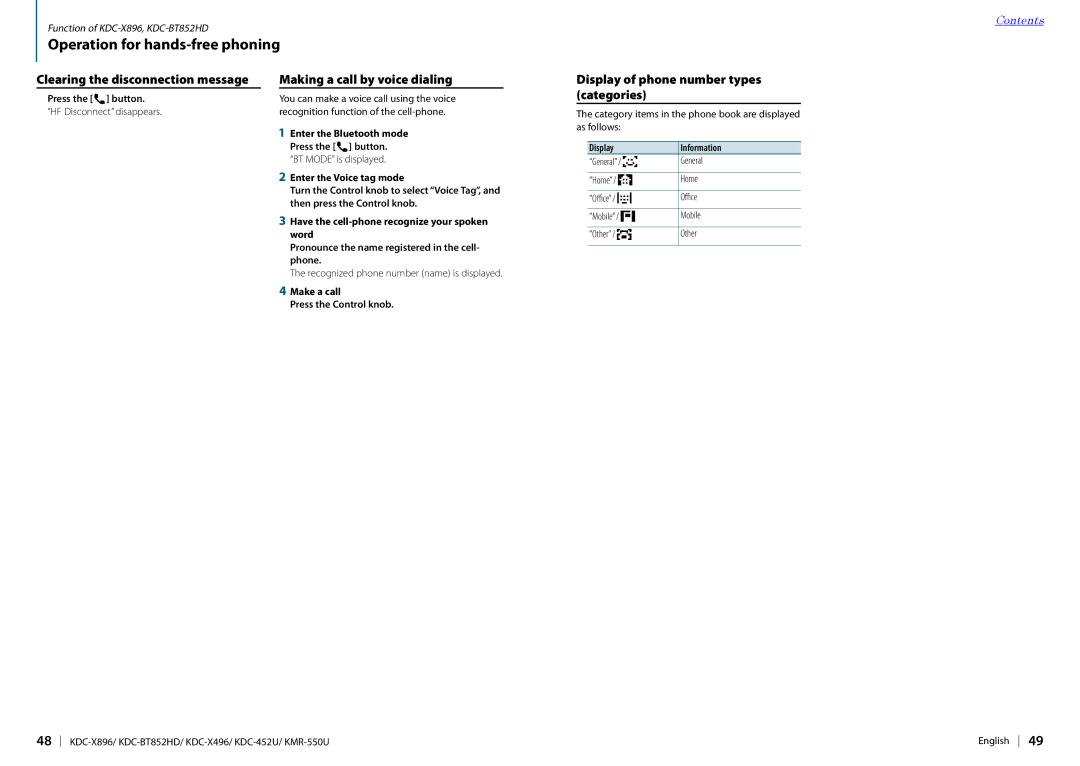
Display settings

Contents

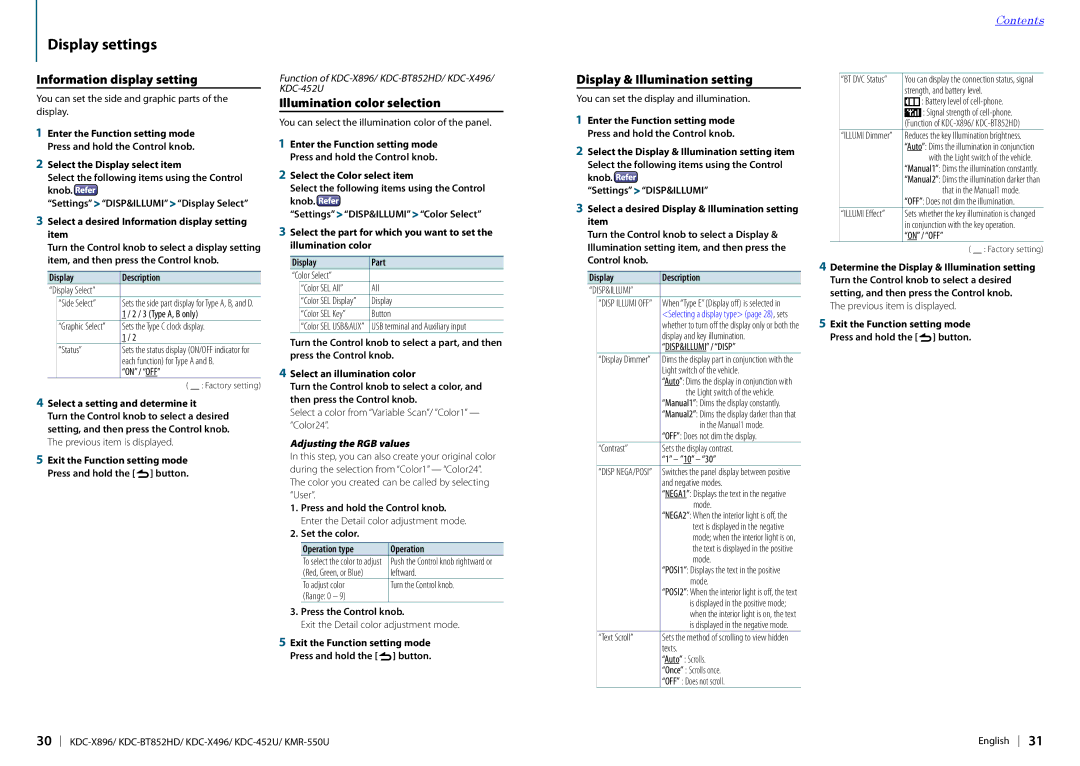
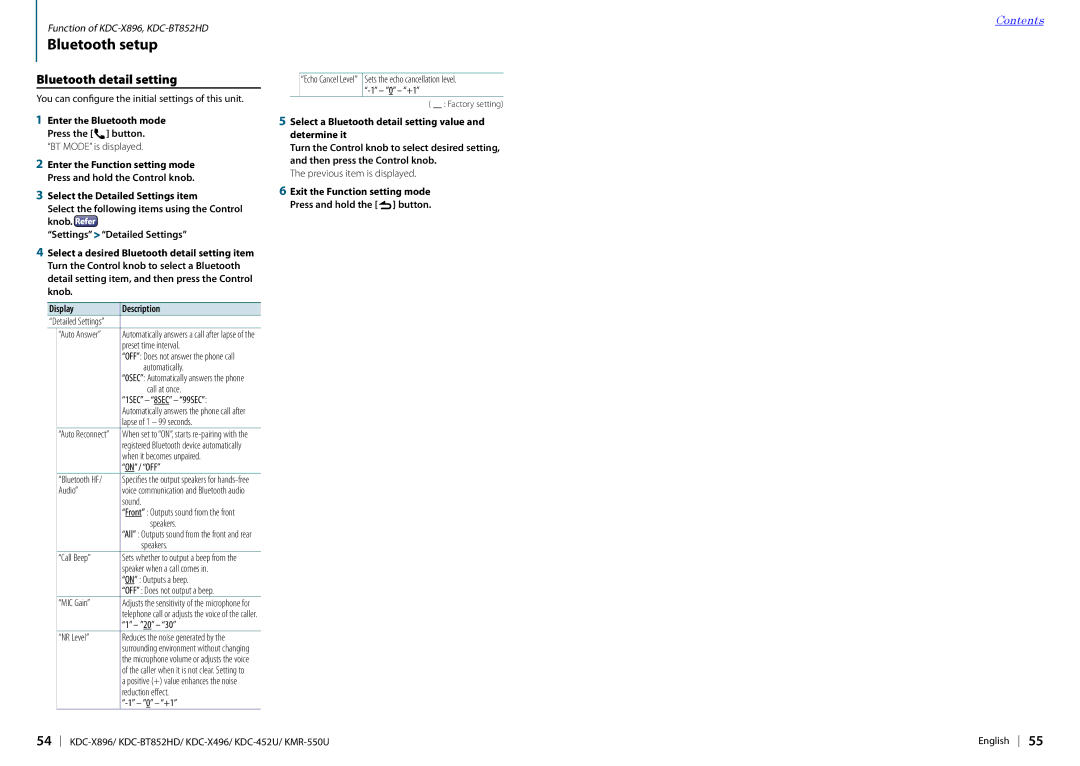
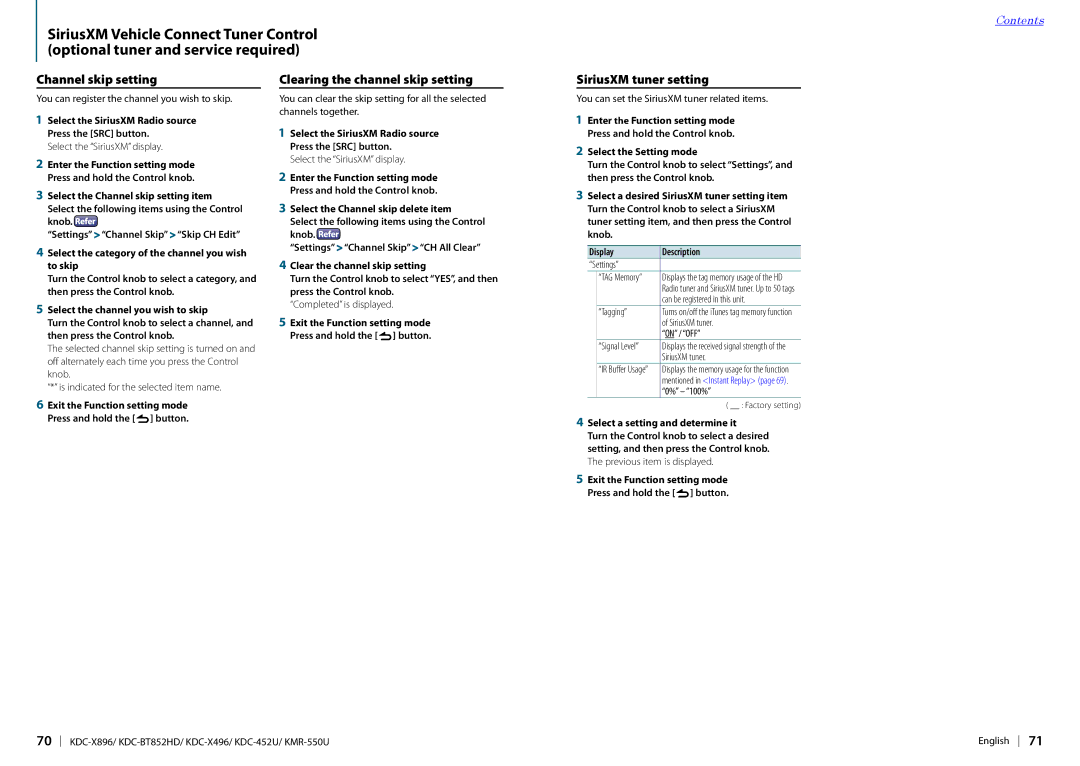
Information display setting

You can set the side and graphic parts of the display.

1Enter the Function setting mode Press and hold the Control knob.

2Select the Display select item

Select the following items using the Control

knob. 

“Settings” > “DISP&ILLUMI” > “Display Select”

3Select a desired Information display setting item

Turn the Control knob to select a display setting item, and then press the Control knob.

Display

Description


“Display Select”


“Side Select”

Sets the side part display for Type A, B, and D.


1 / 2 / 3 (Type A, B only)


“Graphic Select”

Sets the Type C clock display.


1 / 2


“Status”

Sets the status display (ON/OFF indicator for


each function) for Type A and B.


“ON” / “OFF


(


: Factory setting)

4Select a setting and determine it

Turn the Control knob to select a desired setting, and then press the Control knob. The previous item is displayed.

5Exit the Function setting mode Press and hold the [  ] button.

Function of KDC-X896/ KDC-BT852HD/ KDC-X496/ KDC-452U

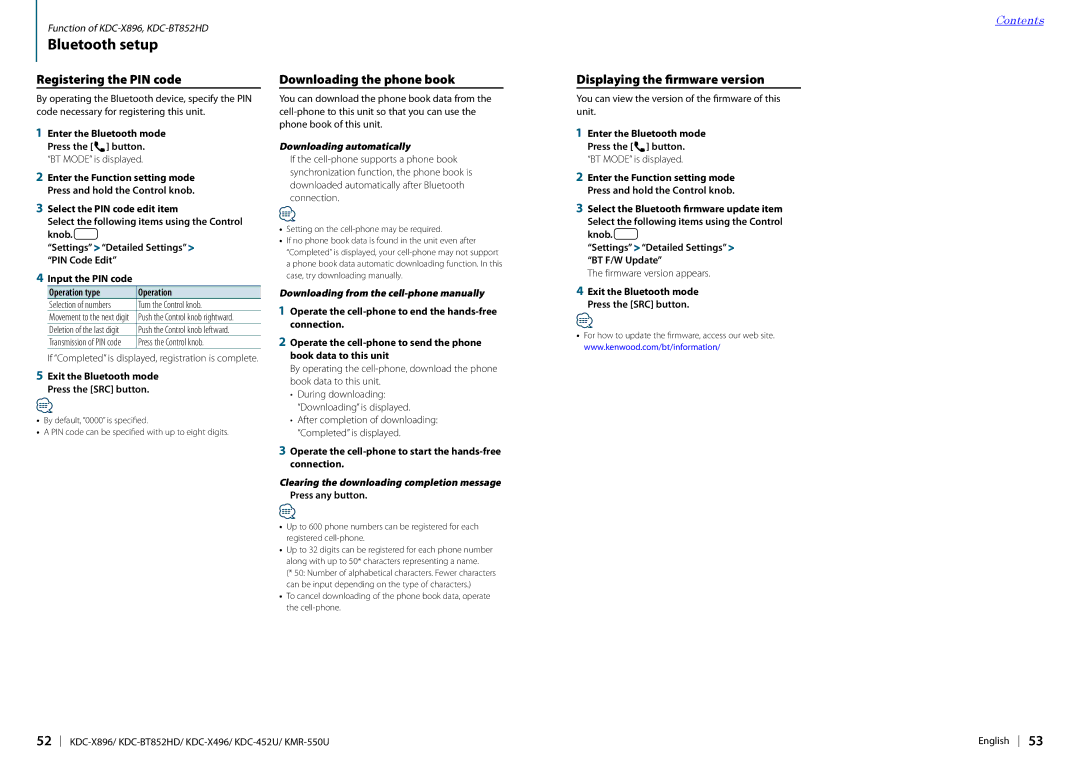
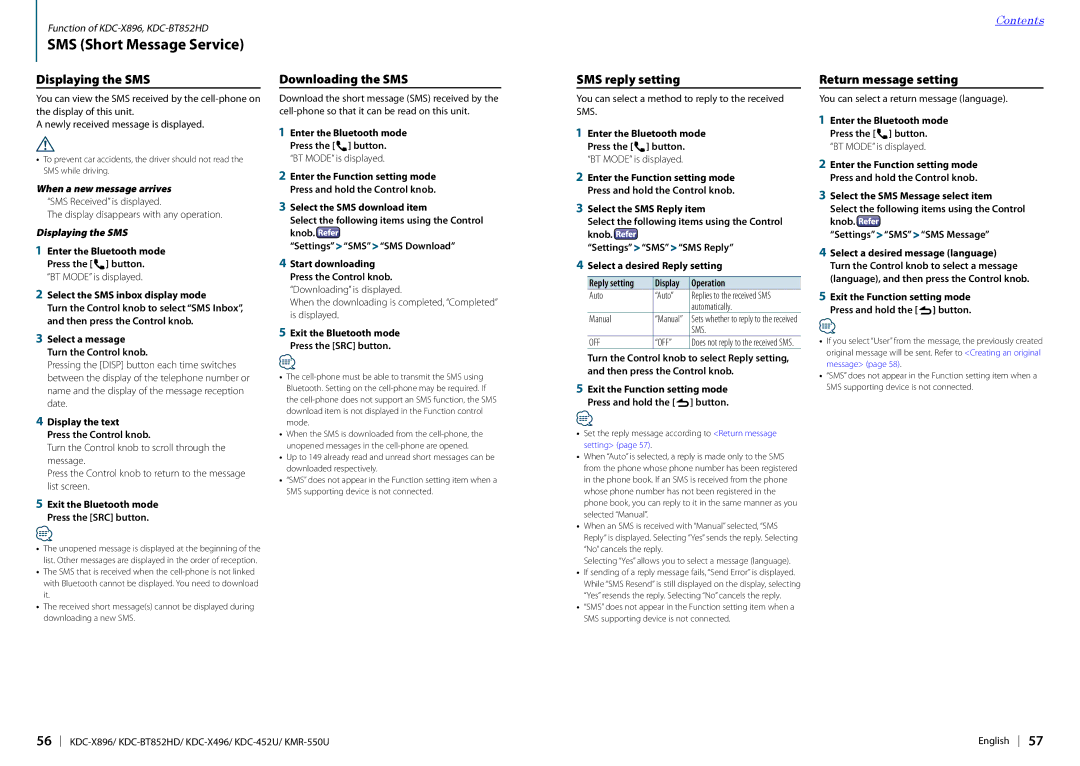
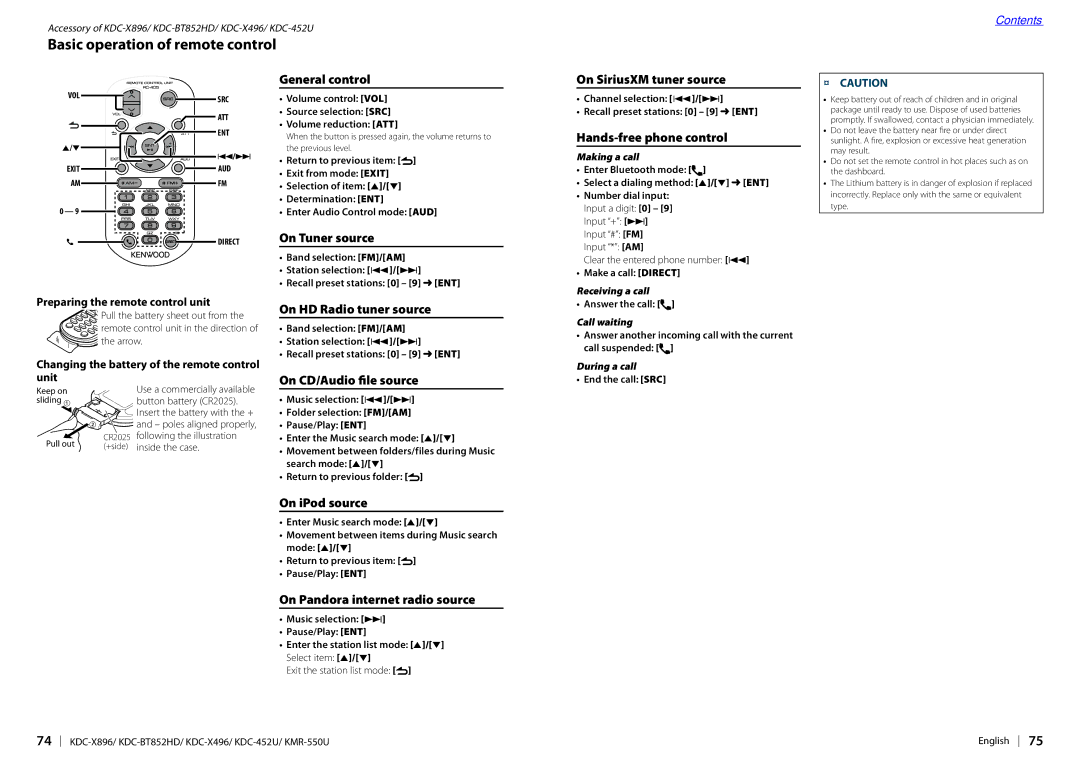
Illumination color selection

You can select the illumination color of the panel.

1Enter the Function setting mode Press and hold the Control knob.

2Select the Color select item

Select the following items using the Control

knob. 

“Settings” > “DISP&ILLUMI” > “Color Select”

3Select the part for which you want to set the illumination color

Display

Part

“Color Select”


“Color SEL All”

All


“Color SEL Display”

Display


“Color SEL Key”

Button


“Color SEL USB&AUX”

USB terminal and Auxiliary input

Turn the Control knob to select a part, and then press the Control knob.

4Select an illumination color

Turn the Control knob to select a color, and then press the Control knob.

Select a color from “Variable Scan”/ “Color1” — “Color24”.

Adjusting the RGB values

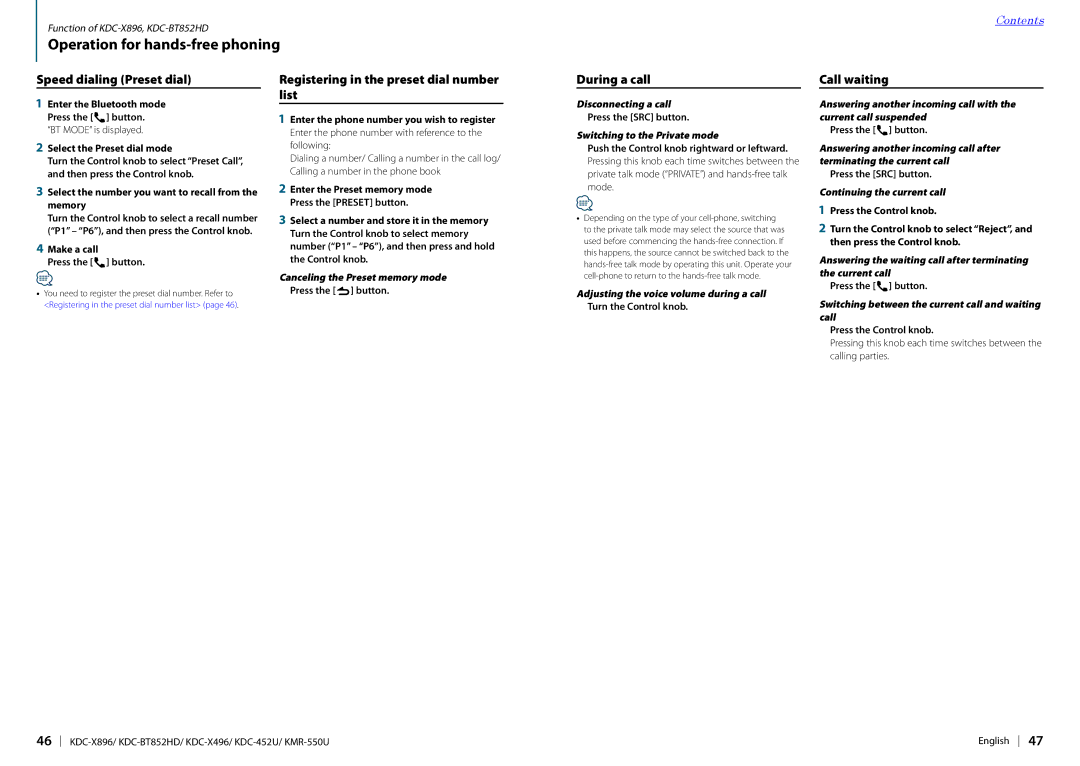
In this step, you can also create your original color during the selection from “Color1” — “Color24”. The color you created can be called by selecting “User”.

1.Press and hold the Control knob. Enter the Detail color adjustment mode.

2.Set the color.

Operation type

Operation

To select the color to adjust

Push the Control knob rightward or

(Red, Green, or Blue)

leftward.

To adjust color

Turn the Control knob.

(Range: 0 – 9)


3.Press the Control knob.

Exit the Detail color adjustment mode.

5Exit the Function setting mode Press and hold the [  ] button.

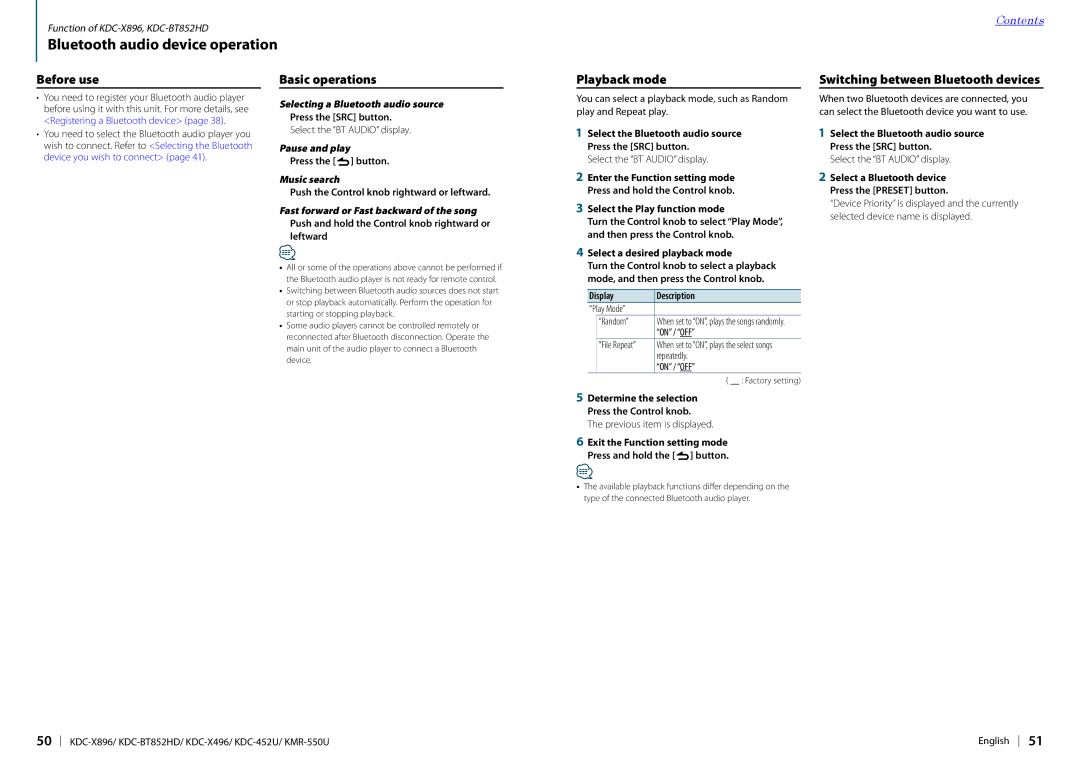
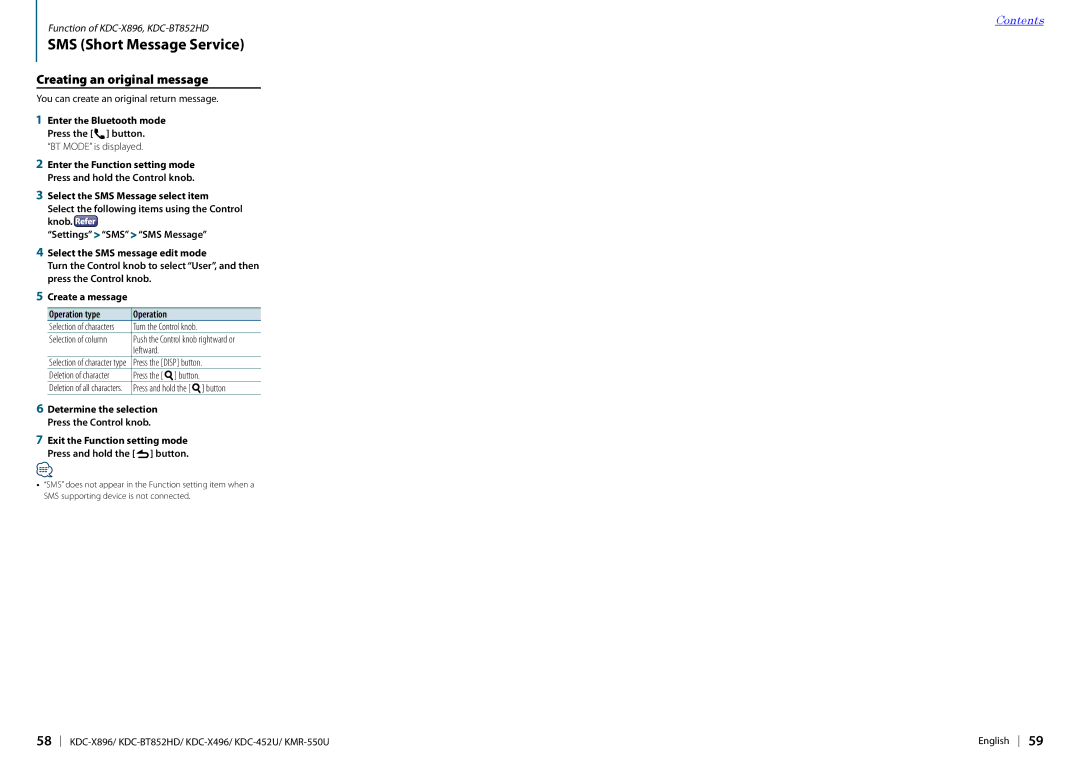
Display & Illumination setting

You can set the display and illumination.

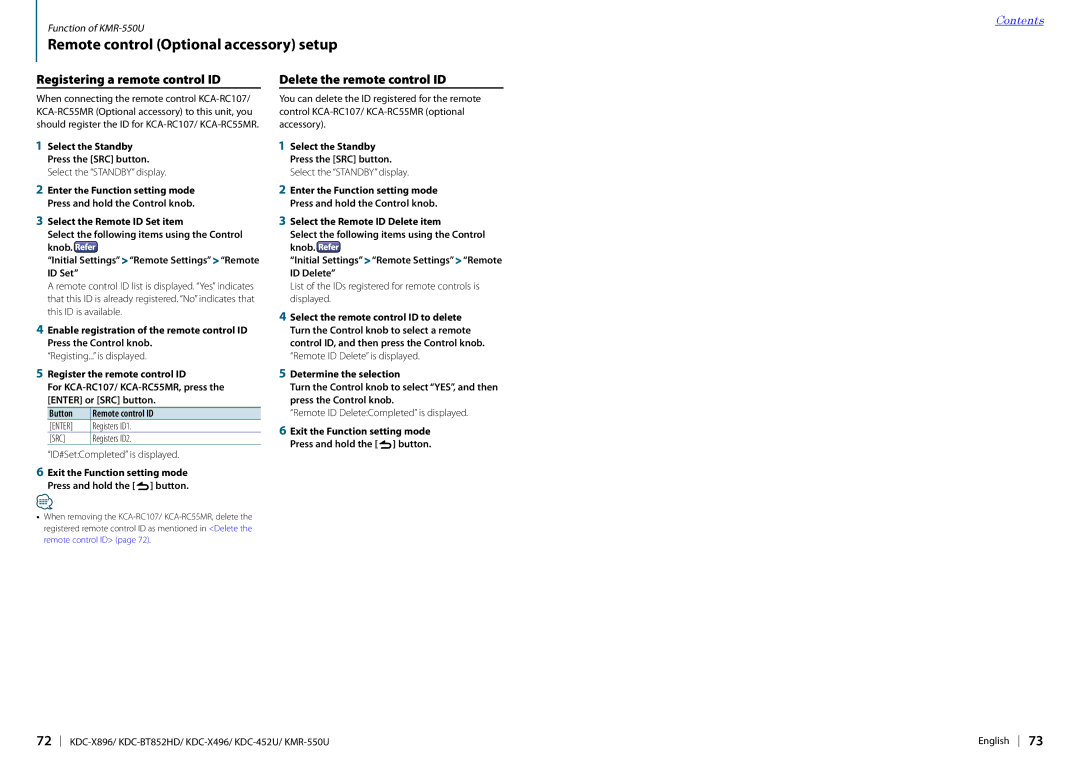
1Enter the Function setting mode Press and hold the Control knob.

2Select the Display & Illumination setting item

Select the following items using the Control

knob. 

“Settings” > “DISP&ILLUMI”

3Select a desired Display & Illumination setting item

Turn the Control knob to select a Display & Illumination setting item, and then press the Control knob.

Display

Description

“DISP&ILLUMI”


“DISP ILLUMI OFF”

When “Type E” (Display off) is selected in


<Selecting a display type> (page 28), sets


whether to turn off the display only or both the


display and key illumination.


DISP&ILLUMI” / “DISP”


“Display Dimmer”

Dims the display part in conjunction with the


Light switch of the vehicle.


Auto”: Dims the display in conjunction with


the Light switch of the vehicle.


“Manual1”: Dims the display constantly.


“Manual2”: Dims the display darker than that


in the Manual1 mode.


“OFF”: Does not dim the display.


“Contrast”

Sets the display contrast.


“1” – ”10” – “30”


“DISP NEGA/POSI”

Switches the panel display between positive


and negative modes.


NEGA1”: Displays the text in the negative


mode.


“NEGA2”: When the interior light is off, the


text is displayed in the negative


mode; when the interior light is on,


the text is displayed in the positive


mode.


“POSI1”: Displays the text in the positive


mode.


“POSI2”: When the interior light is off, the text


is displayed in the positive mode;


when the interior light is on, the text


is displayed in the negative mode.


“Text Scroll”

Sets the method of scrolling to view hidden


texts.


Auto” : Scrolls.


“Once” : Scrolls once.


“OFF” : Does not scroll.


“BT DVC Status”

You can display the connection status, signal


strength, and battery level.


: Battery level of cell-phone.


: Signal strength of cell-phone.


(Function of KDC-X896/ KDC-BT852HD)


“ILLUMI Dimmer”

Reduces the key Illumination brightness.


Auto”: Dims the illumination in conjunction


with the Light switch of the vehicle.


“Manual1”: Dims the illumination constantly.


“Manual2”: Dims the illumination darker than


that in the Manual1 mode.


“OFF”: Does not dim the illumination.


“ILLUMI Effect”

Sets whether the key illumination is changed


in conjunction with the key operation.


ON” / “OFF”


(


: Factory setting)

4Determine the Display & Illumination setting Turn the Control knob to select a desired setting, and then press the Control knob.

The previous item is displayed.

5Exit the Function setting mode Press and hold the [  ] button.

30 KDC-X896/ KDC-BT852HD/ KDC-X496/ KDC-452U/ KMR-550U

English 31

Image 16
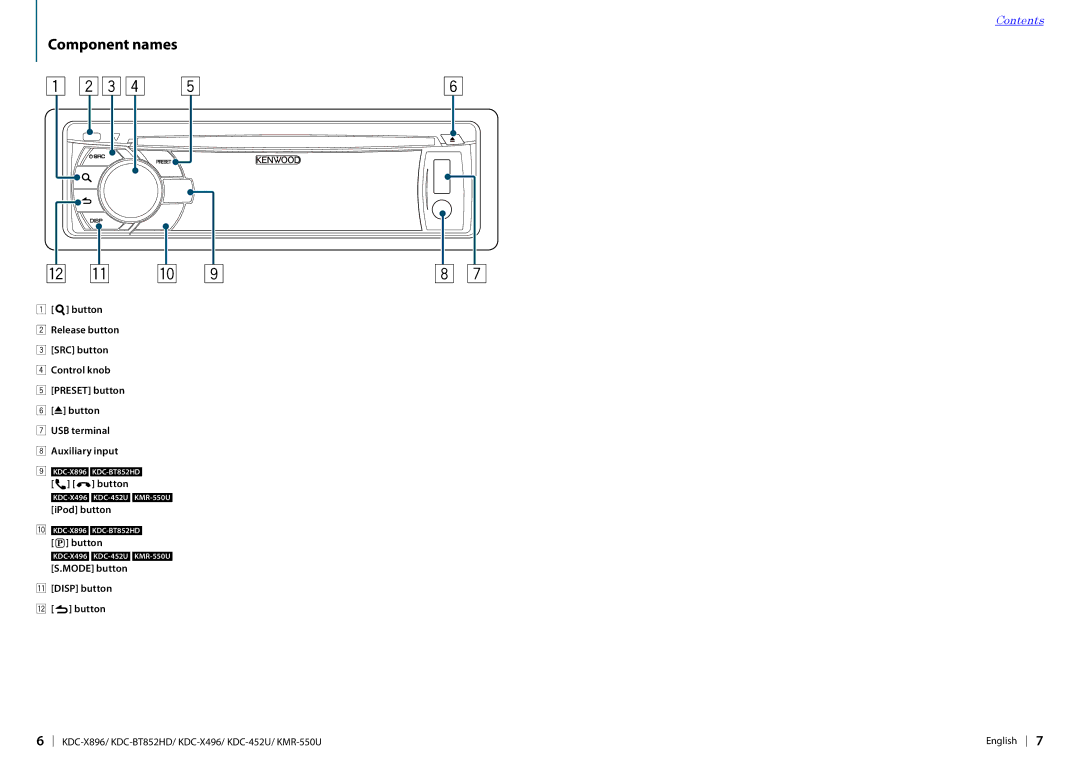
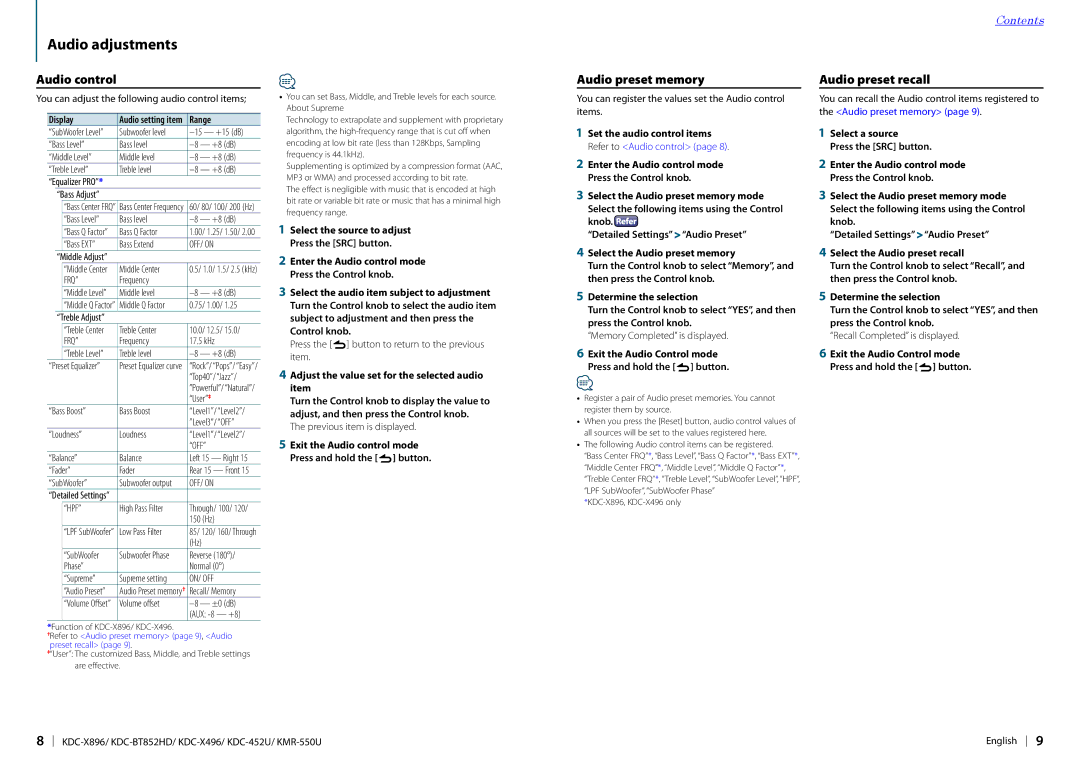
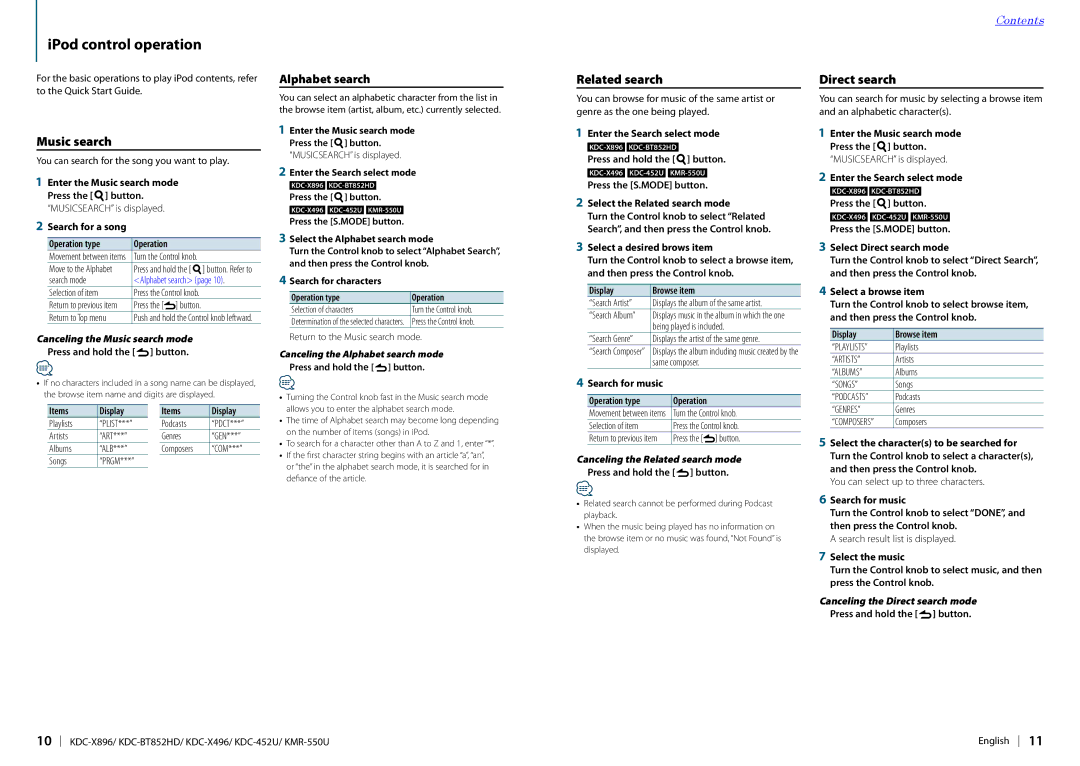
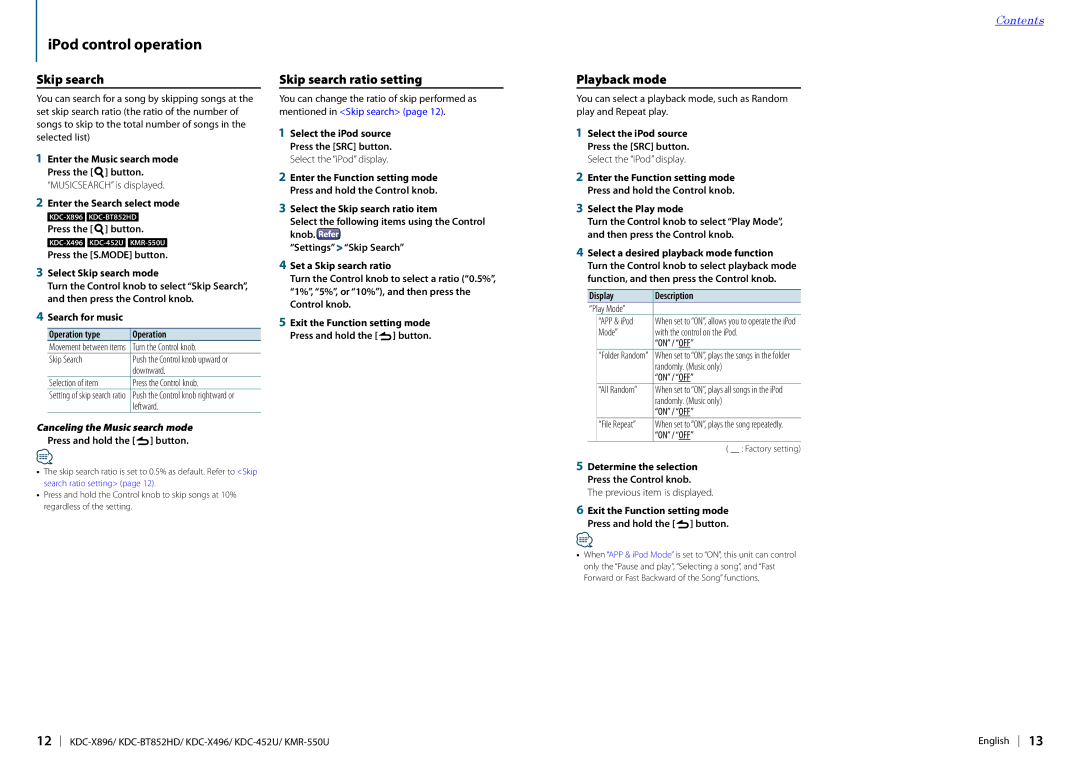
Contents How to read this manual Function setting procedureAbout the notation Contents Example Adjusting the contrast of the displayContents Before use Mode button Disp button Button Component namesButton IPod buttonAudio adjustments Audio preset memoryAudio preset recall Audio controlIPod control operation Music searchAlphabet search Related searchPlayback mode Skip search ratio settingSkip search Pandora internet radio control Listening to the Pandora internet radioBasic operations Station searchDeletion of station Search and new station registrationPandora source control Music disc/Audio file CD or USB operation Direct music searchAudio file CD sourceTuner setting Direct access tuningCanceling Direct access tuning mode Tuner operationProgram Type presetting PTY Program TypeHD Radio tuner setting Select the Setting modeSelect a setting and determine HD Radio tuner controlTuning method Display Canceling Direct Access TuningFrequency Channel Example of frequency inputSelecting a display type Display settingsSelecting a text display Information display setting Display & Illumination settingAdjusting the RGB values Illumination color selectionAdjusting the clock Adjusting the dateClock & date display type setting General operationInitial settings Auxiliary input display settingMuting the audio upon reception of a phone call You can turn on/off the demonstration mode Demonstration mode settingSelect the Demonstration mode item Registering a Bluetooth device About registration of a Bluetooth deviceSimple Bluetooth device registration Registering a Bluetooth device by operating itRegistering a special Bluetooth device Simple Bluetooth device selectionSelecting the Bluetooth device you wish to connect Simple Bluetooth device deletionDeleting a registered Bluetooth device Bluetooth device registration testYou can delete a registered Bluetooth device Select a Bluetooth device deletion itemDialing a number Operation for hands-free phoningCalling a number in the call log Speed dialing Preset dial Registering in the preset dial number listDuring a call Call waitingDisplay of phone number types categories Then press the Control knobWord PhoneBluetooth audio device operation Selecting a Bluetooth audio sourceSelect the Play function mode Music searchBluetooth setup Registering the PIN codeDownloading the phone book Displaying the firmware versionSelect the Detailed Settings item Bluetooth detail settingSelect a Bluetooth detail setting value and determine it SMS Short Message Service SMS reply settingReturn message setting Displaying the SMSExit the Function setting mode Press and hold the button Creating an original messageYou can create an original return message Press the Disp buttonBefore use Channel preset memoryCategory and channel search Preset tuning Seek mode settingCanceling Preset tuning Channel scanParental Lock setting Clearing the Parental Lock settingSelect the Lock channel edit item Set Parental LockSetting Parental Lock for Mature content Parental Lock pass code settingContent alert Registering contentContent alert setting Editing a Content alert itemDelete a Content alert item Instant ReplayClearing the channel skip setting Channel skip settingSiriusXM tuner setting Remote control Optional accessory setup Registering a remote control IDDelete the remote control ID Knob.  Initial Settings Remote Settings Remote ID SetBasic operation of remote control Appendix Troubleshooting guide GeneralTuner source Disc sourceMessages shown below indicates your system condition SiriusXM Advisory MessagesSpecifications Location Top plate Contains Transmitter ModuleFCC ID RKXFC6000S Contains Transmitter Module IC 5119A-FC6000SThis HD Radio receiver enables

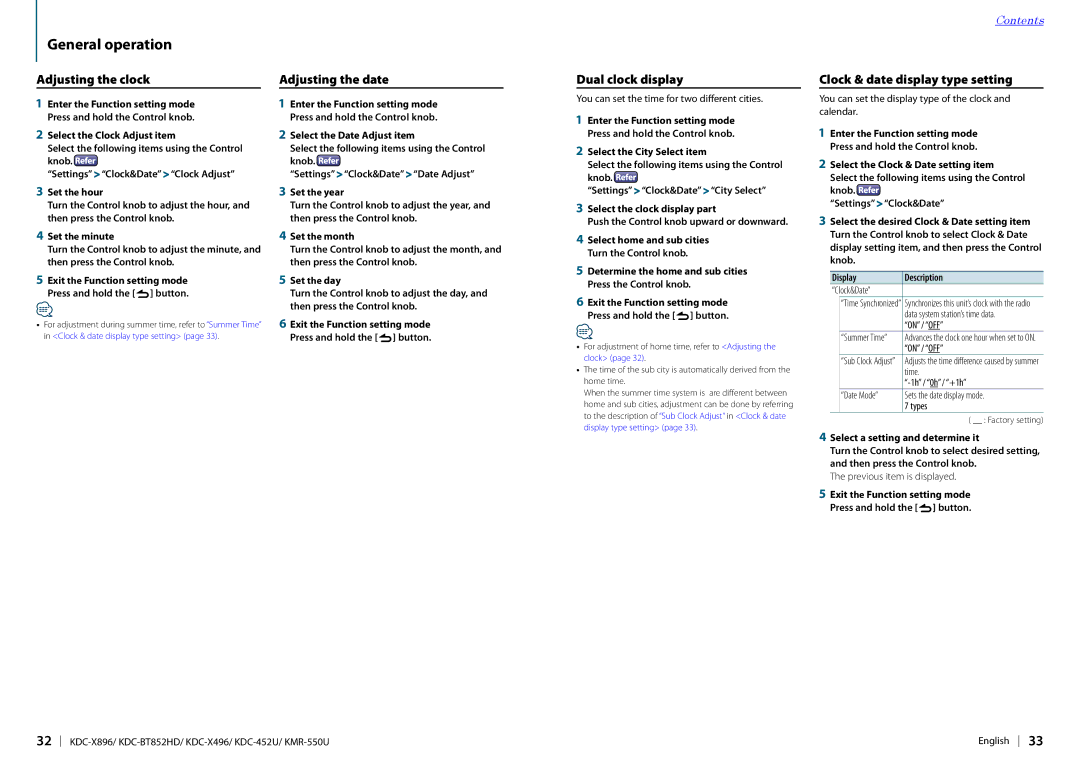
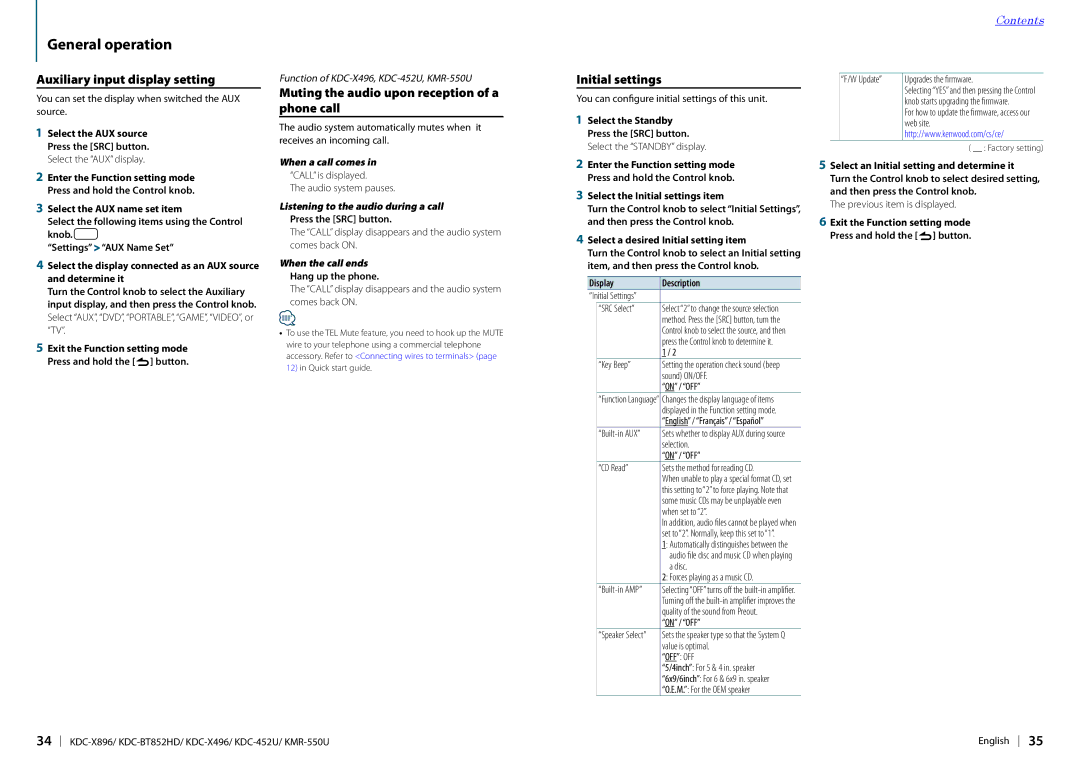
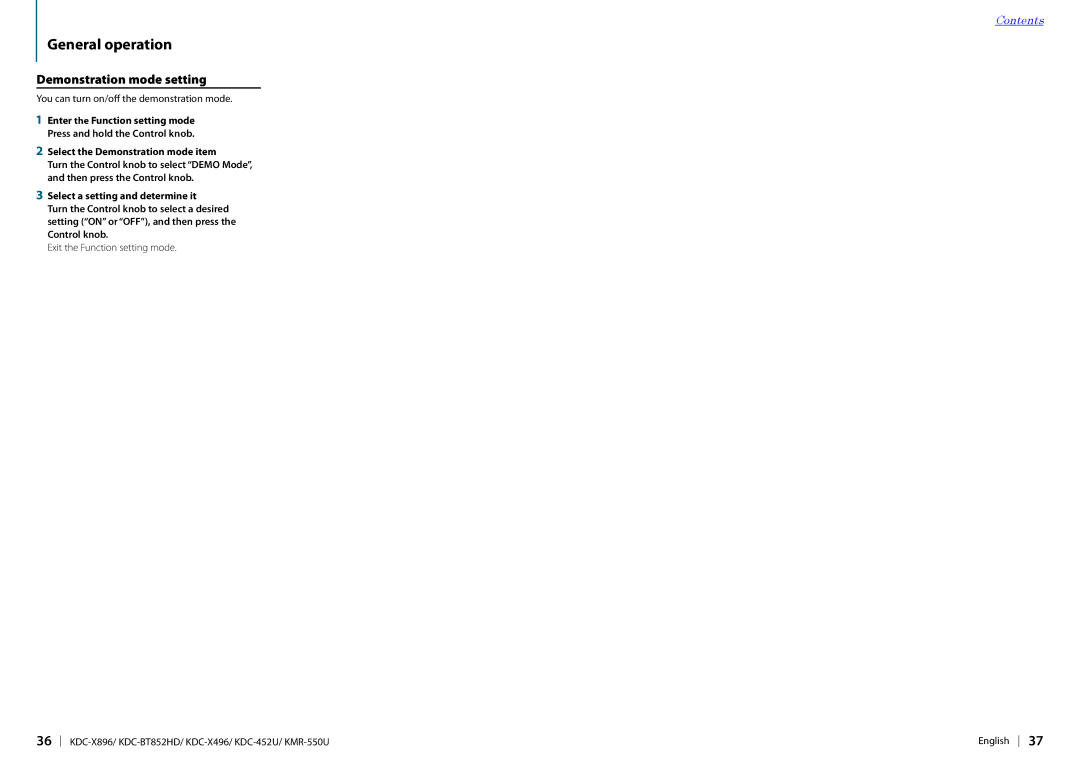
KDC-X496, KDC-X896, KDC-BT852HD, KDC-452U, KMR-550U specifications

Kenwood is a well-known name in the car audio industry, providing enthusiasts with high-quality products that enhance their driving experience. Among their impressive lineup, models like the Kenwood KMR-550U, KDC-452U, KDC-BT852HD, KDC-X896, and KDC-X496 stand out for their technology, features, and performance.

The Kenwood KMR-550U is a marine digital media receiver, designed specifically for boats and outdoor environments. It boasts a sleek design and a user-friendly interface, supporting Bluetooth connectivity for hands-free calls and audio streaming. The KMR-550U features a 13-band equalizer, allowing users to customize their sound experience. Additionally, it offers USB and AUX inputs, making it easy to connect a multitude of devices. Its IPX5 rating assures water resistance, ideal for challenging weather conditions.

The Kenwood KDC-452U is a versatile single-DIN receiver that emphasizes simplicity and functionality. It features Bluetooth technology, offering seamless connectivity to smartphones for calls and music playback. The KDC-452U includes USB and AUX inputs, ensuring easy access to your favorite media. Its variable color illumination adds a touch of personalization, while the front USB port allows for quick charging of devices.

Moving on to the KDC-BT852HD, it offers advanced audio processing with high-definition radio capabilities. This model stands out with its integrated Bluetooth for hands-free calling and wireless audio streaming. The KDC-BT852HD features a 13-band graphic equalizer, providing exceptional sound tuning options. With its dual phone connection, users can connect two devices simultaneously, enhancing convenience.

The KDC-X896 offers a multitude of features for the modern audiophile. With both Bluetooth and high-definition radio support, this model excels in versatility. It incorporates a customizable 13-band equalizer and allows users to adjust audio settings to their liking. Furthermore, the KDC-X896 supports a variety of music formats, including FLAC, ensuring high-quality playback.

Lastly, the KDC-X496 is designed for drivers seeking a quality audio experience without breaking the bank. It supports Bluetooth wireless technology for easy connection to devices, as well as USB and AUX inputs for versatile playback options. Users can take advantage of the 13-band equalizer to fine-tune the sound to their preference. With its clear display and intuitive controls, the KDC-X496 is an excellent choice for anyone looking to upgrade their car audio system.

In conclusion, Kenwood's KMR-550U, KDC-452U, KDC-BT852HD, KDC-X896, and KDC-X496 offer a range of impressive features, catering to various automotive audio needs. From marine applications to versatile everyday use, these models incorporate advanced technologies that enhance sound quality, connectivity, and overall user experience. Whether you're a casual listener or an audio enthusiast, Kenwood has a solution that fits your needs.