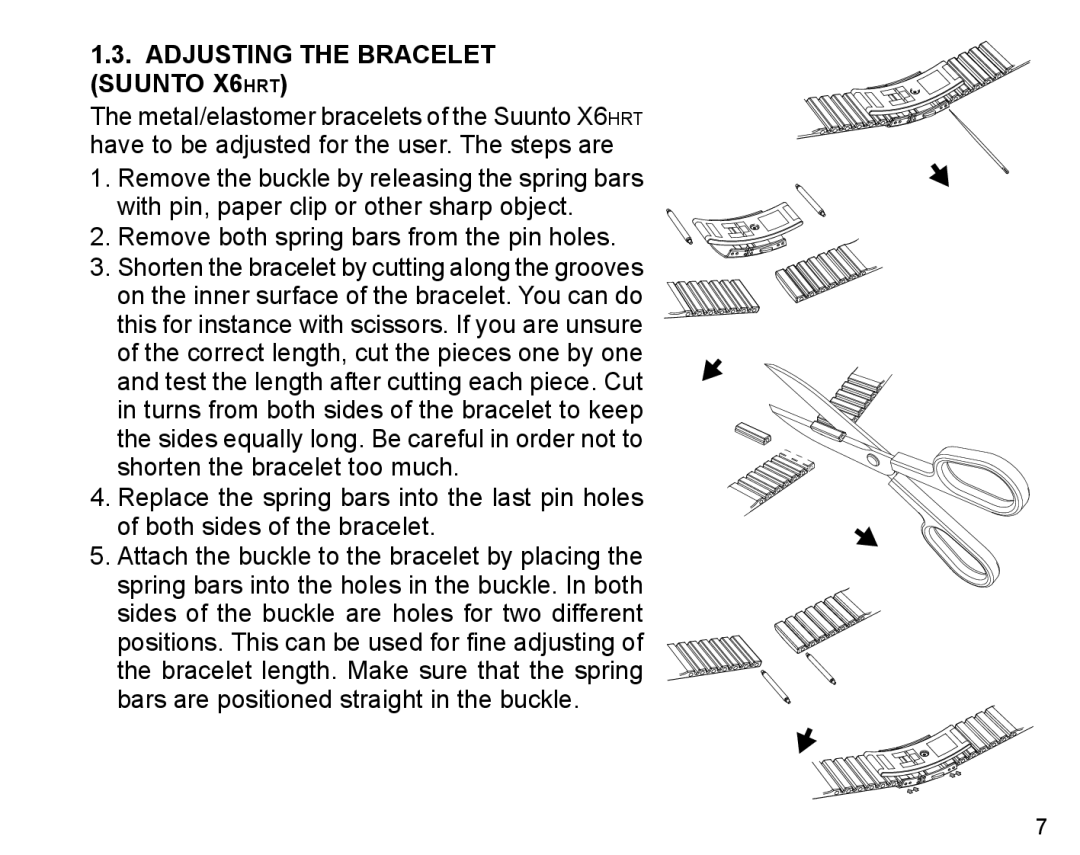
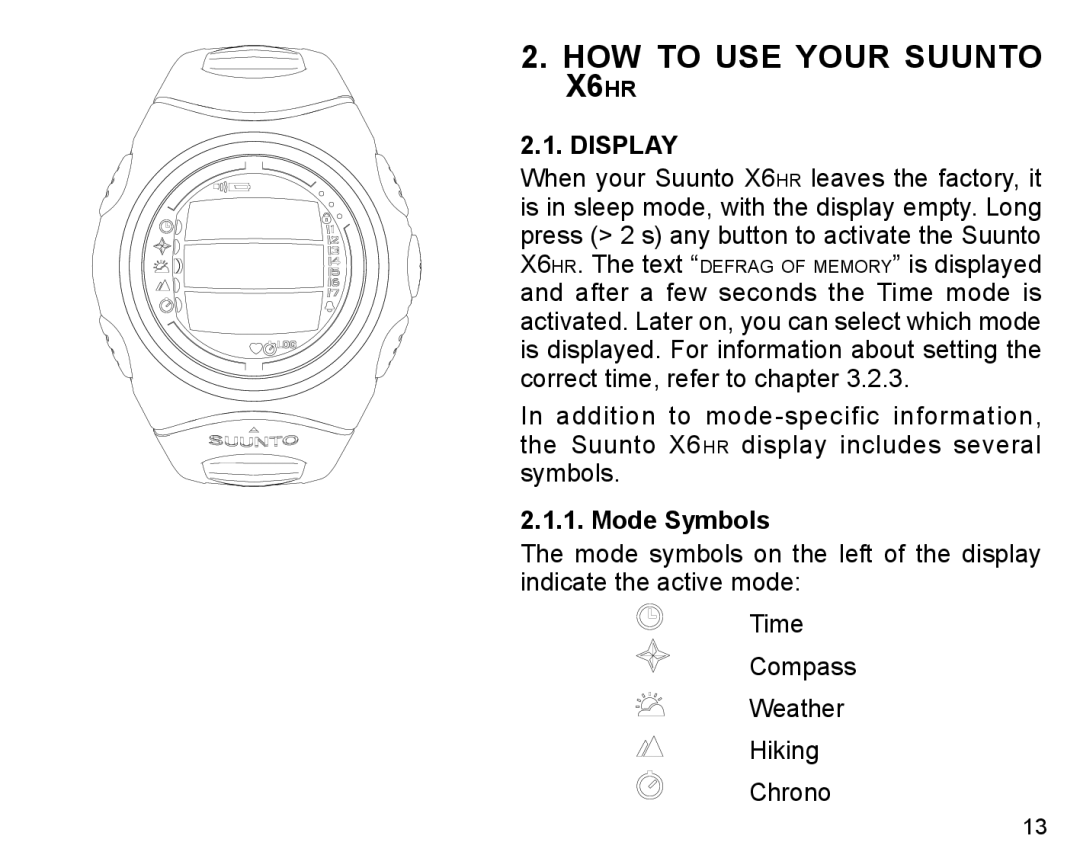
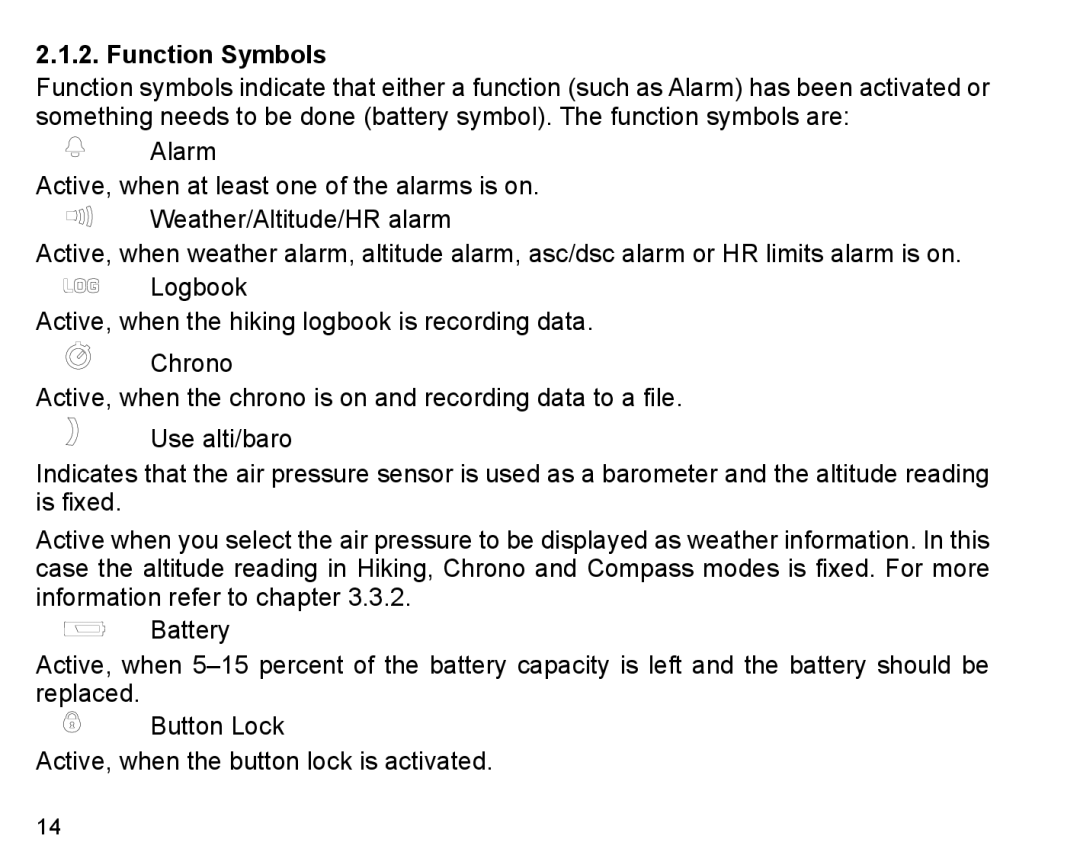
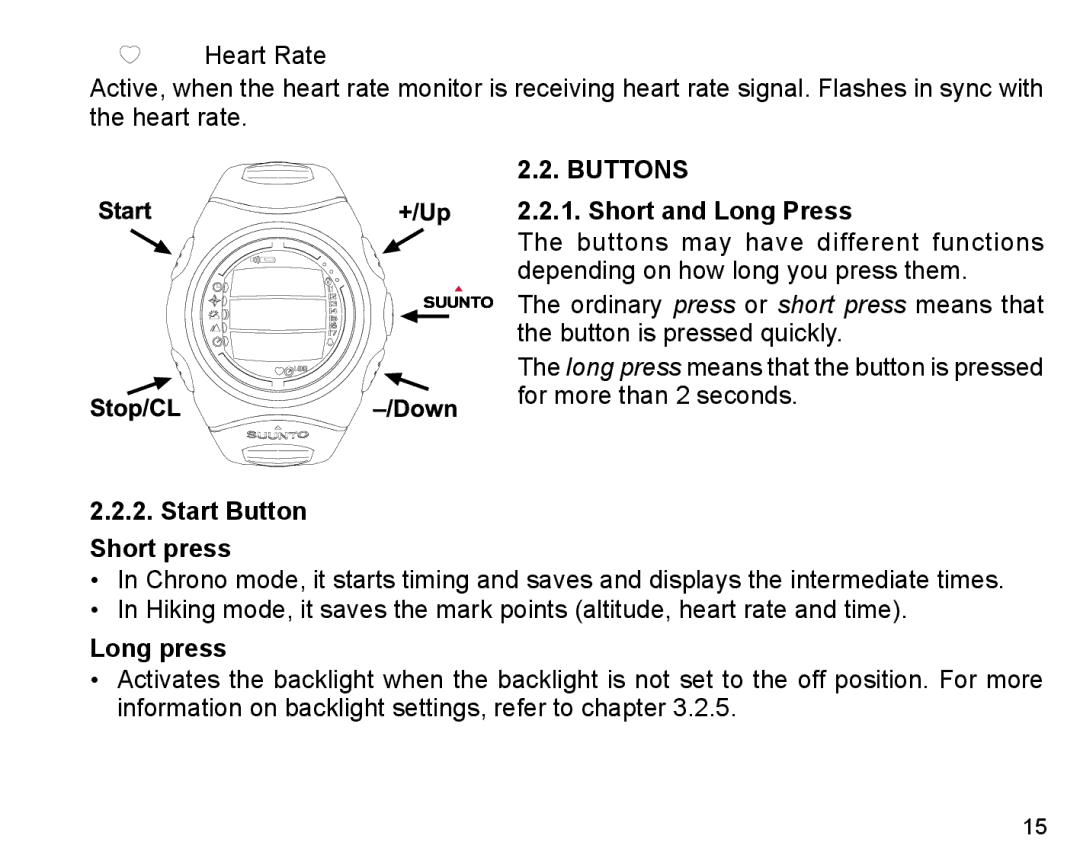
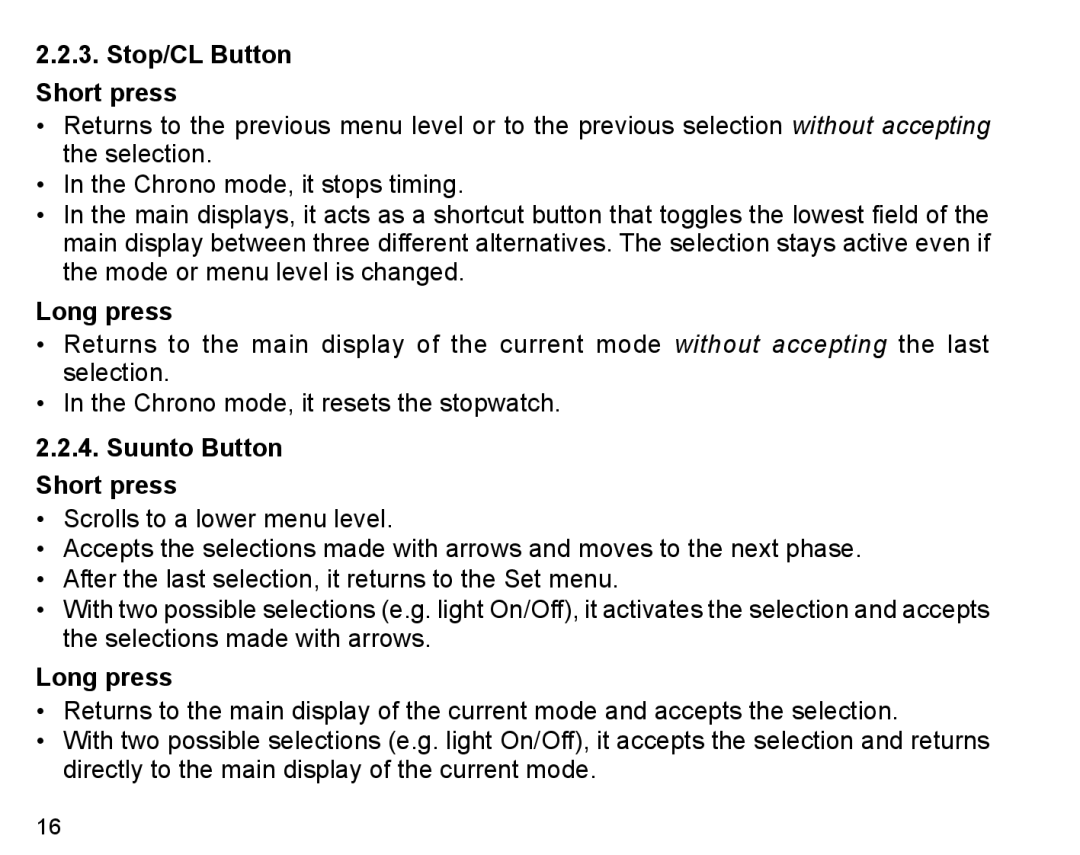
Suunto X6HR manual Adjusting the Bracelet Suunto X6hrt, Remove both spring bars from the pin holes

Page 9

1.3.ADJUSTING THE BRACELET (Suunto X6hrt)

The metal/elastomer bracelets of the Suunto X6hrt have to be adjusted for the user. The steps are

1. Remove the buckle by releasing the spring bars with pin, paper clip or other sharp object.

2. Remove both spring bars from the pin holes.

3. Shorten the bracelet by cutting along the grooves on the inner surface of the bracelet. You can do this for instance with scissors. If you are unsure of the correct length, cut the pieces one by one and test the length after cutting each piece. Cut in turns from both sides of the bracelet to keep the sides equally long. Be careful in order not to shorten the bracelet too much.

4. Replace the spring bars into the last pin holes of both sides of the bracelet.

5. Attach the buckle to the bracelet by placing the spring bars into the holes in the buckle. In both sides of the buckle are holes for two different positions. This can be used for fine adjusting of the bracelet length. Make sure that the spring bars are positioned straight in the buckle.


Image 9
Contents Page Page USER’S Guide Table of Contents Use of the Suunto X6hr and Transmitter Belt Chrono General Information Care and Maintenance Care of Suunto X6hrWater Resistance Care of Transmitter BeltRemove both spring bars from the pin holes Adjusting the Bracelet Suunto X6hrtBattery Replacement Replacing the Battery Page Page After sales service How to Use Your Suunto X6hr Mode SymbolsDisplay Function Symbols Buttons Short and Long Press Start Button Short pressLong press Suunto Button Short press Stop/CL Button Short pressButton Lock Arrow Buttons Short pressActivating the button lock Deactivating the button lockNavigating in Menus Menus Basic Menu StructureElectromagnetic interference Heart Rate Monitor and Transmitter BeltUse of Suunto X6hr and Transmitter Belt in water General Information ModesAlarm Time Mode Main DisplayDate TimeActivating alarms Deactivating alarms Acknowledging alarmsSetting the time and the dual time Changing the date Setting the tones Setting the iconsGeneral Calibrating the air pressure sensor Setting the backlightUnits Setting the time formatSetting the temperature unit Setting the date formatSetting the air pressure unit Setting the elevation unitSetting the ascent/descent rate unit Compass mode Main Display BearingCompass Shortcuts Use Calibrating the compass Altitude/SealevelPage Setting the compass declination Weather Mode Main Display TemperatureAir pressure Sealevel Memory Hiking Mode Main Display Ascent/descent rateAltitude Starting the logbook LogbookViewing logbook files Stopping the logbookErasing logbook files Resetting the logbook history Viewing logbook historyLogbook marks Alarms Setting the ascent/descent alarm Setting the altitude alarmStopwatch Chrono Main DisplayViewing Heart Rate memory Time/Heart RatePage Viewing the altitude memory Erasing memory files Use Alti/Baro Setting the recording intervalActivating the timer TimerStopping the timer Setting the Heart Rate limitsHR Limits Additional Features PC InterfaceTransferring data Page Logs Charts and Data Suunto Activity Manager Features UsersAnalyzing Data Changing Suunto X6hr SettingsSystem Requirements SuuntoSports.comCommunities My SuuntoGetting Started Sport ForumsAltimeter Technical DataBarometer ThermometerTransmitter Belt Copyright and Trademark NoticeLimits of Liability and ISO 9001 Compliance Disposal of the Device Customer Service Contacts Suunto Oy 10/2004, 11/2005, 3/2007