Beko WI 1382 user manual Draining any remaining water and cleaning the pump filter

Page 29

Close the taps.

Remove the nuts of the water intake hoses to clean the surfaces of the filters on the water intake valves with an appropriate brush.

If the filters are very dirty, you can pull them out by means of pliers and clean them.

Take out the filters on the flat ends of the water intake hoses together with the gaskets and clean thoroughly under streaming water.

Replace the gaskets and filters carefully to their places and tighten the hose nuts by hand.

Draining any remaining water and cleaning the pump filter

Filter system in your machine prevents solid items such as buttons, coins and fabric fibers clogging the pump propeller during discharging of the washing water. Thus, a good water discharger is achieved and the pump life is extended.

If your machine fails to drain the water, the pump filter may be clogged. You may have to clean it every 2 years or whenever it is plugged. Water must be drained off to clean the pump filter.

In addition, water may have to be drained off completely in the following cases:

before transporting the machine (e.g. when moving house)

when there is the danger of frost

In order to clean the dirty filter and discharge the water;

1- Unplug the machine to cut off the supply power.

AThere may be water at 90°C in the

machine. the filter must be cleaned only after the inside water is cooled down to avoid hazard of scalding.

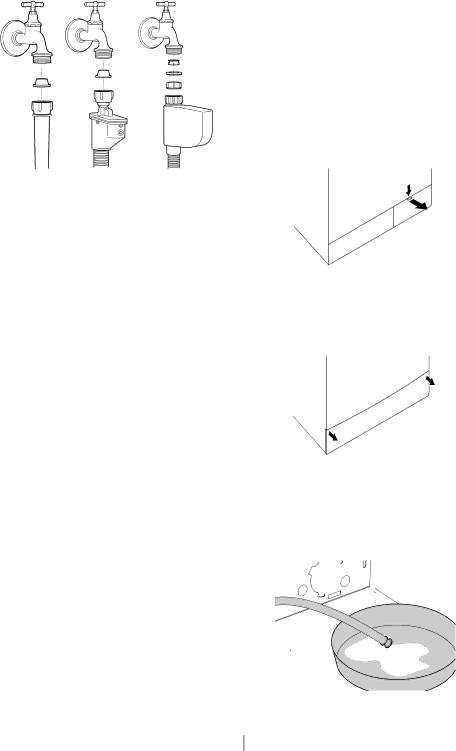
2- Open the filter cap. The filter cap may be composed of one or two pieces according to the model of your machine.

If it is composed of two pieces, press the tab on the filter cap downwards and pull the piece out towards yourself.

C If your machine is built-in, then it does not contain a filter cover.

If it is composed of one piece, hold it from both sides and open it by pulling out.

C You can remove the filter cover by slightly pushing the kick plate downwards with a screwdriver, through the gap above the filter cover.

3- An emergency drain hose is supplied with some of our models. Others are not supplied with this item.

If your product is supplied with an emergency drain hose, do the following as shown in the figure below:

Pull out the pump outlet hose from its housing.

29

EN

Image 29
Contents Washing Machine Explanation of symbols Table of Contents Overview Your washing machineTechnical specifications Intended use Important safety instructionsGeneral safety Childrens safety Appropriate installation location InstallationRemoving packaging reinforcement Removing the transportation locksConnecting to the drain Connecting water supplyRaising the appliance Adjusting the feetFitting a different plug Electrical connectionElectrical requirements Disposing of packaging material First useTransportation of the product Disposing of the old productThings to be done for energy saving PreparationSorting the laundry Preparing laundry for washingLoading the laundry Correct load capacityDetergent Drawer Detergents and softenersDetergent drawer compartments are indicated below II Main Wash CompartmentStarch Pre-Wash CompartmentBleaches Eliminating lime formationWoolens/Silks Tips for efficient washingControl panel Selecting a Program and Operating Your MachineTurning the machine on Display symbolsProgram selection Main programsAdditional programs Spin Speed selection Temperature selectionSpecial programs Program and consumption table Page Time display Auxiliary functionsProgress of program Starting the ProgramChild-proof lock Switching the machine to standby modeChanging the selections after the program has started End of program Ending the program through cancellingProgram in rinse hold mode Detergent Drawer Maintenance and cleaningDraining any remaining water and cleaning the pump filter Into their positions and pushing the upper part of it Tap is turned off. Open the inlet water taps fully TroubleshootingPage Select the proper temperature for the laundry to be washed Page Use smaller amounts of detergent for this type of item Check the supply power Product Fiche BUILT-IN Installation Page 338 190 338 Use 35mm hinge cutting tool Page Page Page To increase height of product order optional part no Page Page Page Page Republic of Ireland Service once the manufacturers guarantee has expiredUK Mainland & Northern Ireland Important notes What is covered?What is not covered?