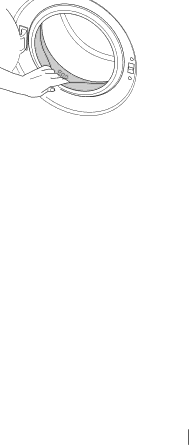
Beko WI 1382 user manual First use, Disposing of packaging material, Transportation of the product

Page 12

First use

Before starting to use the product, make sure that all preparations are made in accordance with the instructions in sections "Important safety instructions" and "Installation".

To prepare the product for washing laundry, perform first operation in Drum Cleaning programme. If your machine is not featured with Drum Cleaning programme, use Cottons-90 programme and select Additional Water or Extra Rinse auxiliary functions as well. Before starting the programme, put max. 100 g of powder anti- limescale into the main wash detergent compartment (compartment nr. II). If the anti-limescale is in tablet form, put only one tablet into compartment nr. II. Dry the inside of the bellow with a clean piece of cloth after the programme has come to an end.

C Use an anti-limescale suitable for the washing machines.

C Some water might have remained in the product due to the quality control processes in the production. It is not harmful for the product.

Disposing of packaging material

Packaging materials are dangerous to children. Keep packaging materials in a safe place away from reach of the children.

Packaging materials of the product are manufactured from recyclable materials. Dispose of them properly and sort

in accordance with recycled waste instructions. Do not dispose of them with normal domestic waste.

Transportation of the product

1.Unplug the product before transporting it.

2.Remove water drain and water supply connections.

3.Drain the remaining water in the product completely; see, "Draining remaining water and cleaning the pump filter".

4.Install transportation safety bolts in the reverse order of removal procedure; see, "Removing the transportation locks".

C Never move the product without the transportation safety bolts properly fixed in place!

Disposing of the old product

Dispose of the old product in an environmentally friendly manner.

Refer to your local dealer or solid waste collection centre in your area to learn how to dispose of your product.

For children's safety, cut the power cable and break the locking mechanism of the loading door so that it will be nonfunctional before disposing of the product.

12

EN

Image 12
Contents Washing Machine Explanation of symbols Table of Contents Your washing machine OverviewTechnical specifications Important safety instructions General safetyIntended use Childrens safety Installation Appropriate installation locationRemoving packaging reinforcement Removing the transportation locks Connecting water supply Connecting to the drainAdjusting the feet Raising the applianceElectrical connection Electrical requirementsFitting a different plug First use Disposing of packaging materialTransportation of the product Disposing of the old productPreparation Things to be done for energy savingSorting the laundry Preparing laundry for washingCorrect load capacity Loading the laundryDetergents and softeners Detergent DrawerDetergent drawer compartments are indicated below II Main Wash CompartmentPre-Wash Compartment StarchBleaches Eliminating lime formationTips for efficient washing Woolens/SilksSelecting a Program and Operating Your Machine Control panelDisplay symbols Turning the machine onProgram selection Main programsAdditional programs Temperature selection Special programsSpin Speed selection Program and consumption table Page Auxiliary functions Time displayStarting the Program Progress of programSwitching the machine to standby mode Changing the selections after the program has startedChild-proof lock Ending the program through cancelling Program in rinse hold modeEnd of program Maintenance and cleaning Detergent DrawerDraining any remaining water and cleaning the pump filter Into their positions and pushing the upper part of it Troubleshooting Tap is turned off. Open the inlet water taps fullyPage Select the proper temperature for the laundry to be washed Page Use smaller amounts of detergent for this type of item Check the supply power Product Fiche BUILT-IN Installation Page 338 190 338 Use 35mm hinge cutting tool Page Page Page To increase height of product order optional part no Page Page Page Page Service once the manufacturers guarantee has expired UK Mainland & Northern IrelandRepublic of Ireland What is covered? What is not covered?Important notes