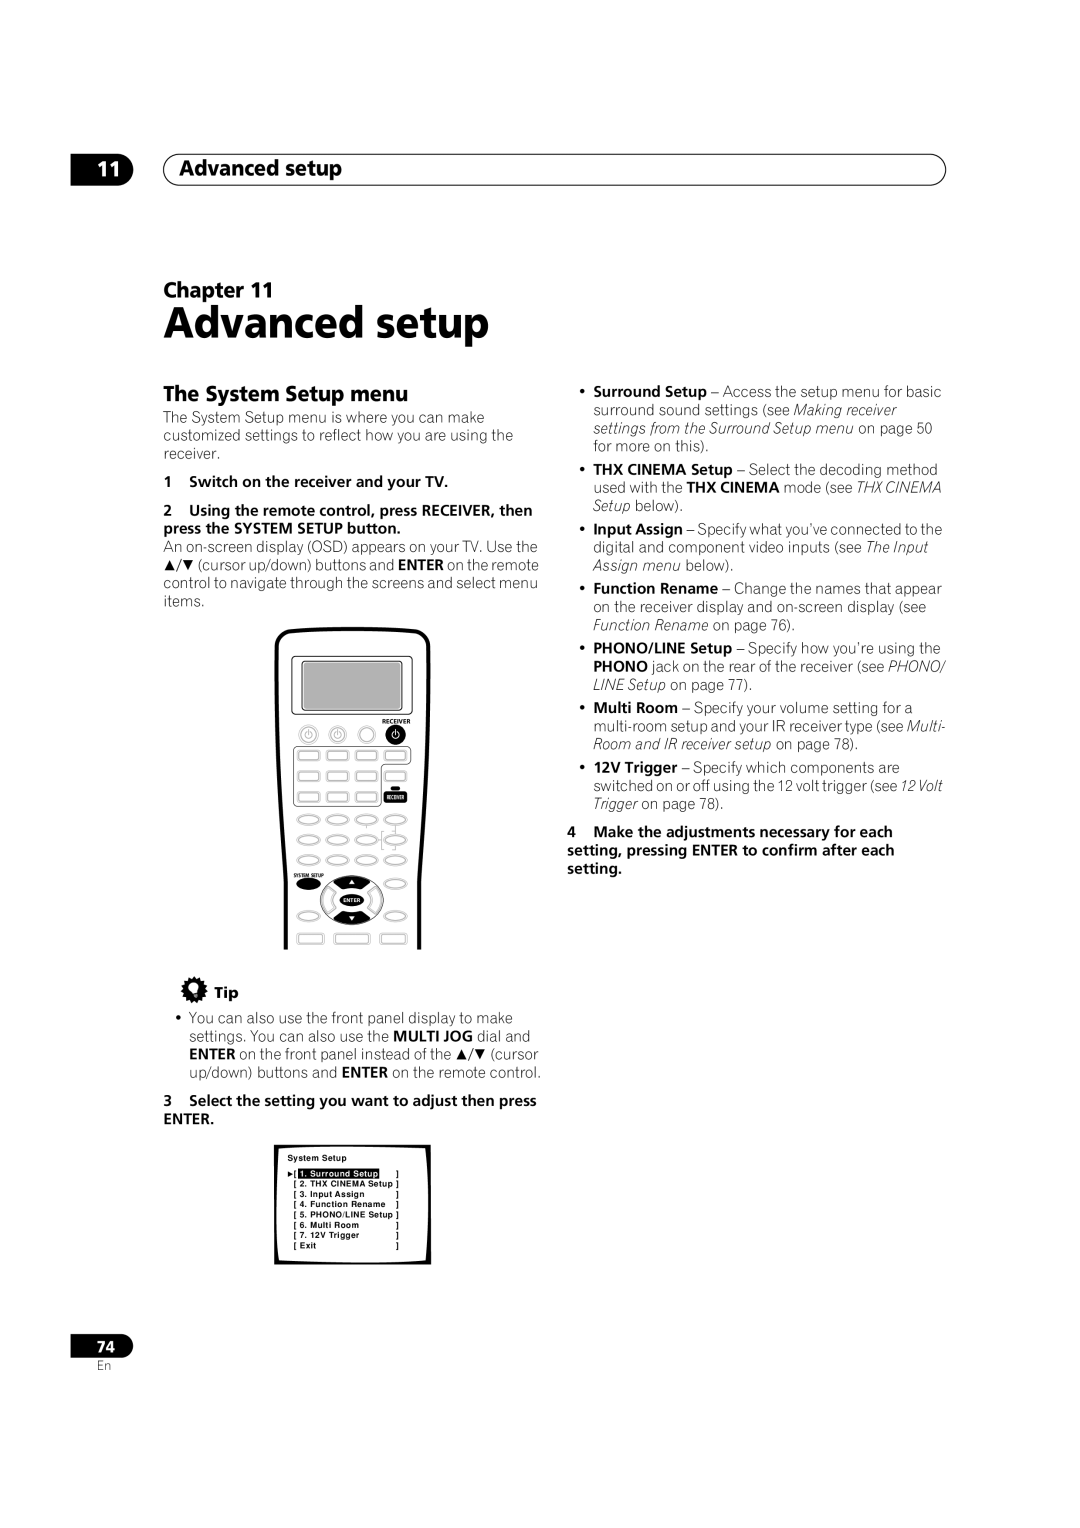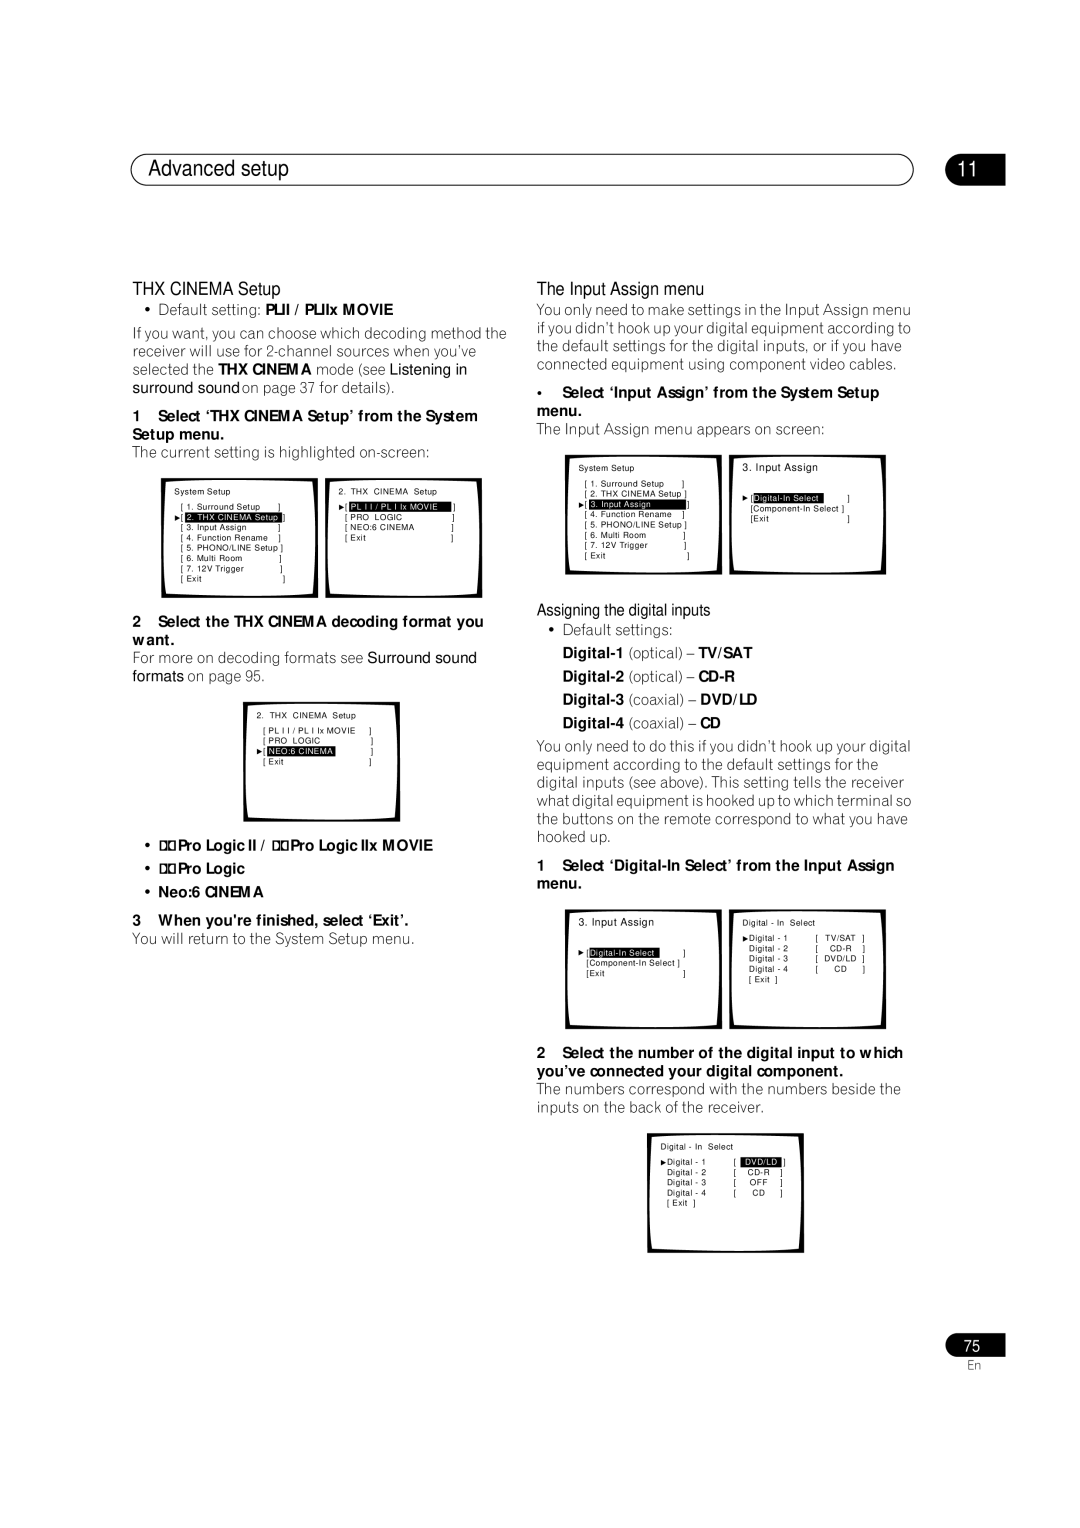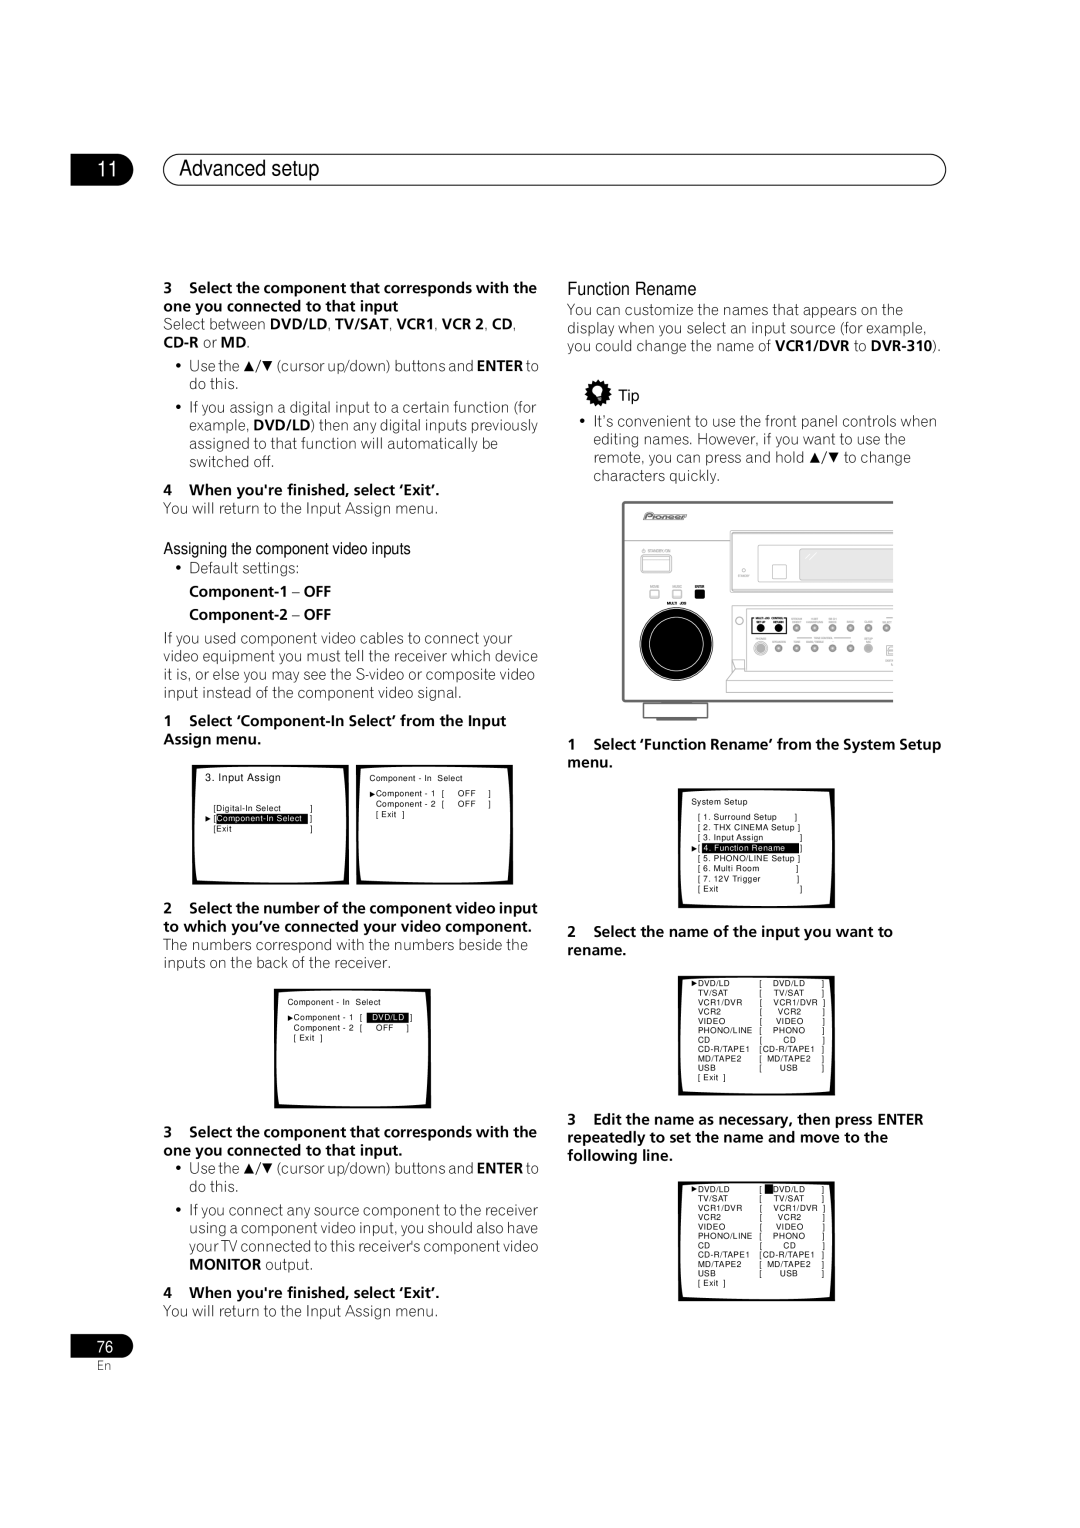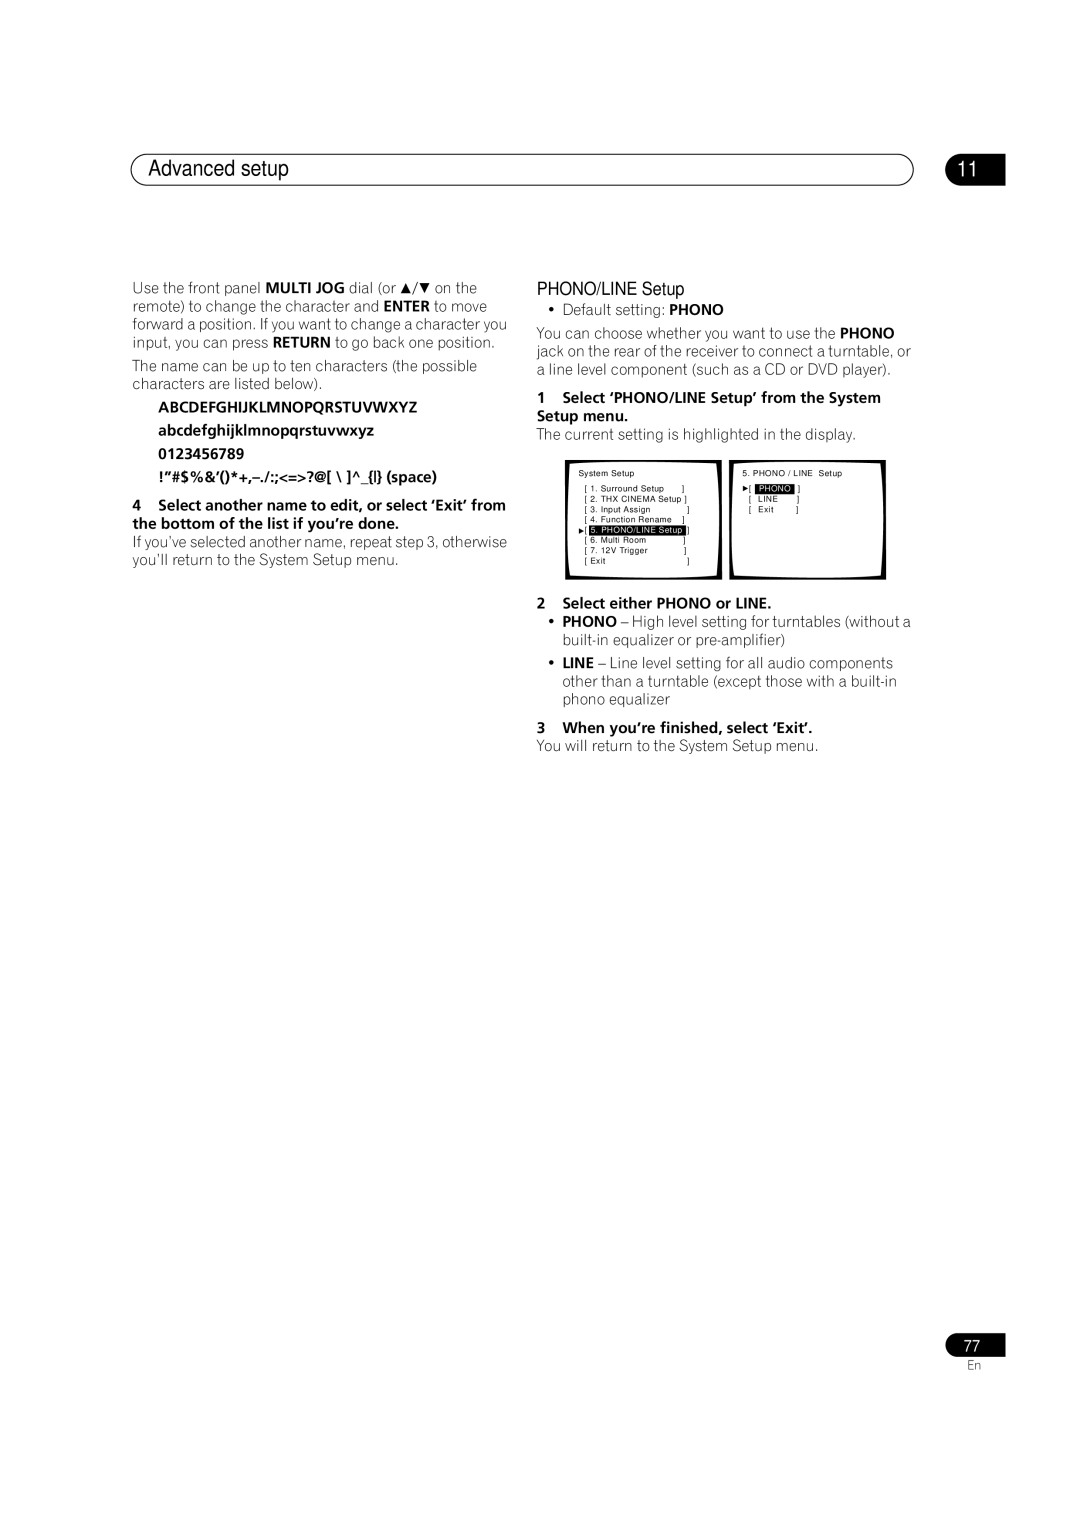
11Advanced setup
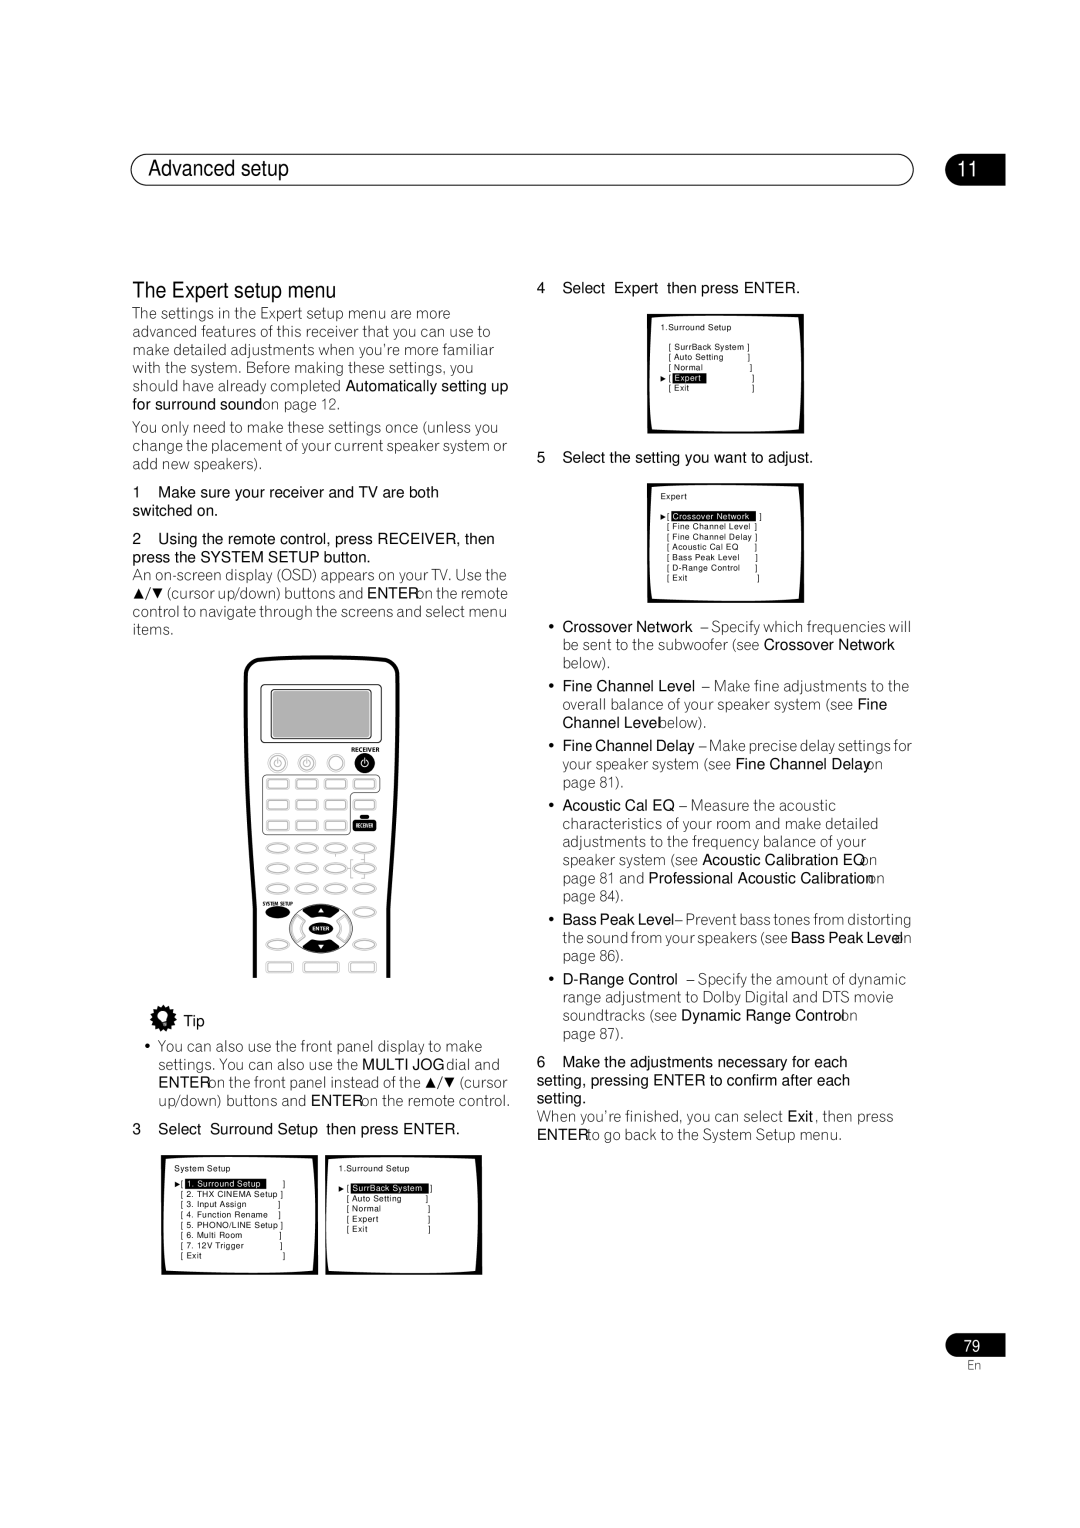
•If No Data is displayed, you will need to make a reverb measurement using the Auto Pro or Reverb Measurement setup option.
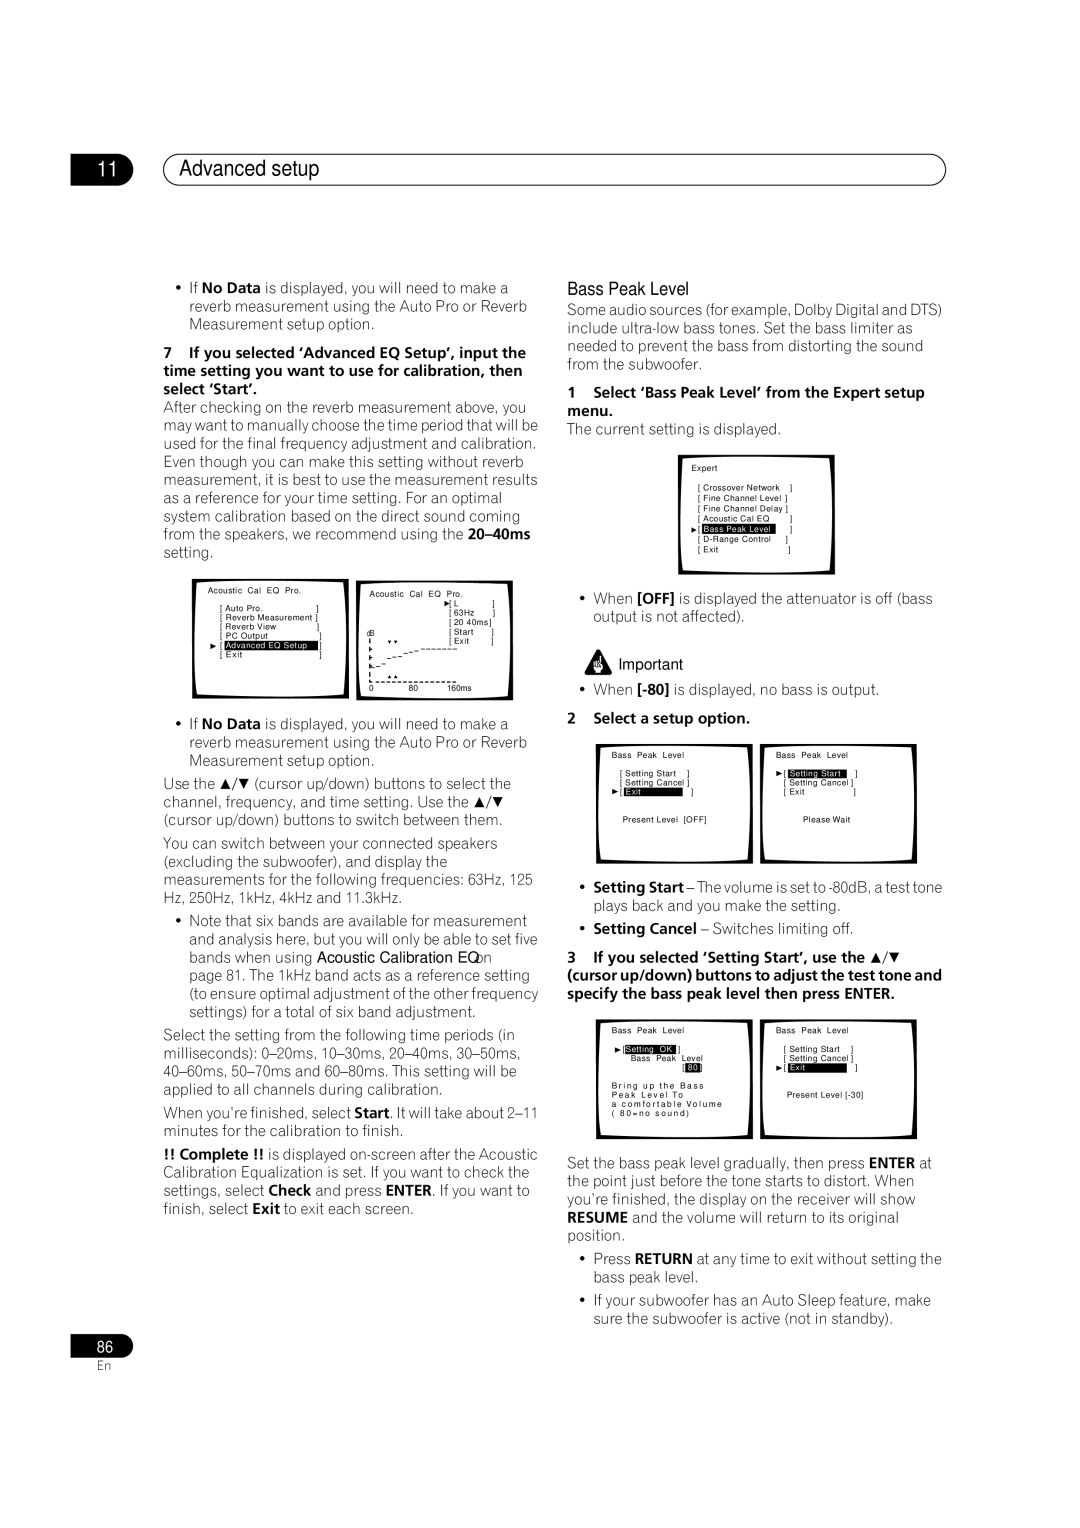
7If you selected ‘Advanced EQ Setup’, input the time setting you want to use for calibration, then select ‘Start’.
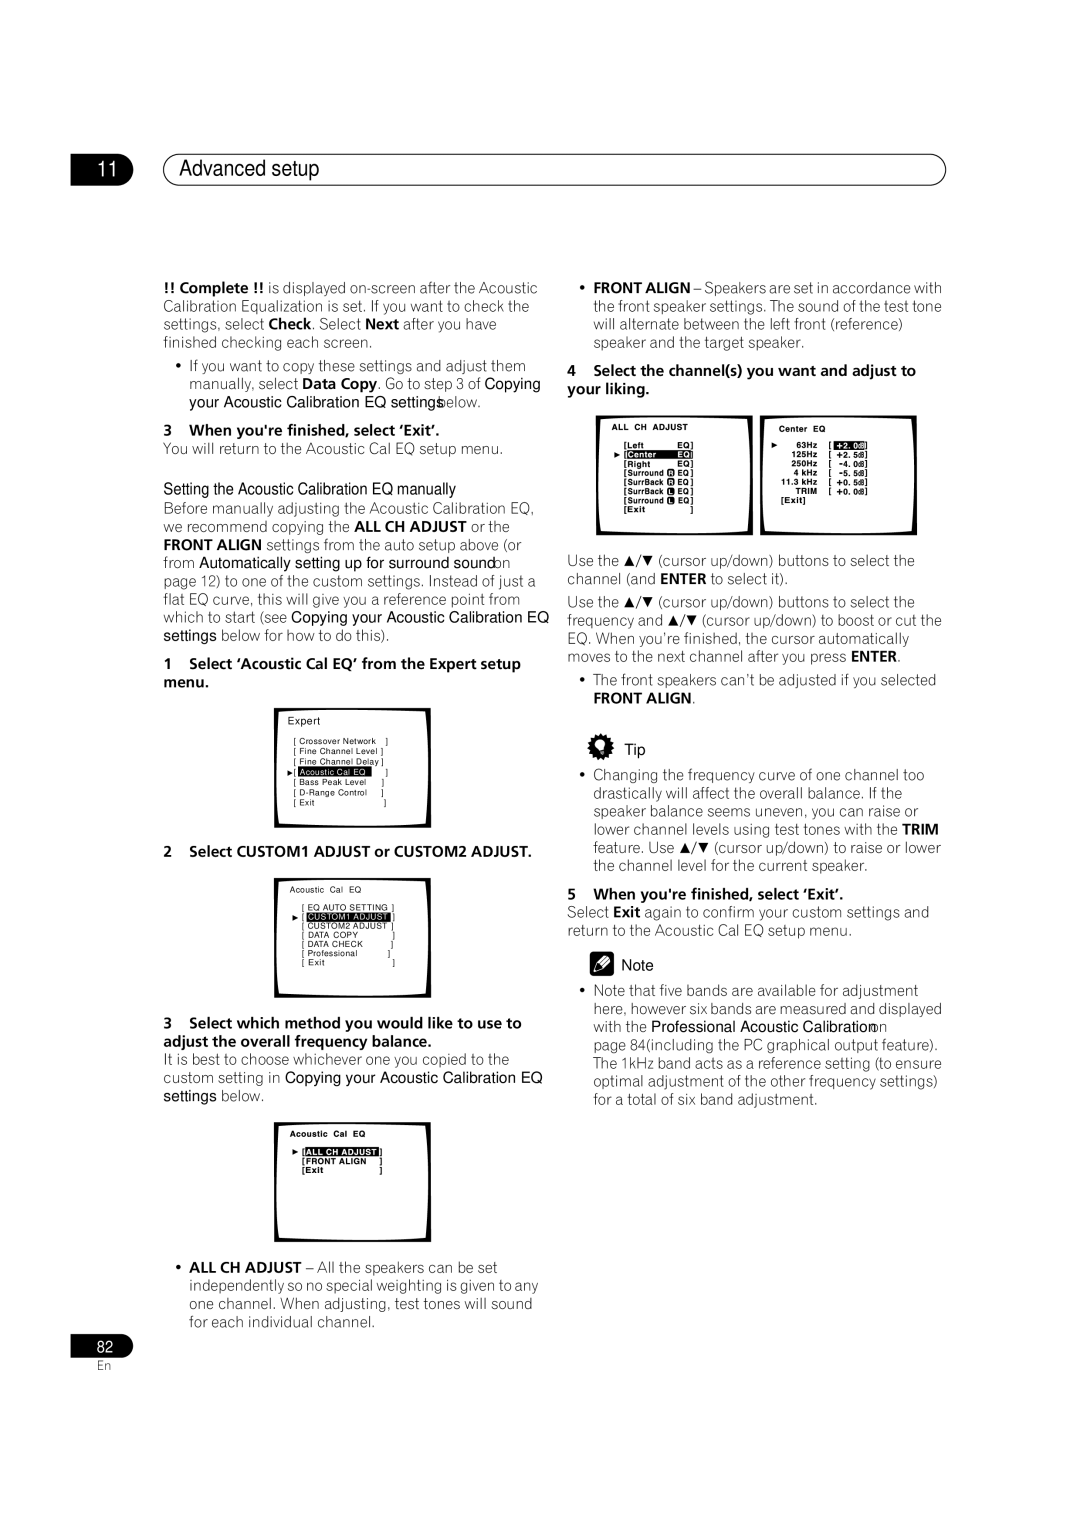
After checking on the reverb measurement above, you may want to manually choose the time period that will be used for the final frequency adjustment and calibration. Even though you can make this setting without reverb measurement, it is best to use the measurement results as a reference for your time setting. For an optimal system calibration based on the direct sound coming from the speakers, we recommend using the
Acoustic Cal EQ Pro. |
|
|
| Acoustic | Cal | EQ Pro. |
| ||
|
|
|
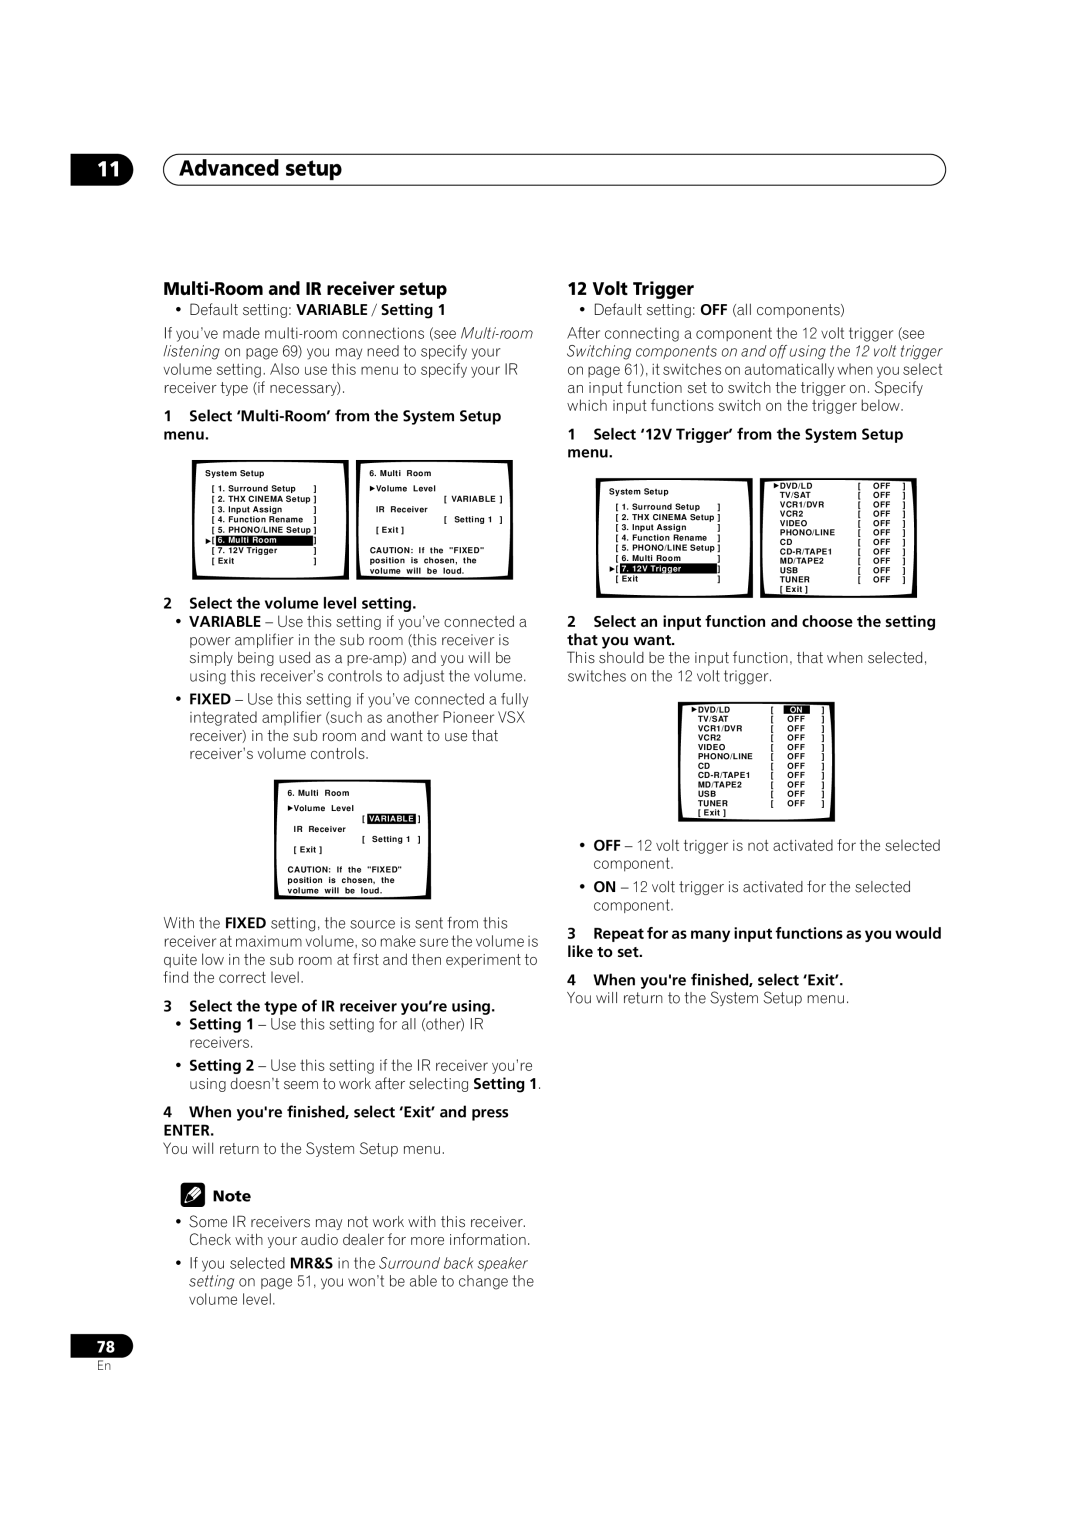
|
|
| ||||
[ Auto Pro. | ] |
|
|
|
|
| [ L | ] | |
|
|
|
|
| [ 63Hz | ] | |||
[ Reverb Measurement ] |
|
|
|
|
| ||||
|
|
|
|
| [ | ||||
[ Reverb View | ] |
|
|
|
|
| |||
| dB |
| [ Start | ] | |||||
[ PC Output | ] |
|
| ||||||
|
|
|
|
| [ Exit | ] | |||
[ | Advanced EQ Setup | ] |
|
|
|
|
| ||
|
|
|
|
|
|
| |||
[ | Exit | ] |
|
|
|
|
|
|
|
|
|
|
|
|
|
|
|
|
|
|
|
|
| 0 |
| 80 | 160ms |
| |
|
|
|
|
|
|
|
|
|
|
•If No Data is displayed, you will need to make a reverb measurement using the Auto Pro or Reverb Measurement setup option.
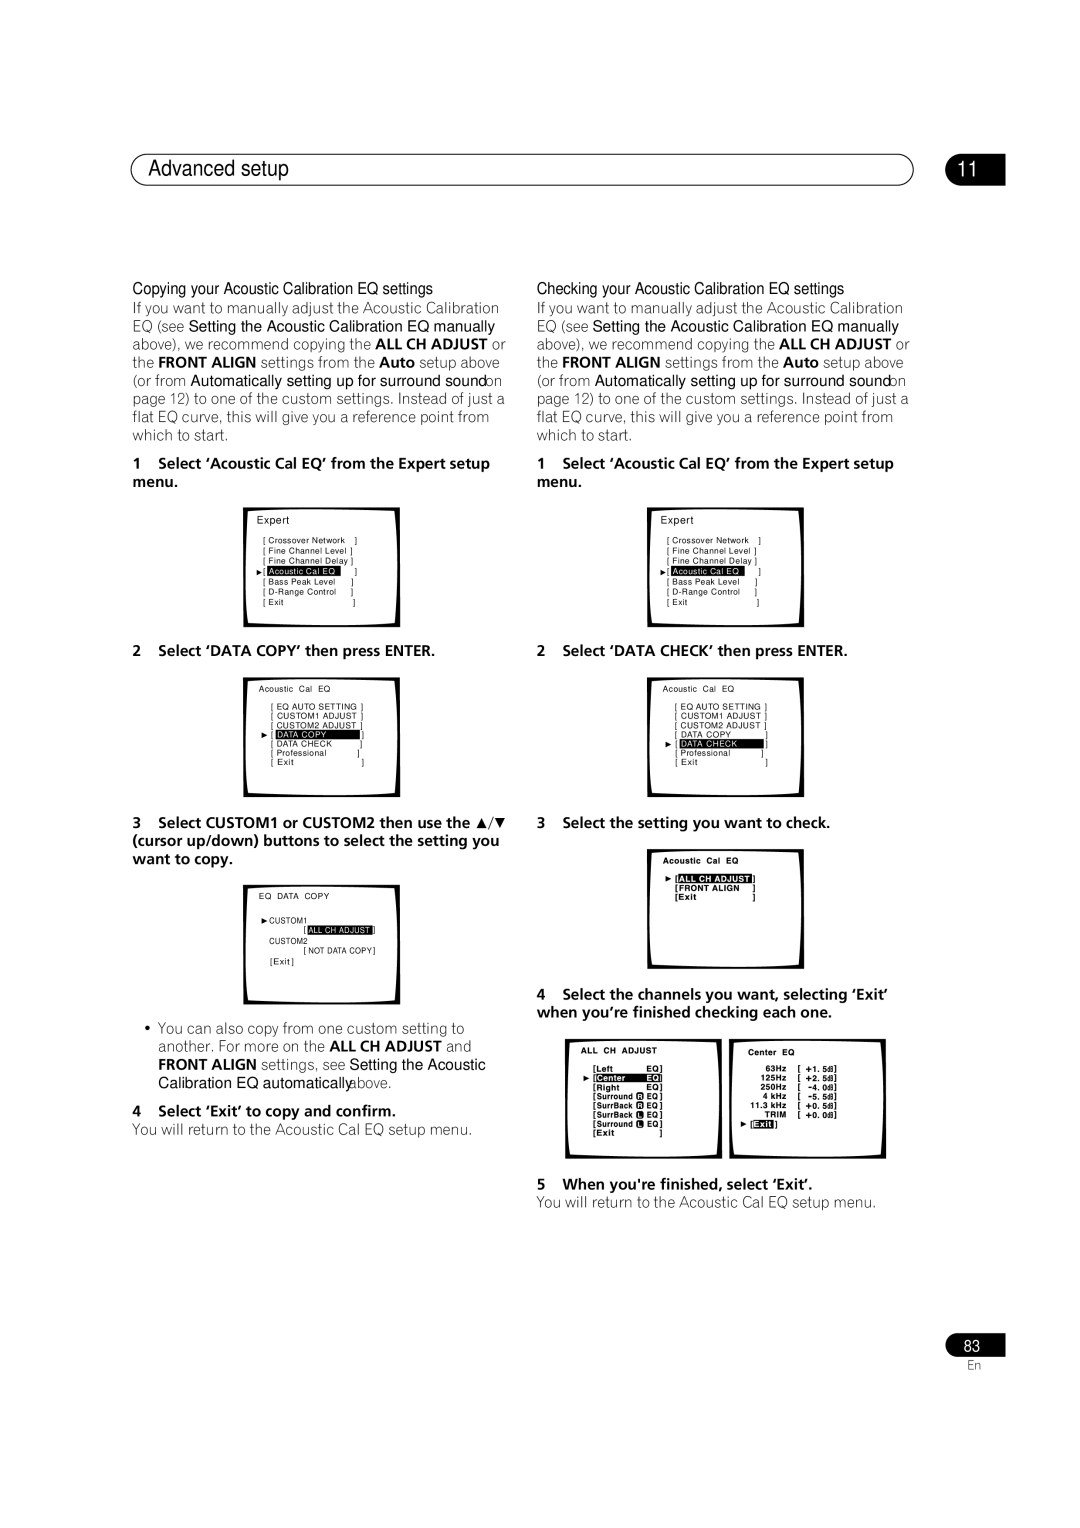
Use the (cursor up/down) buttons to select the channel, frequency, and time setting. Use the (cursor up/down) buttons to switch between them.
You can switch between your connected speakers (excluding the subwoofer), and display the measurements for the following frequencies: 63Hz, 125 Hz, 250Hz, 1kHz, 4kHz and 11.3kHz.
•Note that six bands are available for measurement and analysis here, but you will only be able to set five bands when using Acoustic Calibration EQ on page 81. The 1kHz band acts as a reference setting (to ensure optimal adjustment of the other frequency settings) for a total of six band adjustment.
Select the setting from the following time periods (in milliseconds):
When you’re finished, select Start. It will take about
!!Complete !! is displayed
86
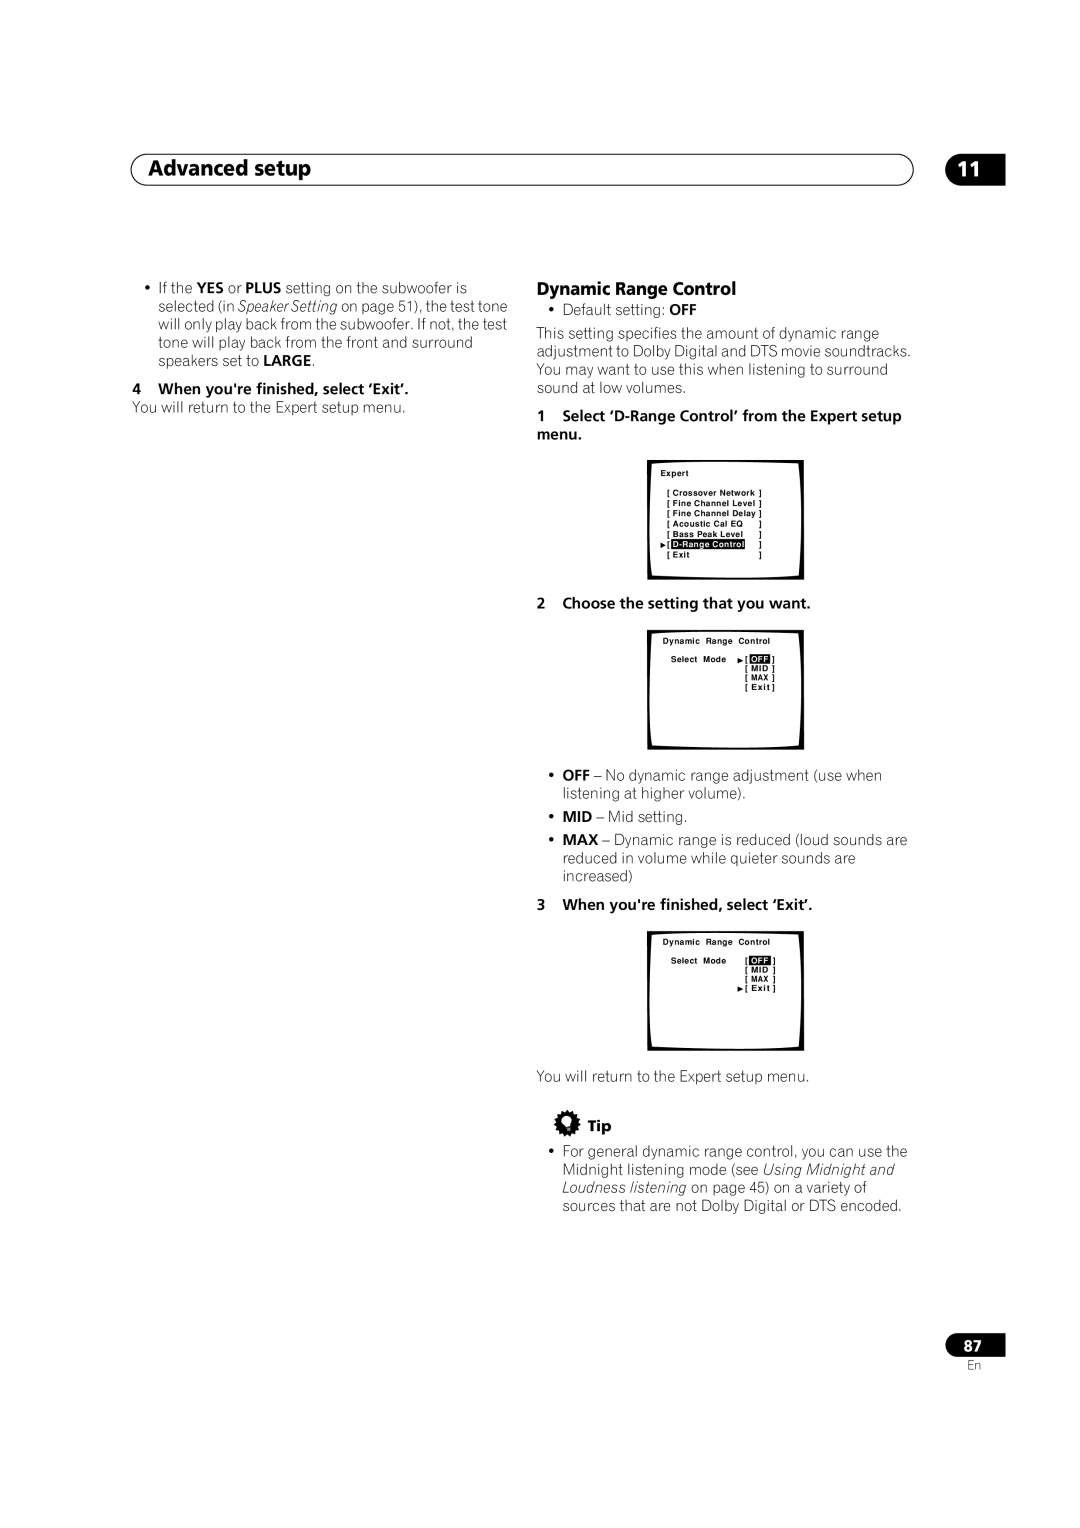
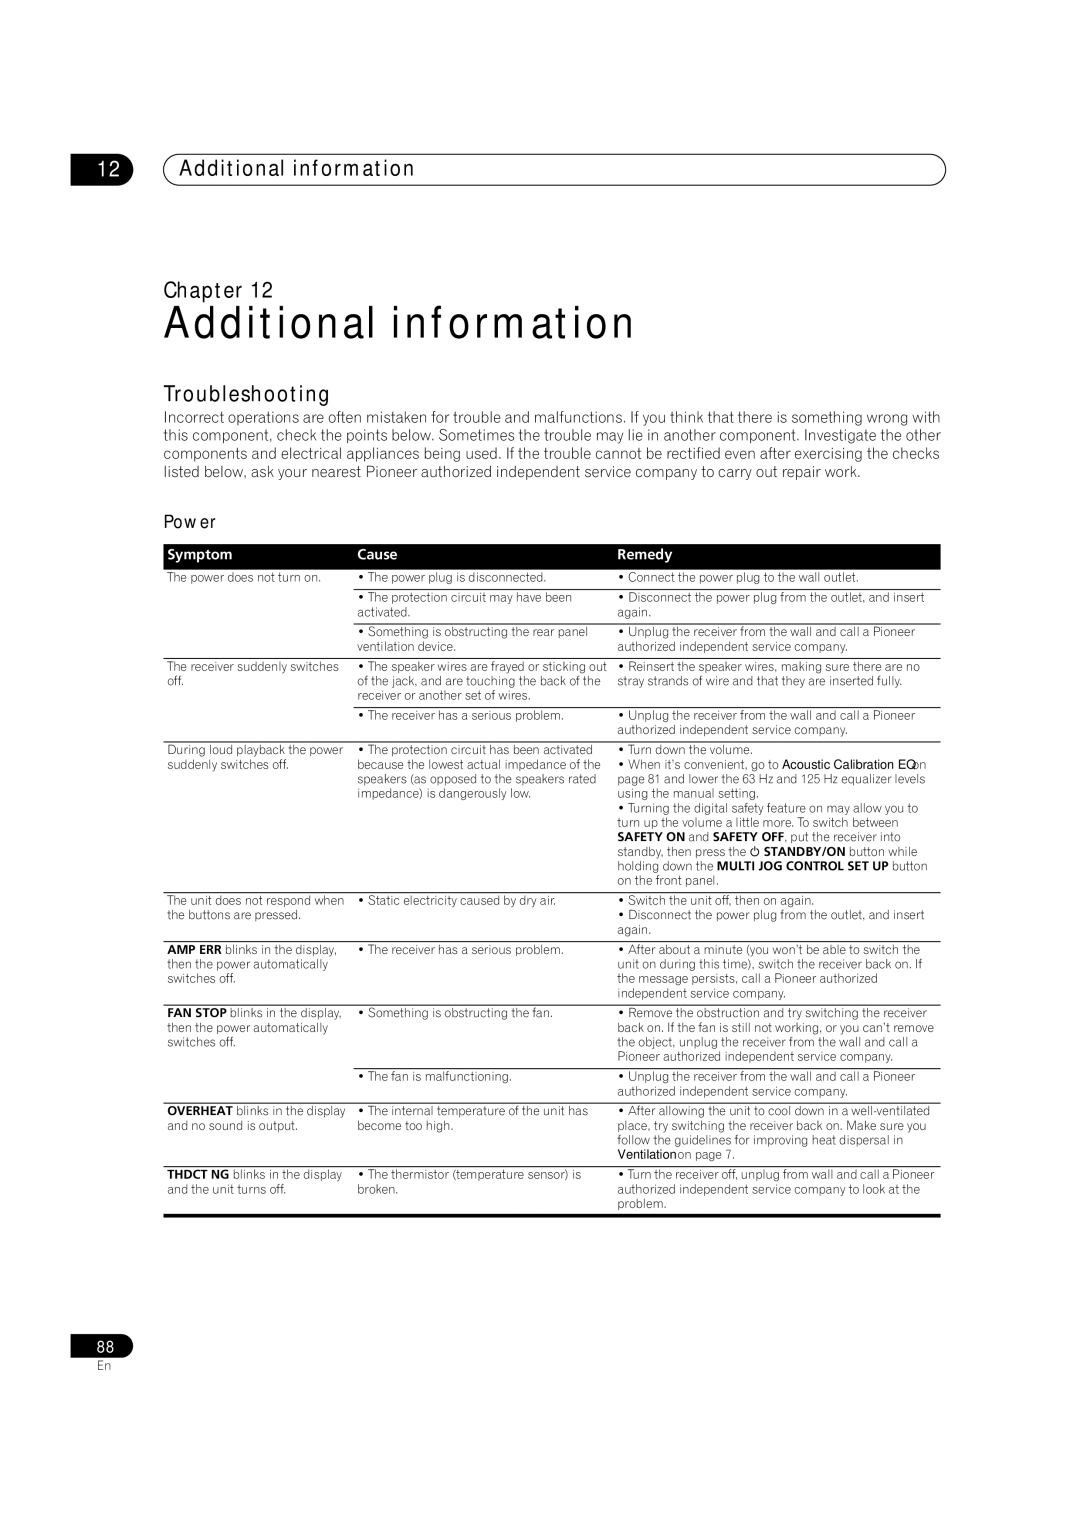
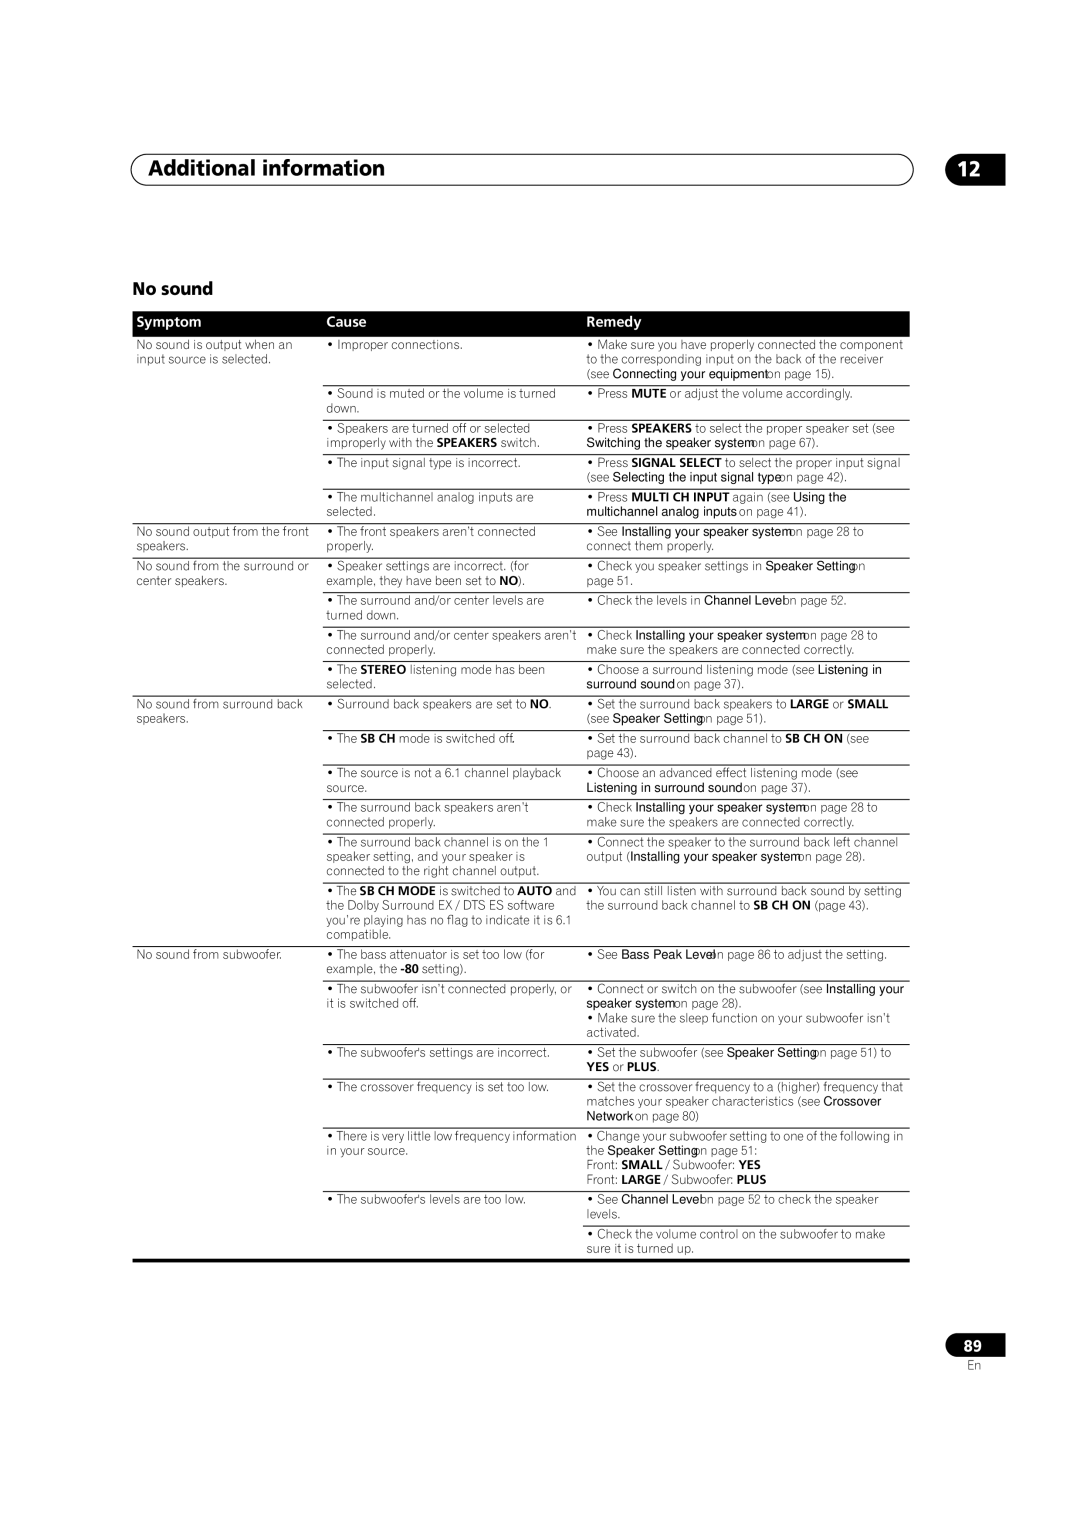
Bass Peak Level
Some audio sources (for example, Dolby Digital and DTS) include
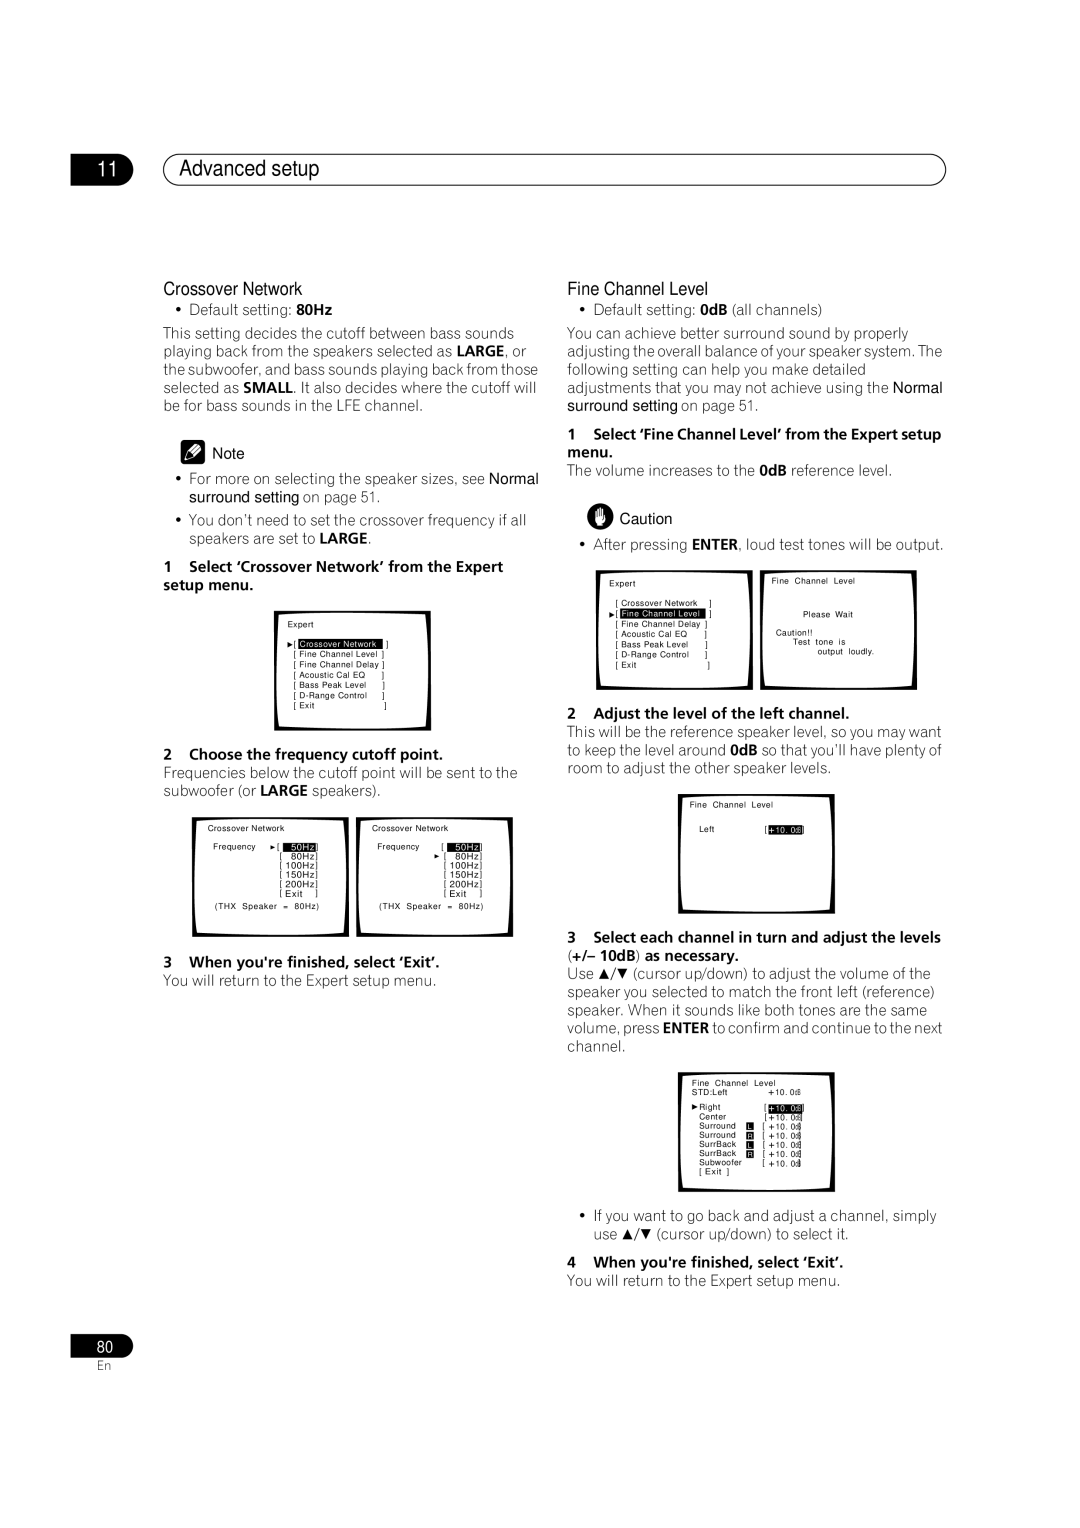
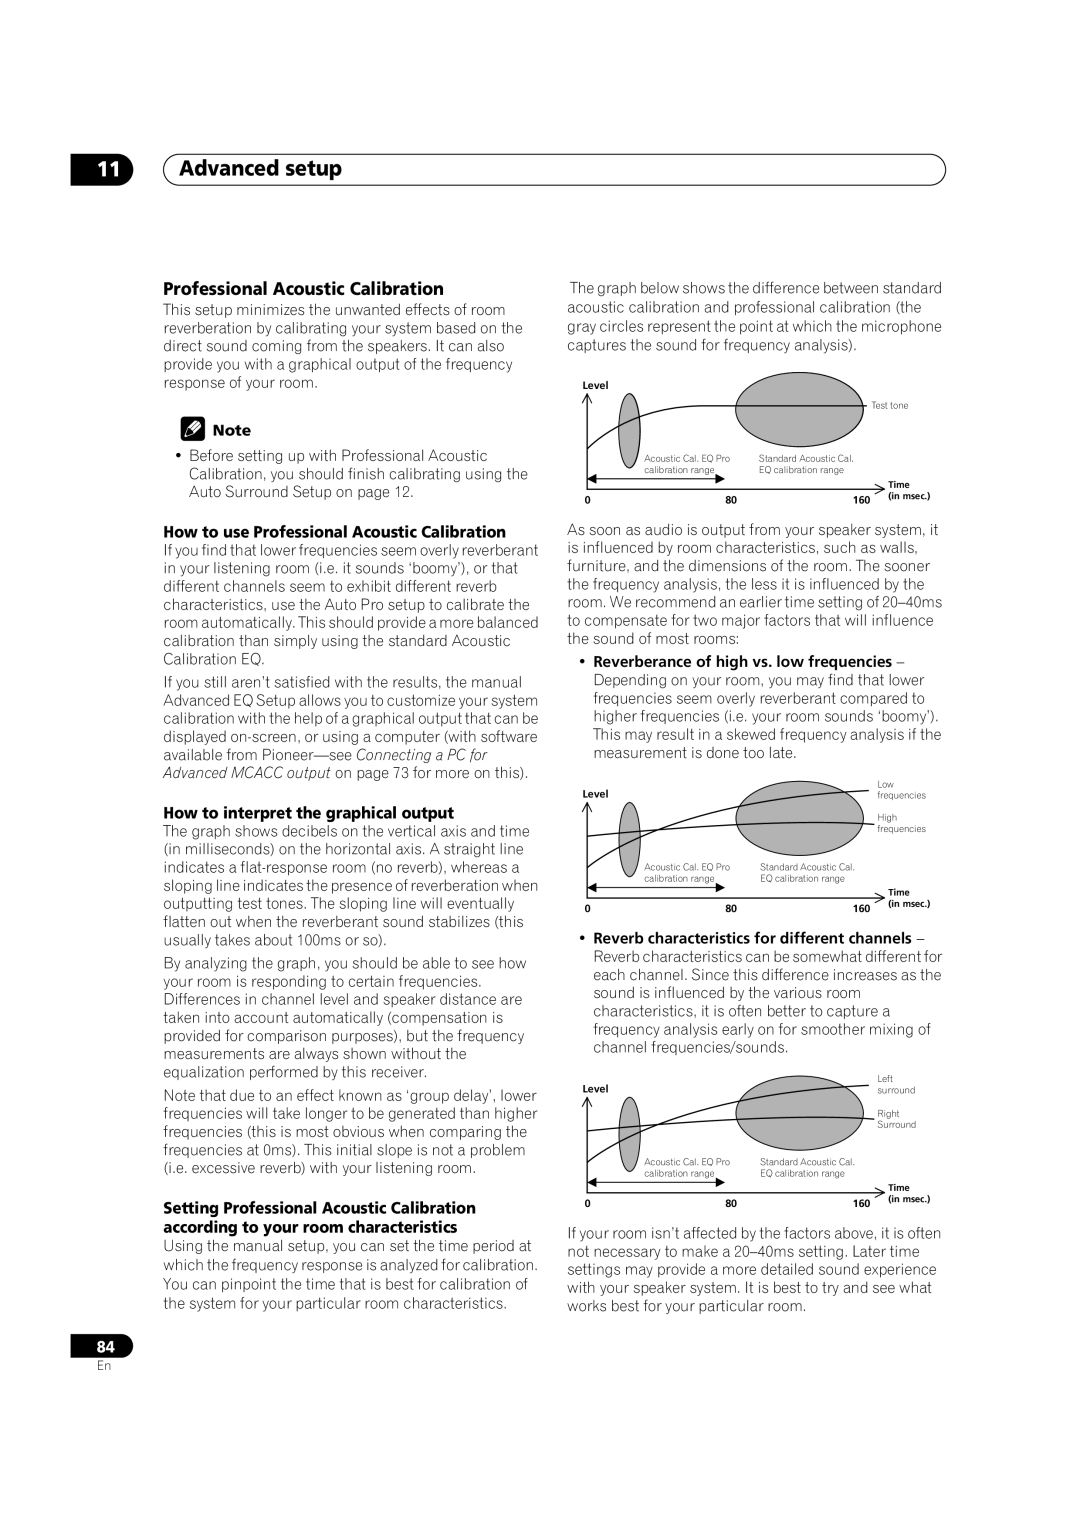
1Select ‘Bass Peak Level’ from the Expert setup menu.
The current setting is displayed.
Expert
[ Crossover Network ]
[ Fine Channel Level ]
[ Fine Channel Delay ]
[ Acoustic Cal EQ | ] | |
[ | Bass Peak Level | ] |
[ | ] | |
[ Exit | ] | |
•When [OFF] is displayed the attenuator is off (bass output is not affected).
![]() Important
Important
• When
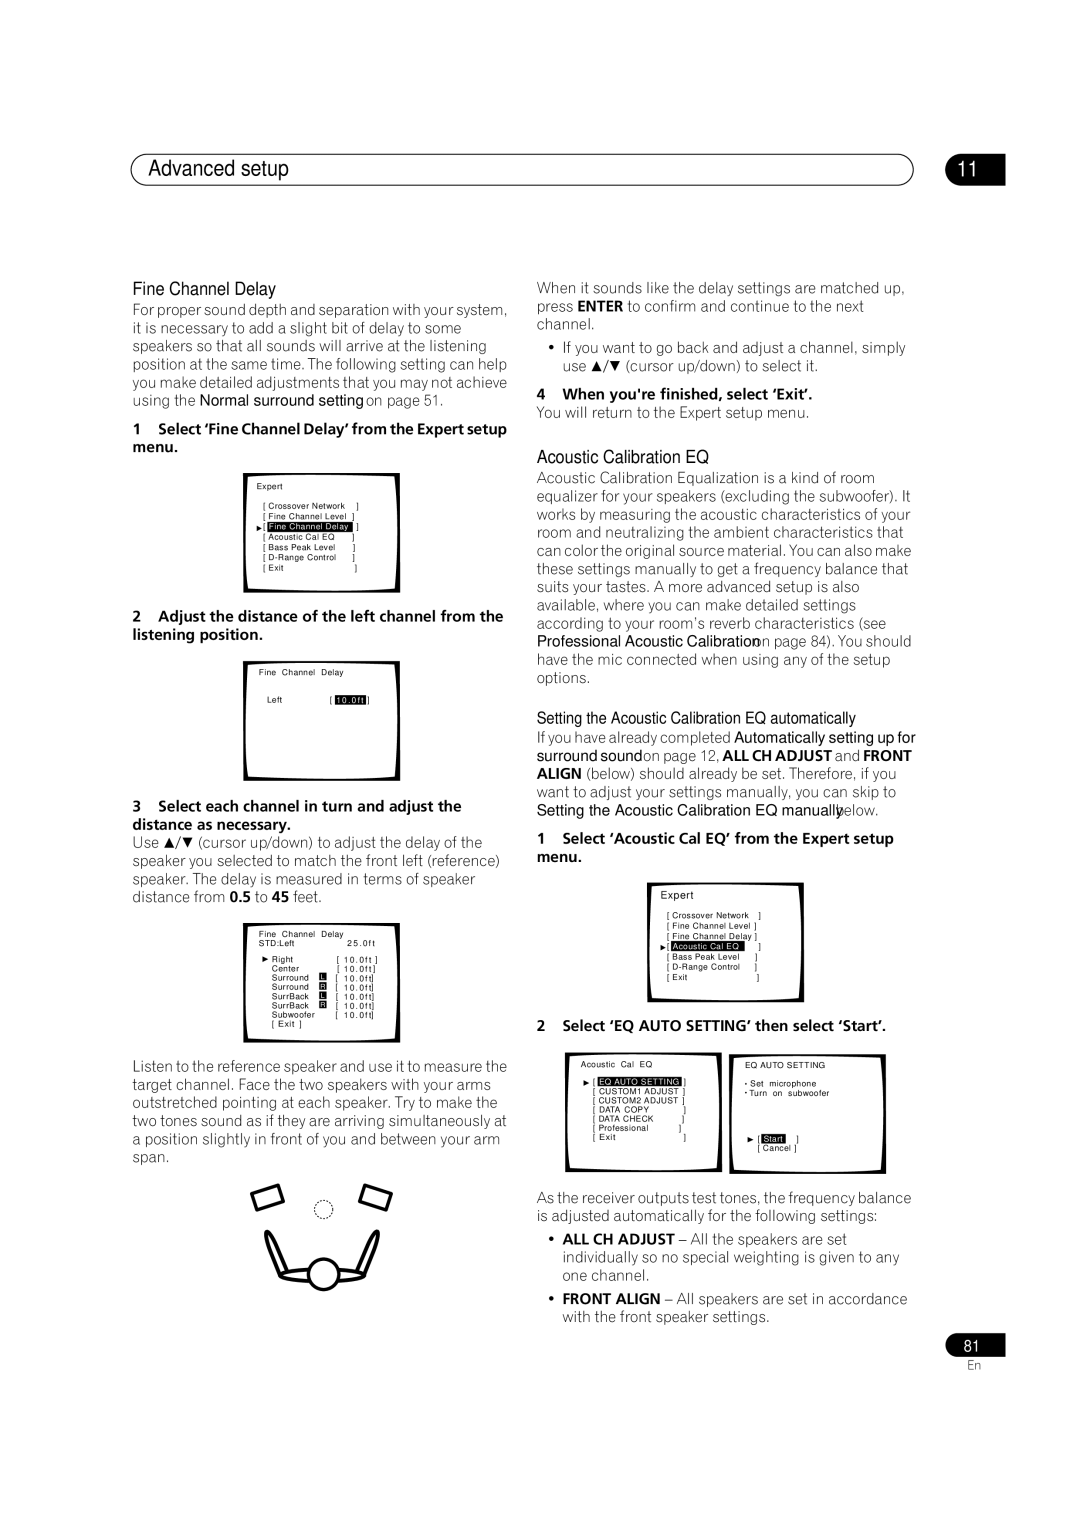
2 Select a setup option.
Bass Peak Level |
| Bass Peak Level |
| ||||
[ Setting Start | ] |
| [ |
|
| ] | |
| Setting Start | ||||||
[ Setting Cancel ] |
| [ | Setting Cancel | ] | |||
[ | Exit | ] |
| [ Exit | ] | ||
Present Level | [OFF] |
|
| Please Wait |
| ||
|
|
|
|
|
|
|
|
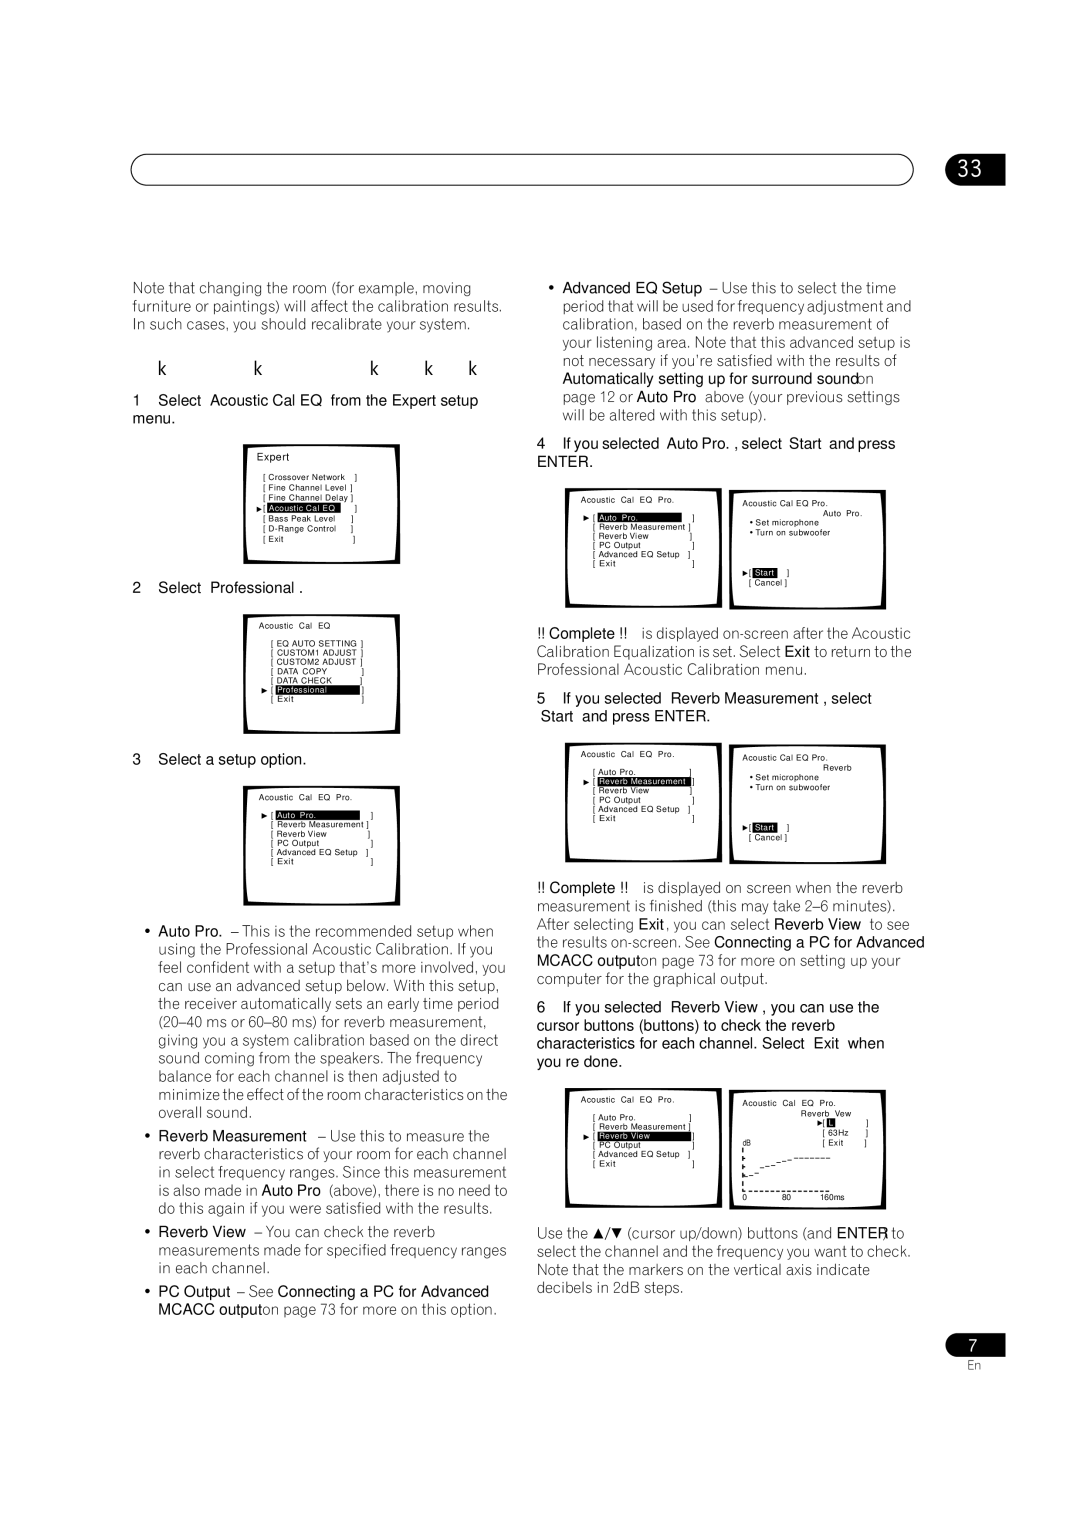
•Setting Start – The volume is set to
•Setting Cancel – Switches limiting off.
3 If you selected ‘Setting Start’, use the
(cursor up/down) buttons to adjust the test tone and specify the bass peak level then press ENTER.
Bass Peak Level | Bass Peak Level |
| |||||||
[ |
|
| ] |
|
| [ Setting Start | ] | ||
Setting | OK | ||||||||
| Bass | Peak | Level | [ Setting Cancel ] | |||||
|
|
| [ | ] | [ | Exit |
| ] | |
B r i n g u p t h e B a s s |
|
|
|
| |||||
P e a k L e v e l To | Present Level | ||||||||
ac o m f o r t a b l e Vo l u m e ( – 8 0 = n o s o u n d )
Set the bass peak level gradually, then press ENTER at the point just before the tone starts to distort. When you’re finished, the display on the receiver will show RESUME and the volume will return to its original position.
•Press RETURN at any time to exit without setting the bass peak level.
•If your subwoofer has an Auto Sleep feature, make sure the subwoofer is active (not in standby).
En
