12![]()
![]()
![]()
![]()
![]()
![]()
![]()
![]()
CONNECTIONS (
( W
W
 hen
hen
 Using
Using JL
JL IP
IP Video
Video Capture
 Software)
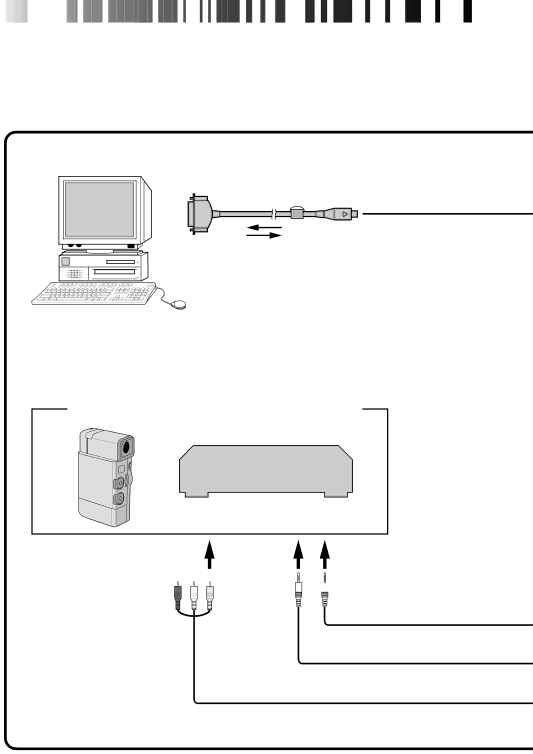
■To assure safety, make sure all units are turned off before making any connections.
■The video images will be displayed on the LCD screen of the attached
■When connecting the provided cables, be sure to connect the terminals equipped with Core filters to the Video Capture Docking Station.
■When using the Video Capture Docking Station, use the
| To Digital |
| Core filter connector |
| PC connection cable |
To COM | (provided) |
|
Personal computer
Image sources with JLIP and video output connectors |
VCR (Recording deck) |
(red) (white) (yellow)
![]()
![]() To JLIP jack
To JLIP jack
To VIDEO output jack