

BATTERY
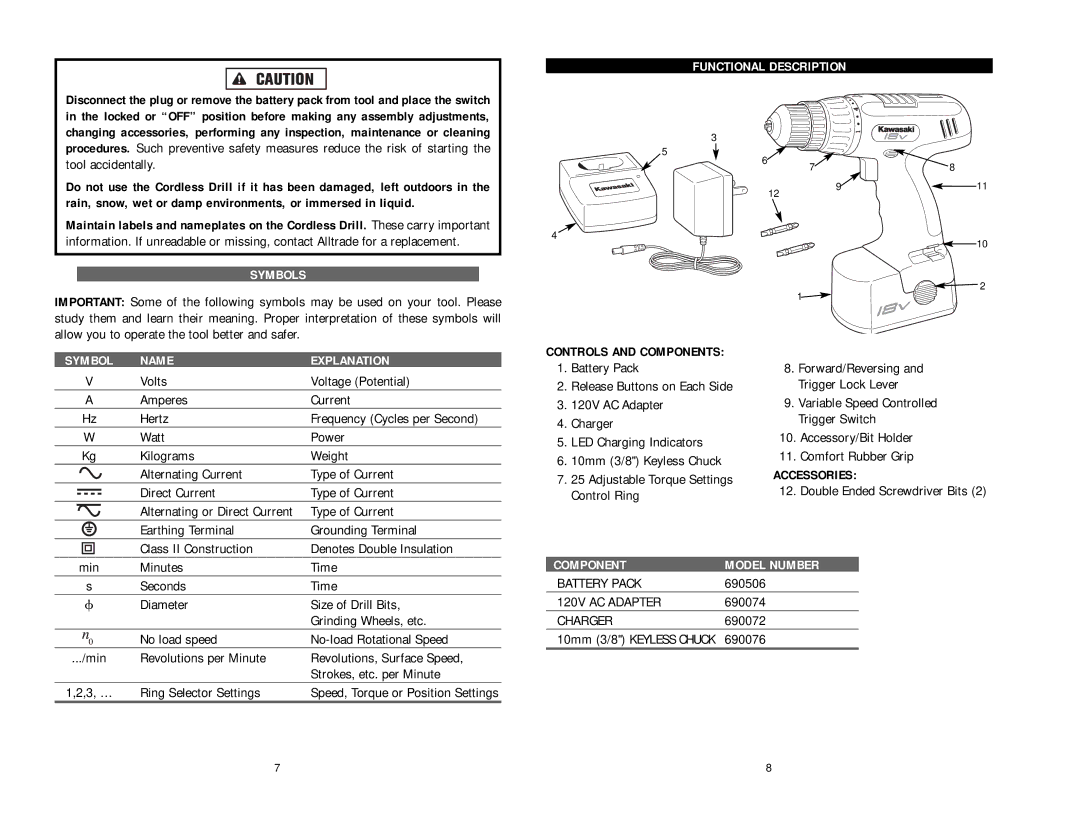
Before using battery pack, please read carefully all instruc- tions and cautionary markings on battery pack, battery charger and product using battery.
® | Do not incinerate the battery pack even if it is severely dam- |
| |
| aged or is completely worn out. The battery pack can explode. |
Do not carry battery packs in aprons, pockets, or tool boxes, product kit boxes, drawers, etc. with loose metal objects. Battery pack terminals could be short circuited causing damage to the battery pack, severe burns or fire.
The battery pack is
The battery is not fully charged. Before first use, the battery pack requires
Always switch to a fresh battery when tool performance begins to diminish. Severe heat is most destructive to a battery; the more heat generated, the faster the battery loses power. A battery that gets too hot can have a shortened life.
Never
Charge battery pack at ambient temperatures between 50° F – 104° F.
Store tool and battery pack in locations where temperatures will not exceed 120°F. This is important to prevent serious damage to the battery cells.
The battery pack should always be recharged when the Cordless Drill begins to run slowly.
When battery pack is not in use, keep it away from other metal objects such as paper clips, coins, keys, nails, screws or other small metal objects that can make a connection from one terminal to another. Shorting the battery terminals together may cause sparks, burns, or fire.
9
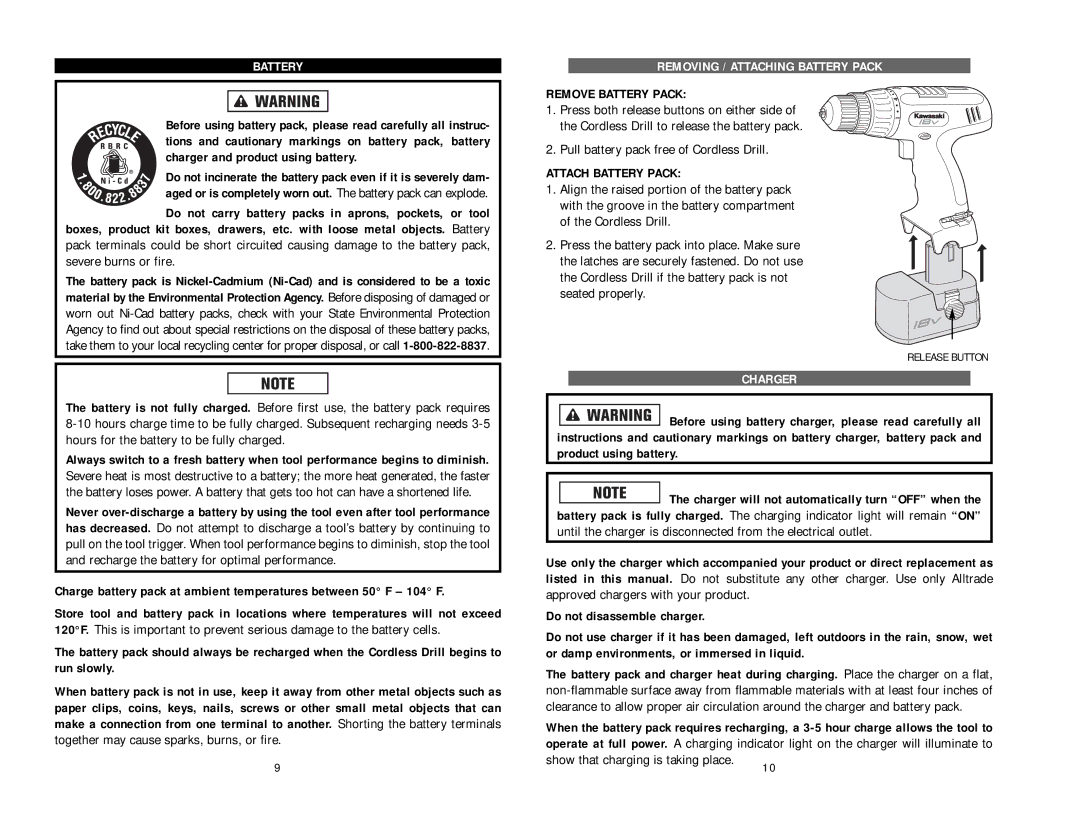
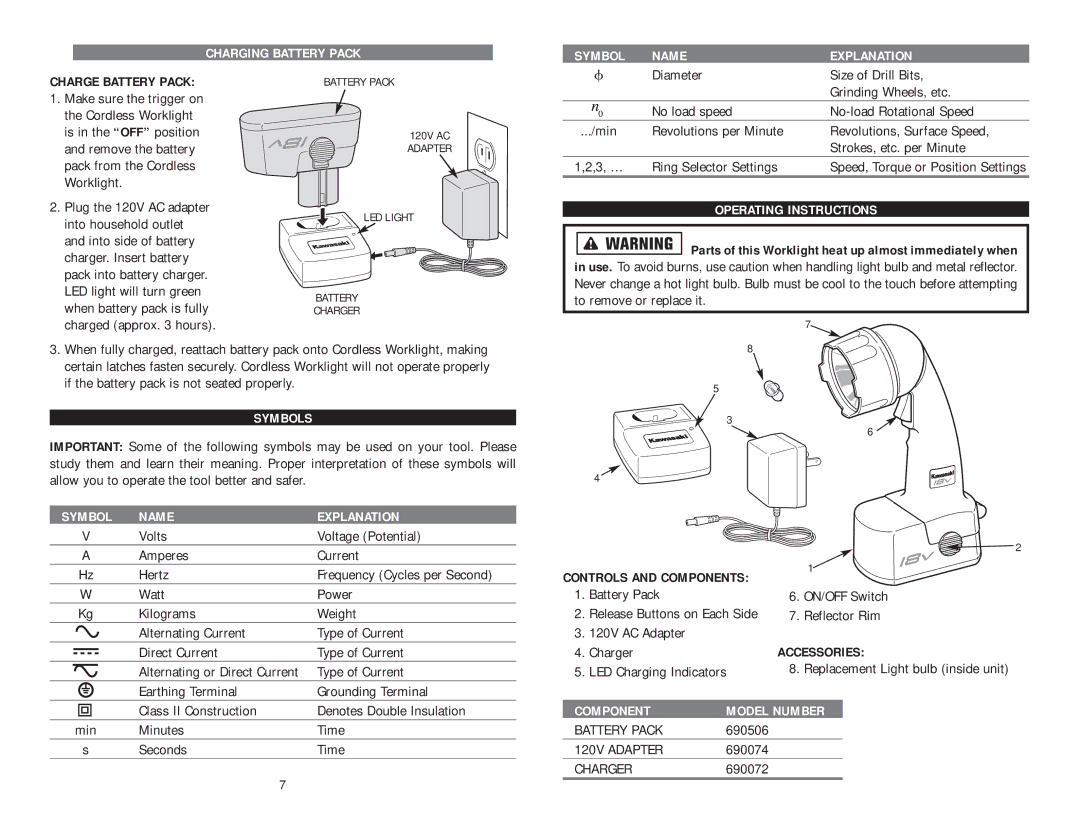
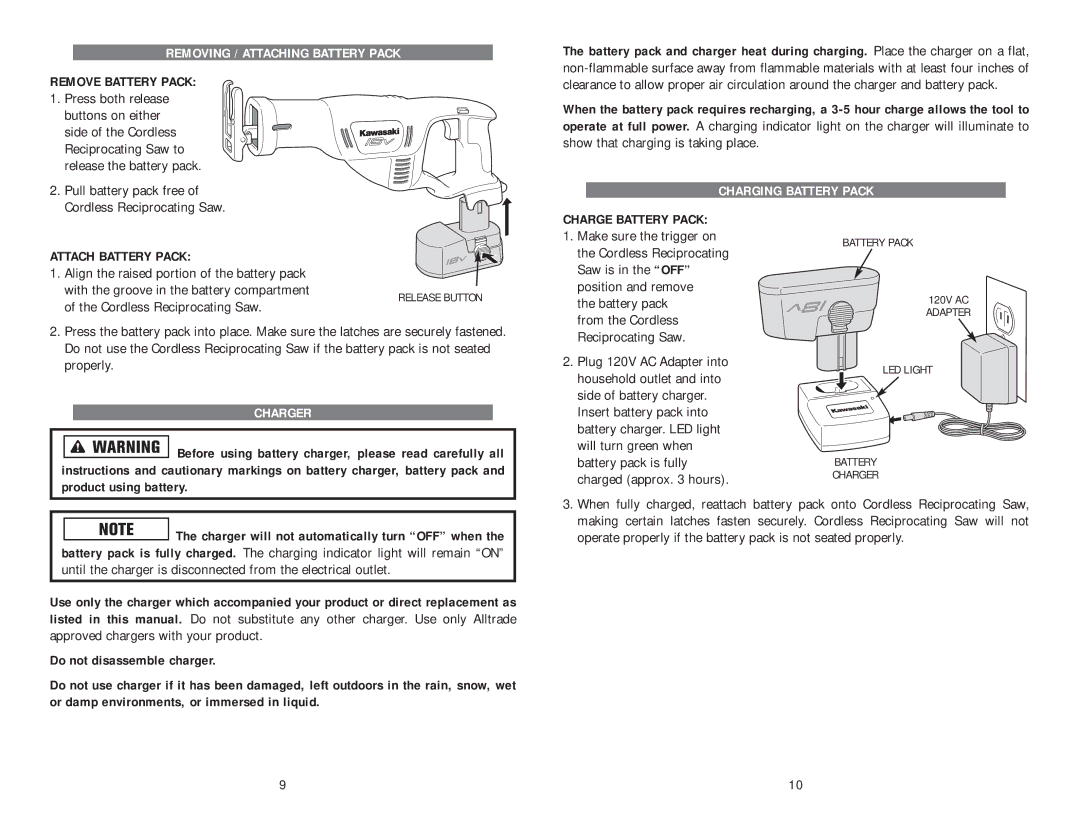
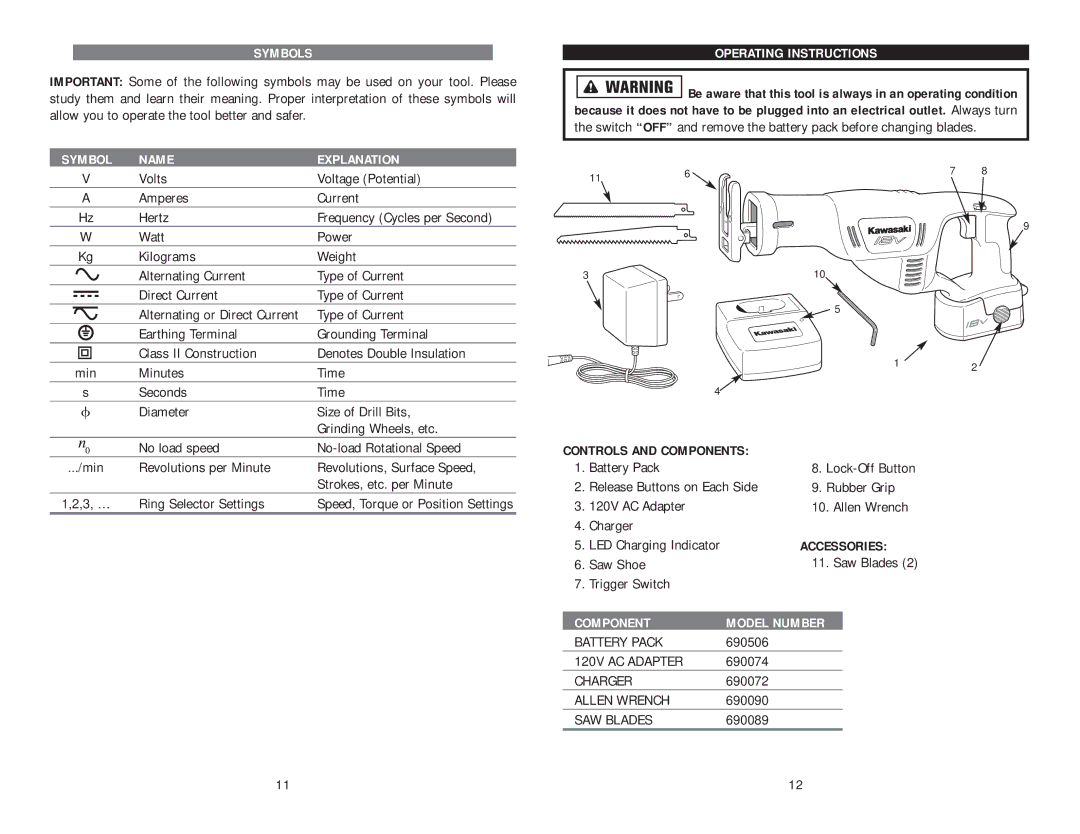
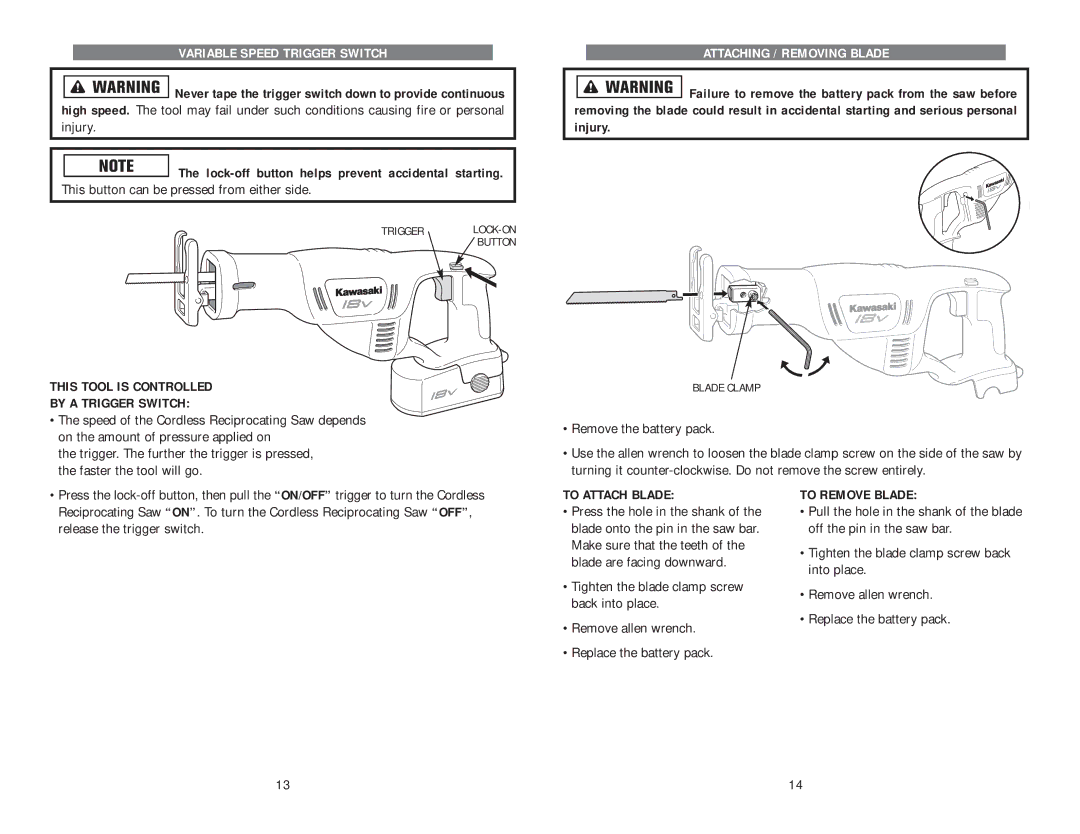
REMOVING / ATTACHING BATTERY PACK
REMOVE BATTERY PACK:
1. Press both release buttons on either side of the Cordless Drill to release the battery pack.
2. Pull battery pack free of Cordless Drill.
ATTACH BATTERY PACK:
1. Align the raised portion of the battery pack with the groove in the battery compartment of the Cordless Drill.
2. Press the battery pack into place. Make sure the latches are securely fastened. Do not use the Cordless Drill if the battery pack is not seated properly.
RELEASE BUTTON
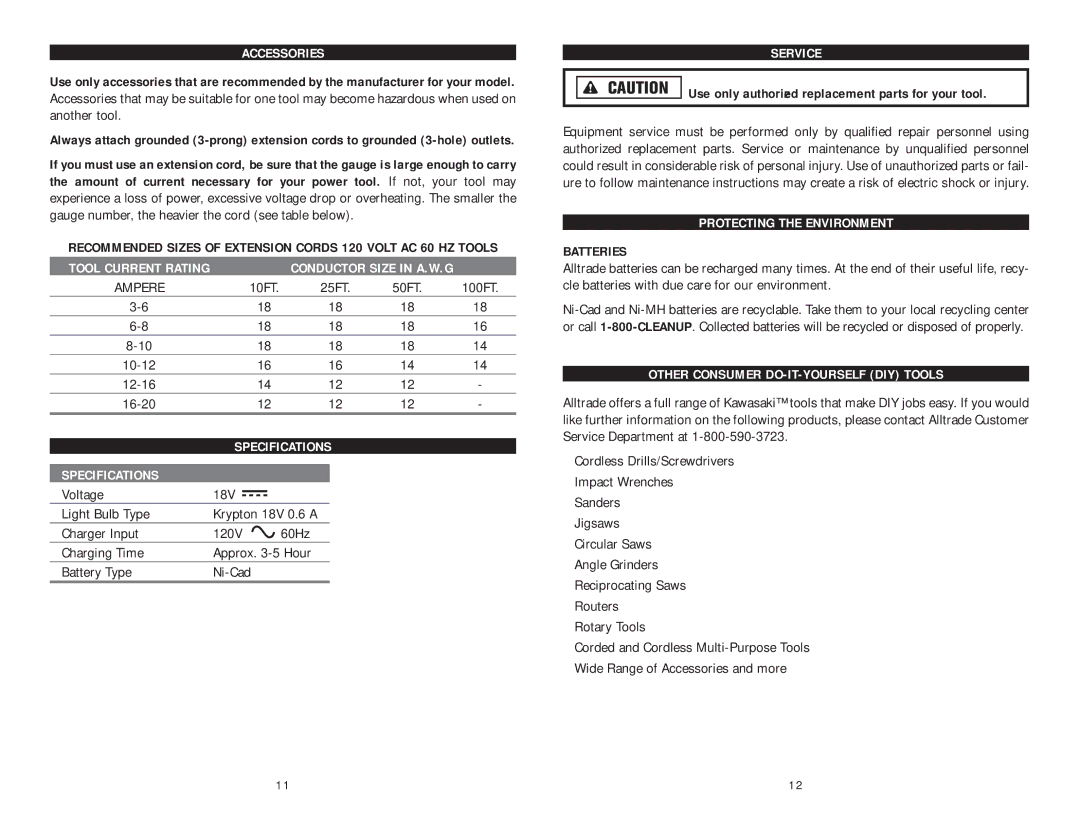
CHARGER
![]() Before using battery charger, please read carefully all instructions and cautionary markings on battery charger, battery pack and product using battery.
Before using battery charger, please read carefully all instructions and cautionary markings on battery charger, battery pack and product using battery.
![]() The charger will not automatically turn “OFF” when the battery pack is fully charged. The charging indicator light will remain “ON” until the charger is disconnected from the electrical outlet.
The charger will not automatically turn “OFF” when the battery pack is fully charged. The charging indicator light will remain “ON” until the charger is disconnected from the electrical outlet.
Use only the charger which accompanied your product or direct replacement as listed in this manual. Do not substitute any other charger. Use only Alltrade approved chargers with your product.
Do not disassemble charger.
Do not use charger if it has been damaged, left outdoors in the rain, snow, wet or damp environments, or immersed in liquid.
The battery pack and charger heat during charging. Place the charger on a flat,
When the battery pack requires recharging, a
show that charging is taking place. | 10 |
|