Routine Cleaning and Maintenance
ASH PAN AND DOOR GASKETS (weekly)
After excessive use the gasket may come loose. To repair this, glue the gasket on, using
ASH PAN (weekly)
Monitor the ash level every week. Remember that different pellet fuels will have different ash contents. Ash content is a good indication of fuel efficiency and quality. Refer to “Warnings and Recommendations” for disposal of ashes. DO NOT PLACE UNBURNED OR RAW PELLET FUEL IN ASH PAN.
INSERT ASH REMOVAL:
The EF4 pellet stove insert does not have an ash pan and the ashes must be vacuumed out of the firebox on a daily basis. CAUTION: BECAUSE THE FLY ASH IS VERY FINE, THE USE OF A VACUUM BAG WILL BE REQUIRED TO PREVENT ASH FROM BEING BLOWN BACK INTO THE ROOM. Please pay special attention that there are no hot ashes in the firebox or there could be a possibility of a fire hazard inside the vacuum cleaner. Place all hot ashes into a
FREESTANDING ASH PAN:
This part is located under the burner, in the pedestal, and has a latching mechanism to secure it. To remove the ash pan, unlock the latch on the pedestal cover and then pull the pan out. Dump the ashes into a metal container stored away from combustibles. Monitor the ash level every week.
HEAT EXCHANGER TUBES (weekly)
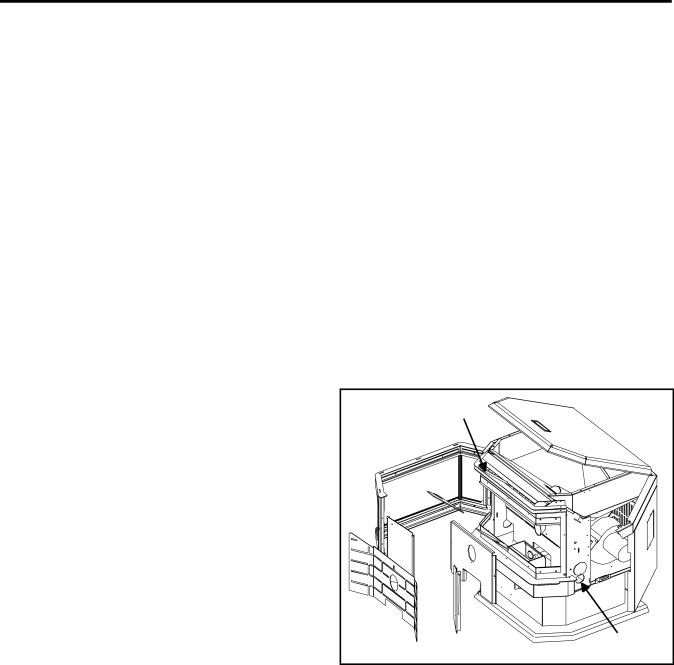
A handle is located under the hopper lid, in the center of the stove just above the door, pointed out in Figure 4. This handle is to be pulled up and down a few times (ONLY WHEN THE UNIT IS COLD) in order to clean away any fly ash that may have collected on the heat exchanger tubes. As different types of pellets produce different amounts of ash, cleaning of the tubes should be done on a regular basis to enable the unit to run efficiently.
FRESH AIR INTAKE (season)
Inspect periodically to be sure that it is not clogged with any foreign materials.
���� ��������� ����� |
������� ������ |
������� |
�������� ����� |
Figure 4: EF4 opened.
Removal of the firebox backing for bi-annual cleaning:
•Open the door by using the handle provided.
•Remove the burn pot and burn pot liner.
•Lubricate all screws with penetrating oil.
•Undo the four (4) screws and remove the firebrick liner.
•Remove the two (2) top baffles (take note of their position).
•Just above the ash sill there are two (2) screws that hold the firebox liners in place, remove these two (2) screws.
•With the tip of a flat screwdriver, gently lift up the side panels and remove the side panels.
•Pull the center panel out.
•Vacuum and clean thoroughly.
9