remote control
The CR102 universal remote controller
The CR102 is a sophisticated ‘universal’ backlit remote control that can control up to eight devices. It is pre- programmed for use with the AVR360 and many other Arcam products (FM/DAB tuners, CD players and DVD players).
With its extensive
The CR102 is a ‘learning’ remote, so you can teach it almost any function from an old
Using the remote control
Please keep in mind the following when using the remote control:
<Ensure there are no obstacles between the remote control and the remote sensor on the AVR360. The remote has a range of about 7 metres. (If the remote sensor is obscured, the Z1 IR remote control input jack on the rear panel is available. Please consult your dealer for further information.)
<remote operation may become unreliable if strong sunlight or fluorescent light is shining on the remote sensor of the AVR360.
<replace the batteries when you notice a reduction in the operating range of the remote control.
1 |
| 2 |
| 3 |
4 |
| 5 |
| 6 |
7 |
| 8 |
| 9 |
PHONO |
|
|
| RPT |
TAPE |
| 0 | TV | RND |
| AV | |||
|
| AUX |
| NET |
SHIFT |
| MCH |
| iPOD |
DVD | SAT |
| AV | TUN |
|
|
| ||
AMP | PVR |
| VCR | CD |
|
|
| ||
|
| OK |
|
|
MODE |
|
|
| MENU |
|
|
| DISP |
|
|
|
|
| CH |
DIRECT | EQ |
| EFFECT | BASS |
TRIM | SYNC |
| SUB | TREBLE |
|
|
|
| SRCH |
FAV+ | FAVÐ |
| HOME | INFO |
SETUP | TITLE | AUDIO | SUBT | |
| CR102 |
| ||
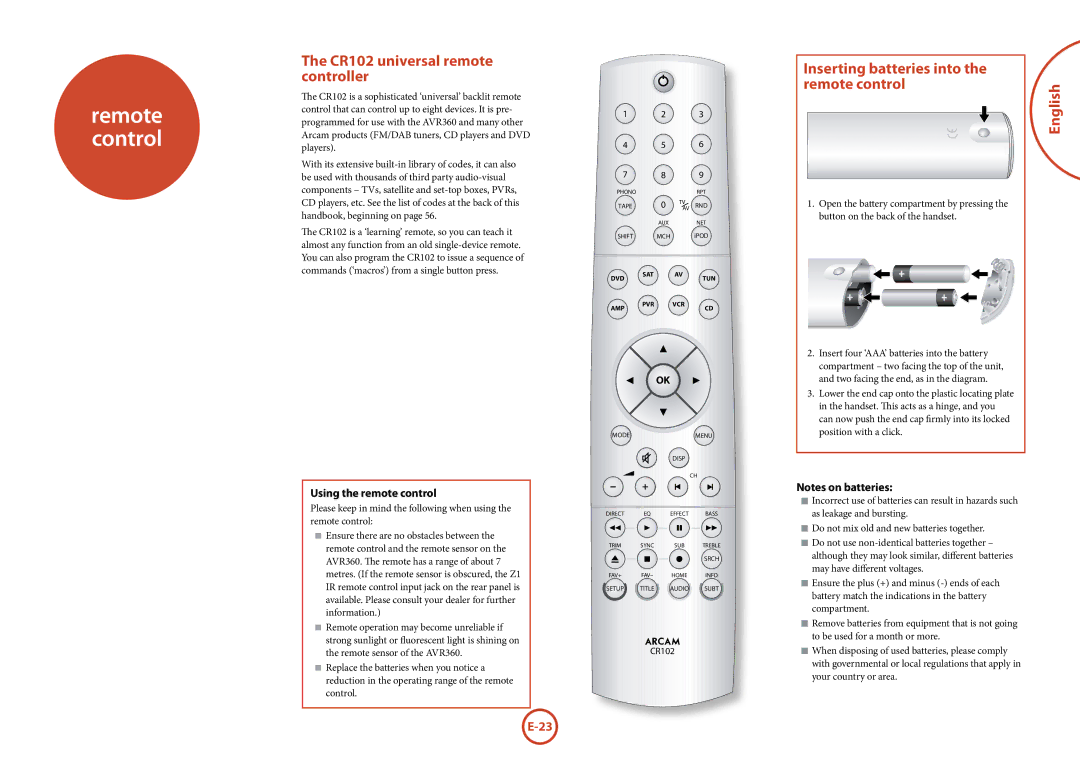
Inserting batteries into the remote control
1.Open the battery compartment by pressing the button on the back of the handset.
2.Insert four ‘AAA’ batteries into the battery compartment – two facing the top of the unit, and two facing the end, as in the diagram.
3.Lower the end cap onto the plastic locating plate in the handset. This acts as a hinge, and you can now push the end cap firmly into its locked position with a click.
Notes on batteries:
<Incorrect use of batteries can result in hazards such as leakage and bursting.
<Do not mix old and new batteries together.
<Do not use
<Ensure the plus (+) and minus
<Remove batteries from equipment that is not going to be used for a month or more.
<When disposing of used batteries, please comply with governmental or local regulations that apply in your country or area.