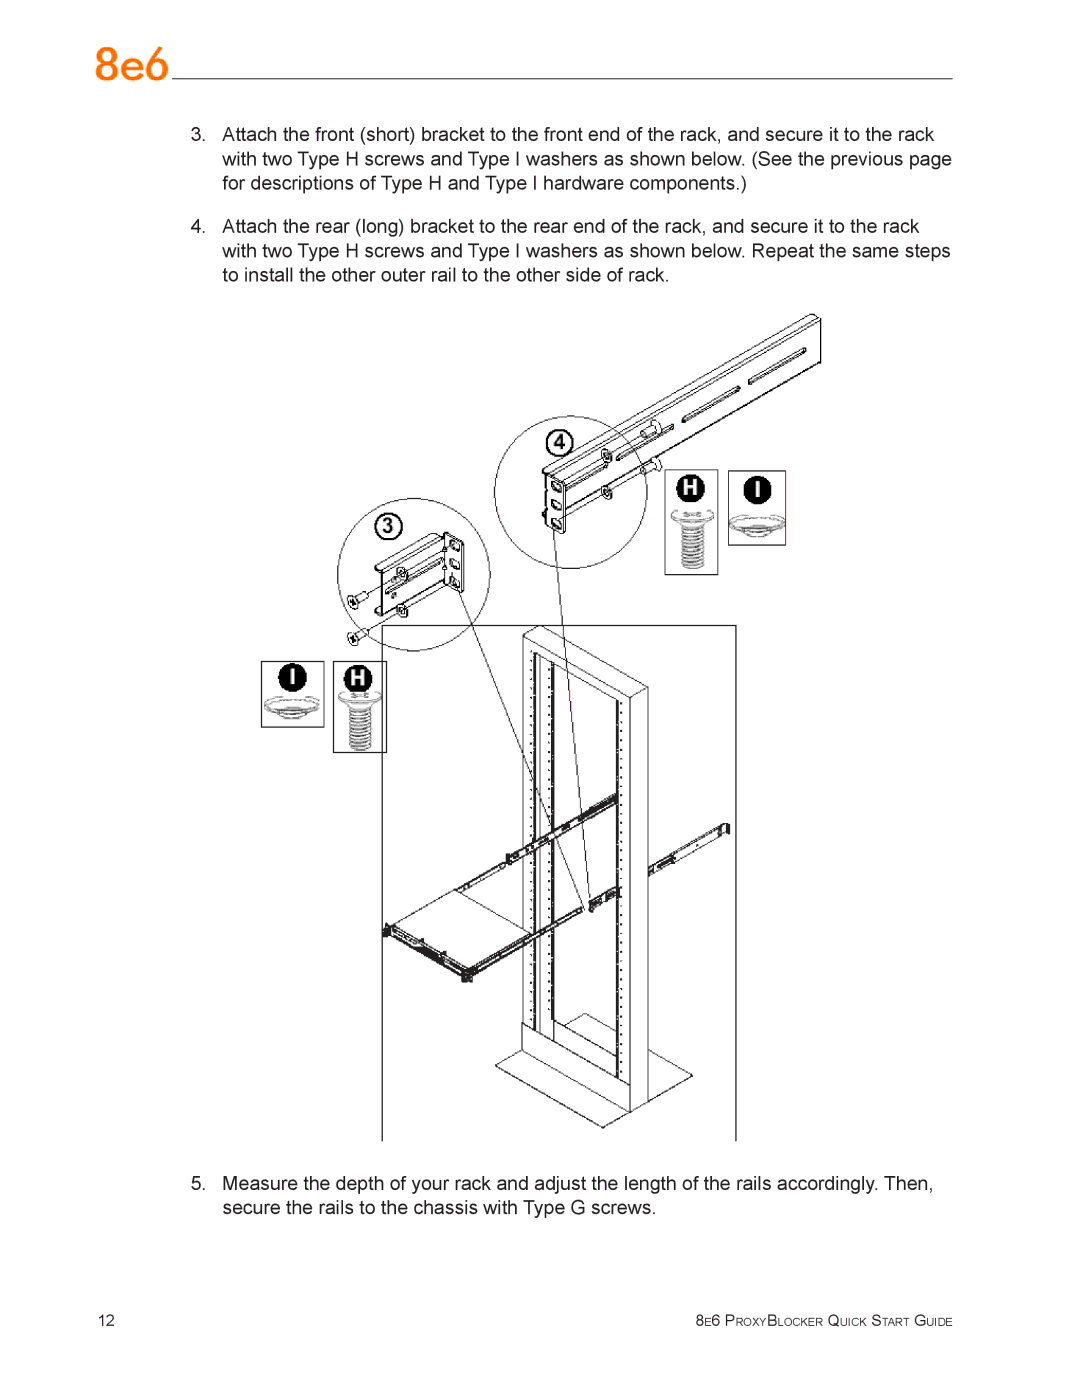
3.Attach the front (short) bracket to the front end of the rack, and secure it to the rack with two Type H screws and Type I washers as shown below. (See the previous page for descriptions of Type H and Type I hardware components.)
4.Attach the rear (long) bracket to the rear end of the rack, and secure it to the rack with two Type H screws and Type I washers as shown below. Repeat the same steps to install the other outer rail to the other side of rack.
5.Measure the depth of your rack and adjust the length of the rails accordingly. Then, secure the rails to the chassis with Type G screws.
12 | 8e6 ProxyBlocker Quick Start Guide |
