Chapter 2 | |
|
|
|
|
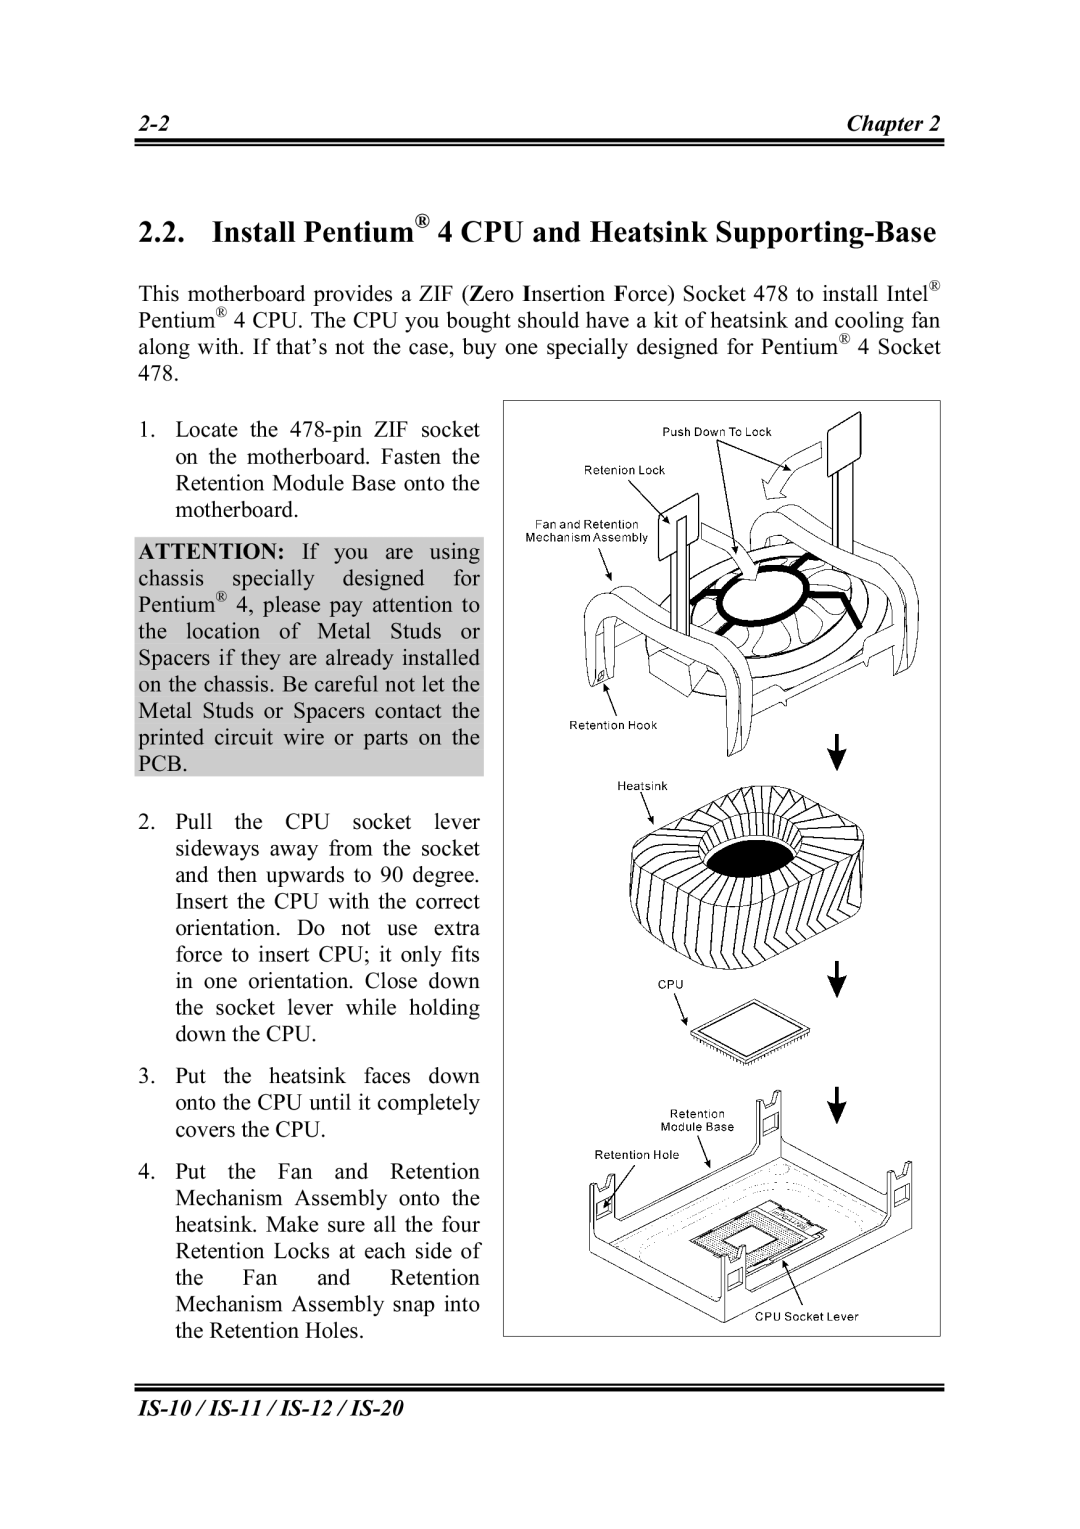
2.2. Install Pentium® 4 CPU and Heatsink Supporting-Base
This motherboard provides a ZIF (Zero Insertion Force) Socket 478 to install Intel® Pentium® 4 CPU. The CPU you bought should have a kit of heatsink and cooling fan along with. If that’s not the case, buy one specially designed for Pentium® 4 Socket 478.
1.Locate the
ATTENTION: If you are using chassis specially designed for Pentium® 4, please pay attention to the location of Metal Studs or Spacers if they are already installed on the chassis. Be careful not let the Metal Studs or Spacers contact the printed circuit wire or parts on the PCB.
2.Pull the CPU socket lever sideways away from the socket and then upwards to 90 degree. Insert the CPU with the correct orientation. Do not use extra force to insert CPU; it only fits in one orientation. Close down the socket lever while holding down the CPU.
3.Put the heatsink faces down onto the CPU until it completely covers the CPU.
4.Put the Fan and Retention Mechanism Assembly onto the heatsink. Make sure all the four Retention Locks at each side of the Fan and Retention Mechanism Assembly snap into the Retention Holes.