INSTALLATION
DO NOT TWIST OR TURN THE CABLE CONNECTORS. EACH CONNECTOR IS
KEYED AND MATES STRAIGHT ON WITH ASSOCIATED DEVICE CONNECTOR.
NOTE: | In addition to the supplied |
| and |
| at an extra cost. |
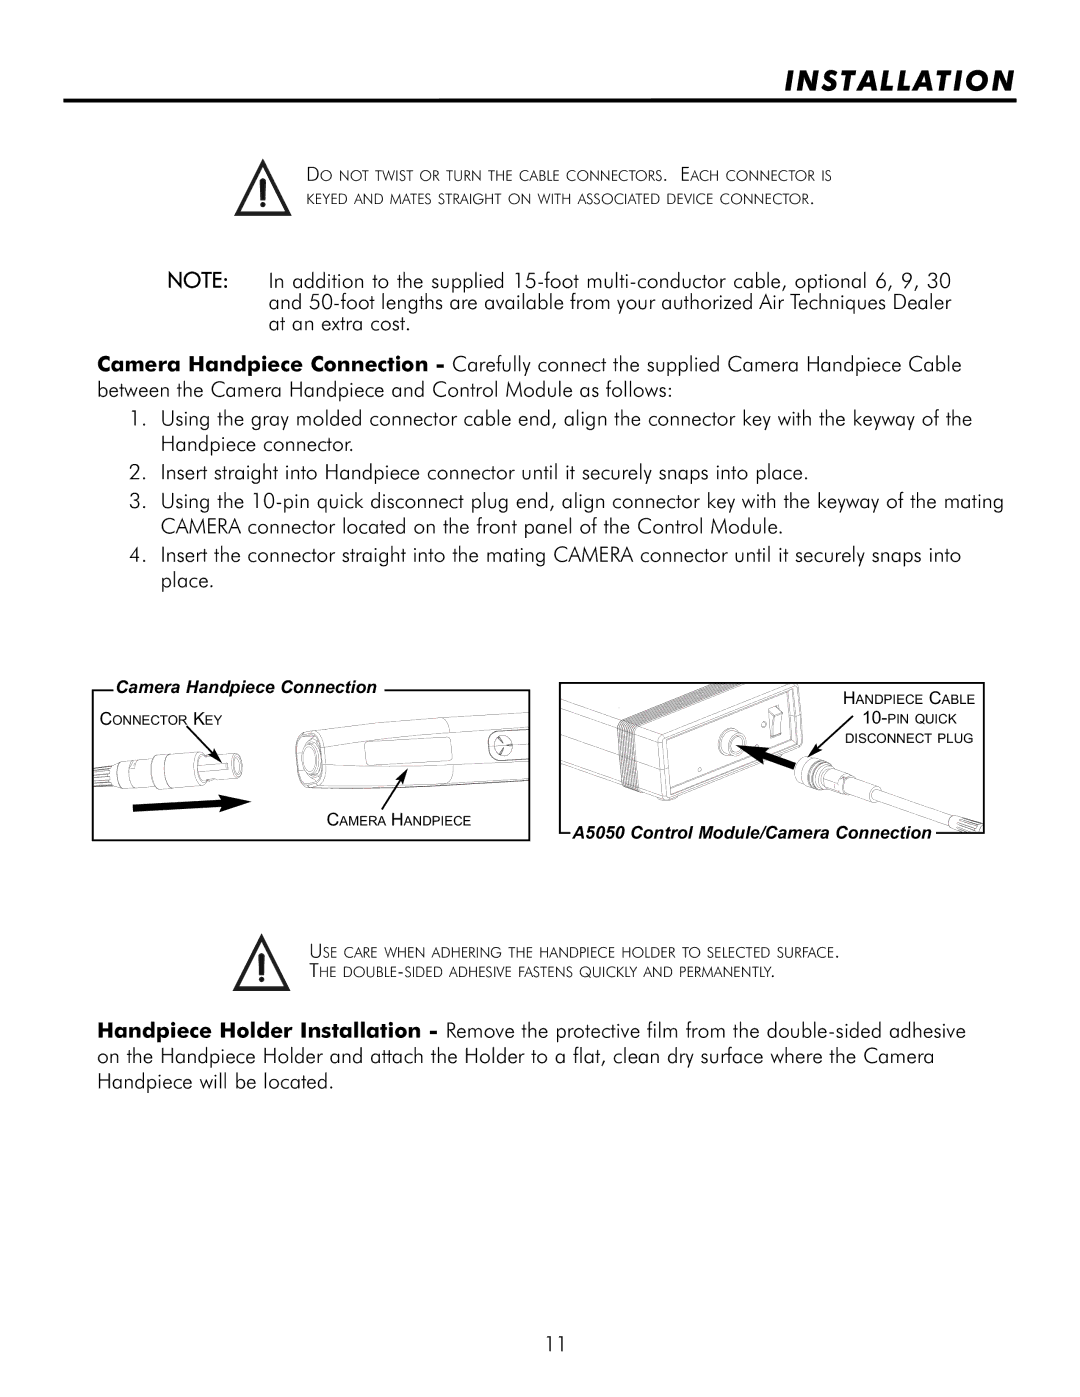
Camera Handpiece Connection - Carefully connect the supplied Camera Handpiece Cable between the Camera Handpiece and Control Module as follows:
1.Using the gray molded connector cable end, align the connector key with the keyway of the Handpiece connector.
2.Insert straight into Handpiece connector until it securely snaps into place.
3.Using the
4.Insert the connector straight into the mating CAMERA connector until it securely snaps into place.
Camera Handpiece Connection |
CONNECTOR KEY |
CAMERA HANDPIECE |
HANDPIECE CABLE |
DISCONNECT PLUG |
A5050 Control Module/Camera Connection |
USE CARE WHEN ADHERING THE HANDPIECE HOLDER TO SELECTED SURFACE.
THE
Handpiece Holder Installation - Remove the protective film from the
11