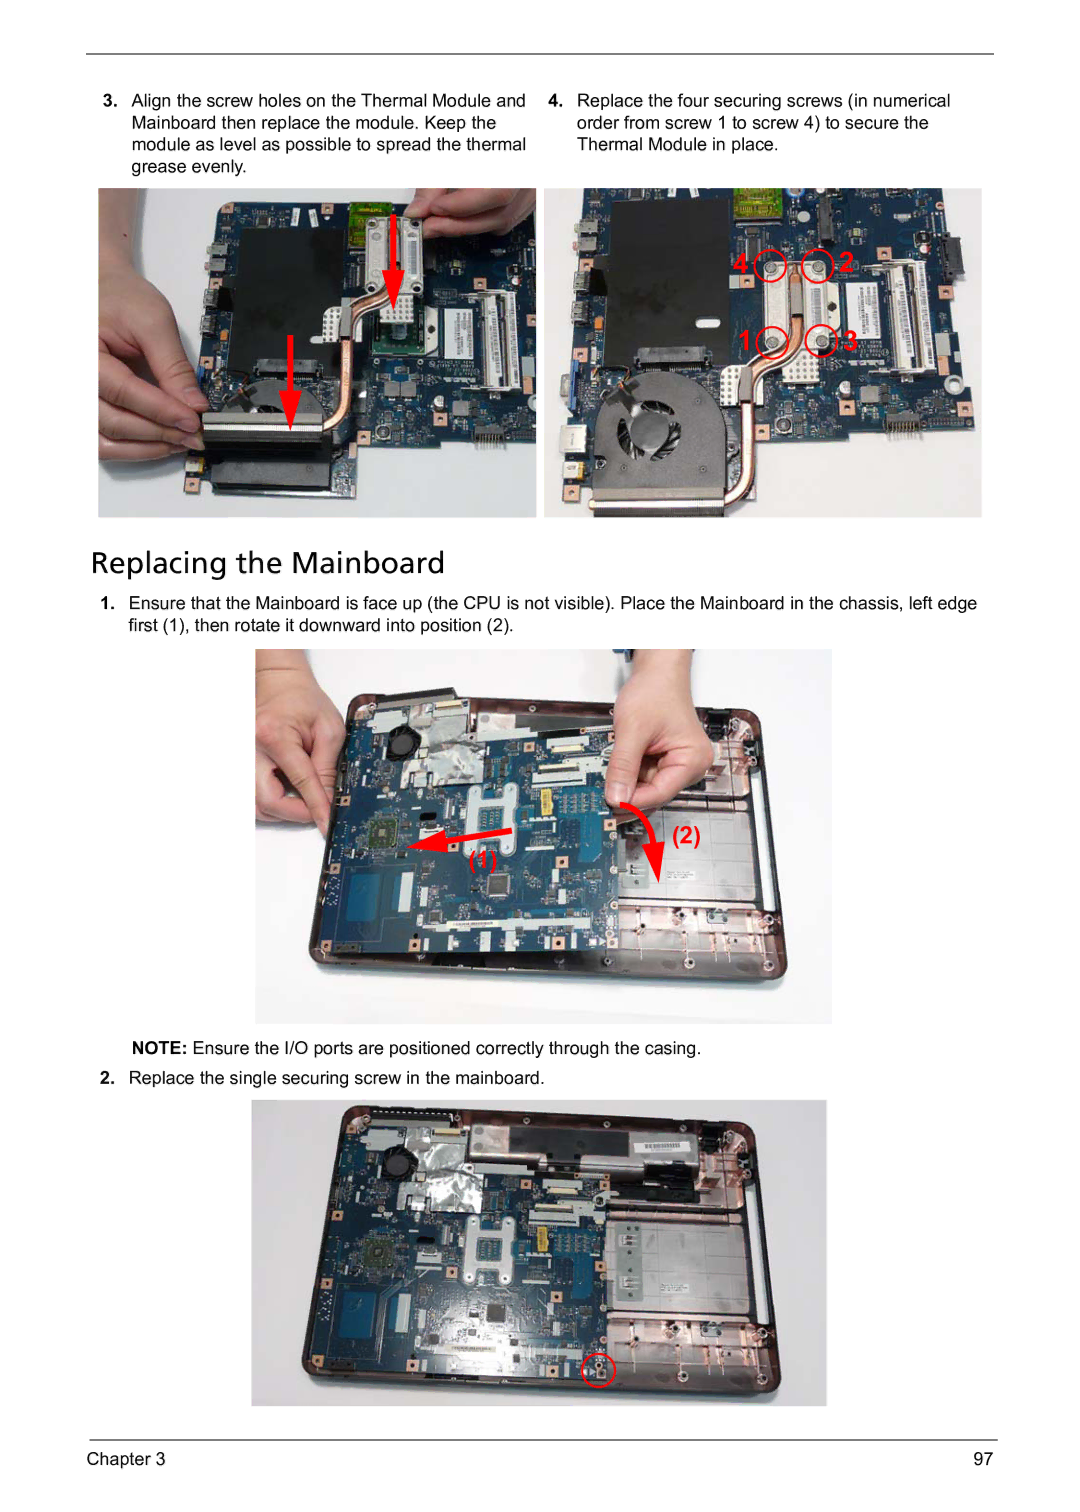
3.Align the screw holes on the Thermal Module and Mainboard then replace the module. Keep the module as level as possible to spread the thermal grease evenly.
4.Replace the four securing screws (in numerical order from screw 1 to screw 4) to secure the Thermal Module in place.
4 ![]()
![]() 2
2
1![]()
![]() 3
3
Replacing the Mainboard
1.Ensure that the Mainboard is face up (the CPU is not visible). Place the Mainboard in the chassis, left edge first (1), then rotate it downward into position (2).
(2)
(1)
NOTE: Ensure the I/O ports are positioned correctly through the casing.
2.Replace the single securing screw in the mainboard.
Chapter 3 | 97 |