Manuals
/
Advantech
/
Computer Equipment
/
Network Card
Advantech
PCL-849
manual
Switch and jumper layout
Models:
PCL-849
1
8
33
33
Download
33 pages
10.17 Kb
5
6
7
8
9
10
11
12
Specifications
Install
Default Settings
Wiring
Configuration
Connector Pin Assignments
DIP switch settings for S1
Switch and jumper layout
Enhanced Mode
Page 8
Image 8
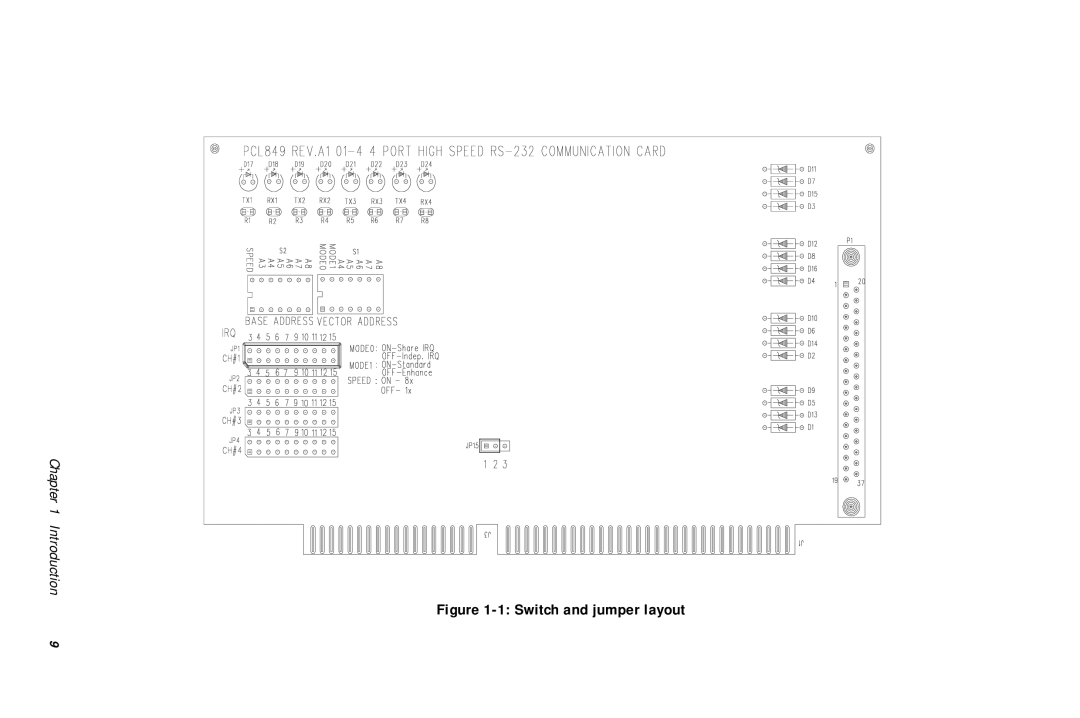
Chapter 1 Introduction
Figure
1-1:
Switch and jumper layout
9
Page 7
Page 9
Page 8
Image 8
Page 7
Page 9
Contents
PCL-849 Port RS-232 Interface Card
Copyright Notice Acknowledgments
Contents
Introduction
Description
Features
Specifications
· Uart
Switch and jumper layout
Page
Hardware Installation
Initial Inspection
Card Installation
Card Configuration
Default Settings
Address and Interrupt Setup
Model Setup base address setting
Enhanced Mode
StandardMode
Default Settings
Interrupt Level IRQ Setting S1, JP1, JP2, JP3, JP4
Interrupt Status Register Setup S1, Vector address
Independent IRQ Mode JP1-JP4
Shared IRQ Mode JP1
Interrupt Status Register S1 Bit
DIP switch settings for S1
High Speed Mode
Speed Mode selection
Normal Speed Mode
Software Installation
Operating Environment Selection
Icom Utility Setup for Windows 95/98/NT Environments
Utility Installation
Configuration
Board Type PCL-849
Vector Address 200H ~ 3F0H
Wiring
Connector Pin Assignments
RS-232 signal wiring
RTS CTS GND DSR DTR DCD
PC I/O Address Reference
PC I/O Address Usage
Quick Reference
Jumper Setting · IRQ Mode
COM1 JP1
Top
Page
Image
Contents