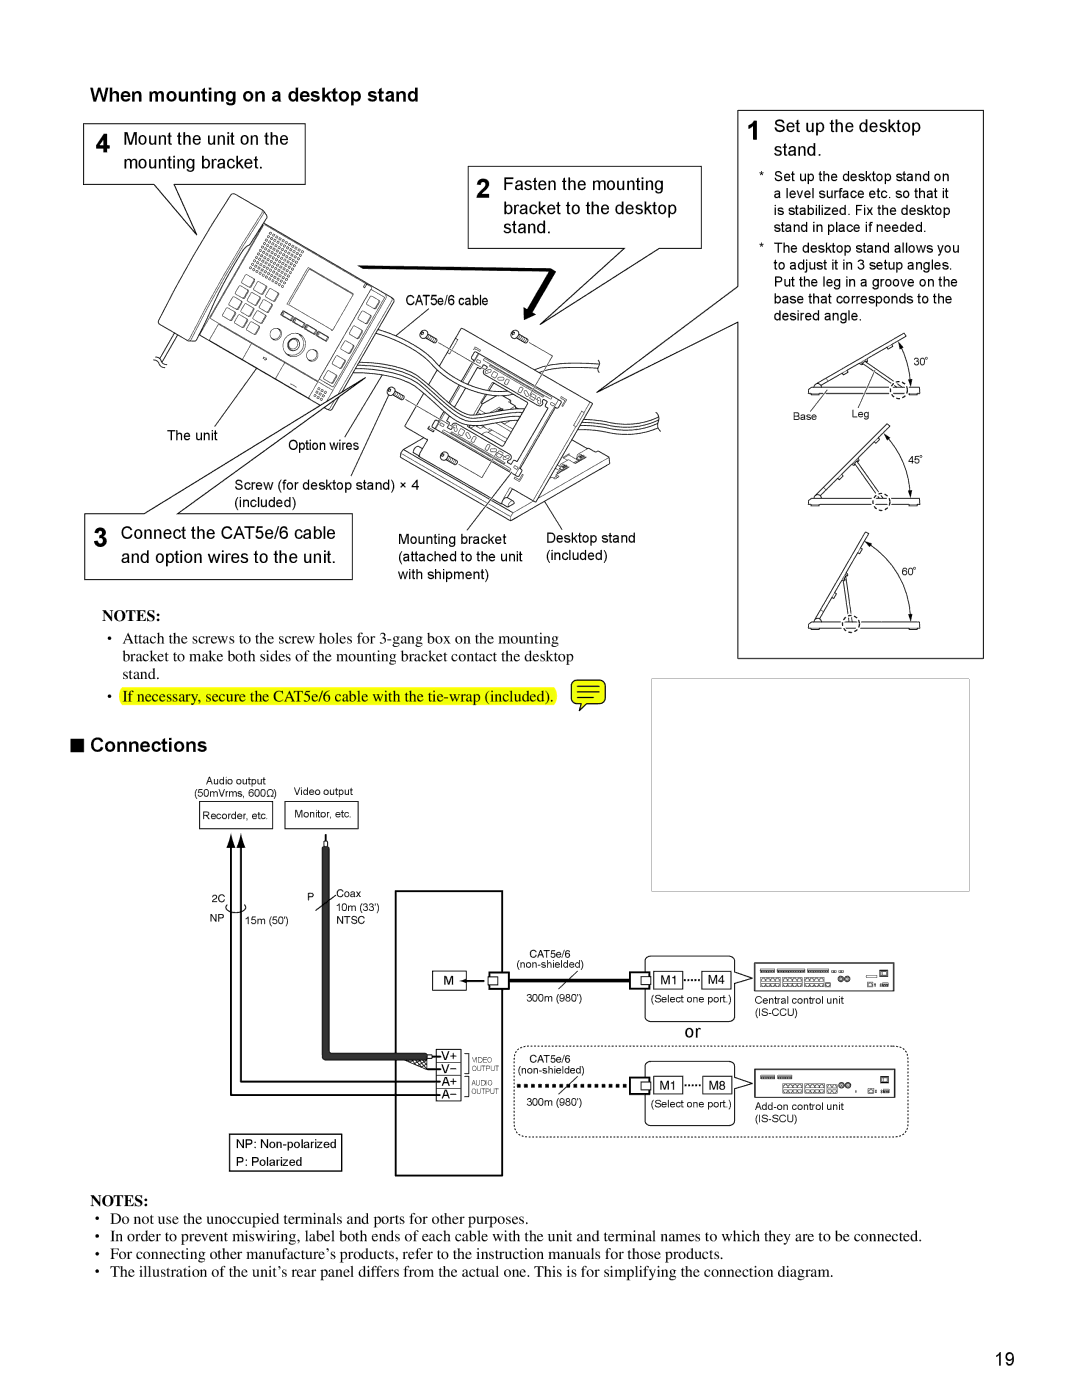
When mounting on a desktop stand
4 Mount the unit on the mounting bracket.
2 Fasten the mounting bracket to the desktop stand.
1 Set up the desktop stand.
* Set up the desktop stand on |
a level surface etc. so that it |
is stabilized. Fix the desktop |
stand in place if needed. |
* The desktop stand allows you |
to adjust it in 3 setup angles. |
Put the leg in a groove on the |
CAT5e/6 cable
The unit | Option wires |
|
Screw (for desktop stand) × 4 (included)
3 Connect the CAT5e/6 cable | Mounting bracket |
and option wires to the unit. | (attached to the unit |
| with shipment) |
Desktop stand (included)
base that corresponds to the |
desired angle. |
30
Base Leg
45
60
NOTES:
•Attach the screws to the screw holes for
•If necessary, secure the CAT5e/6 cable with the
■Connections
Audio output
(50mVrms, 600Ω) Video output
Recorder, etc. ![]()
![]() Monitor, etc.
Monitor, etc.
2C |
| P | Coax |
|
|
| 10m (33') |
|
| ||
NP | 15m (50') |
|
|
| |
| NTSC |
|
| ||
|
|
|
|
| CAT5e/6 |
|
|
|
|
| |
|
|
| M |
|
|
|
|
|
|
| 300m (980') |
|
|
| V | VIDEO | CAT5e/6 |
|
|
| V | OUTPUT | |
|
|
| A | AUDIO |
|
|
|
| A | OUTPUT | 300m (980') |
|
|
|
| ||
|
|
|
|
| |
| NP: |
|
| ||
| P: Polarized |
|
|
|
|
M1 | M4 |
|
(Select one port.) | Central control unit | |
|
| |
| or |
|
M1 | M8 |
|
(Select one port.) | ||
|
| |
NOTES:
•Do not use the unoccupied terminals and ports for other purposes.
•In order to prevent miswiring, label both ends of each cable with the unit and terminal names to which they are to be connected.
•For connecting other manufacture’s products, refer to the instruction manuals for those products.
•The illustration of the unit’s rear panel differs from the actual one. This is for simplifying the connection diagram.
19
