Step 2 Rename the SSID of the Print Server or keep it as default.
Step 3 Set the desired Wireless Channel.
Step 4 Click Save.
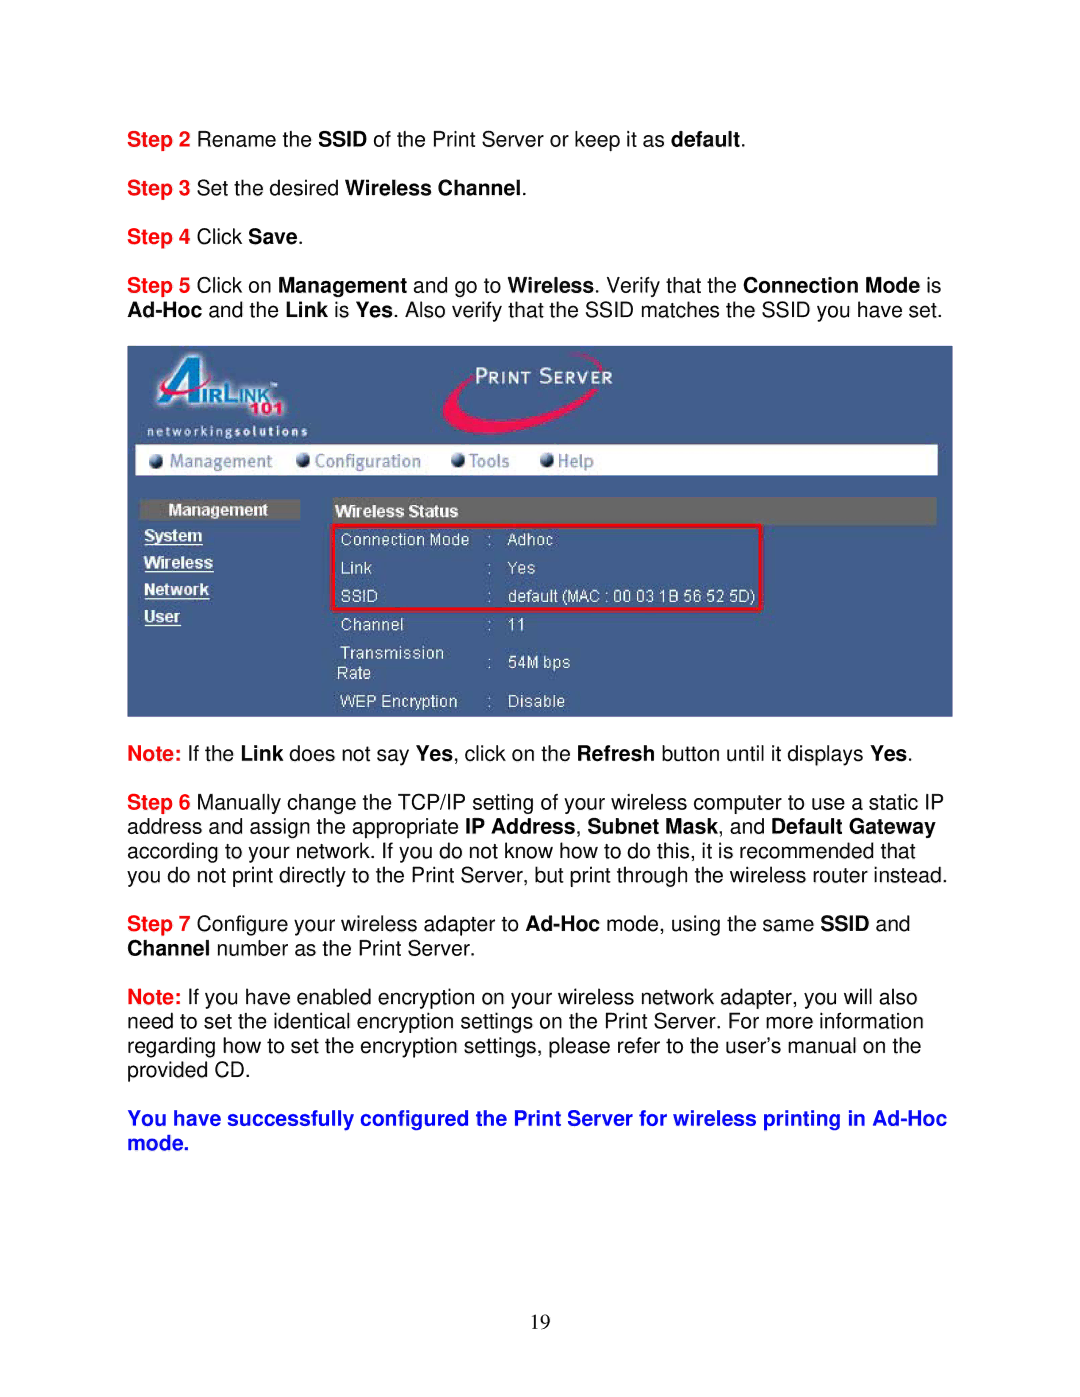
Step 5 Click on Management and go to Wireless. Verify that the Connection Mode is
Note: If the Link does not say Yes, click on the Refresh button until it displays Yes.
Step 6 Manually change the TCP/IP setting of your wireless computer to use a static IP address and assign the appropriate IP Address, Subnet Mask, and Default Gateway according to your network. If you do not know how to do this, it is recommended that you do not print directly to the Print Server, but print through the wireless router instead.
Step 7 Configure your wireless adapter to
Note: If you have enabled encryption on your wireless network adapter, you will also need to set the identical encryption settings on the Print Server. For more information regarding how to set the encryption settings, please refer to the user’s manual on the provided CD.
You have successfully configured the Print Server for wireless printing in
19