REAR VIEW | REMOTE CONTROL |
|
|
4.3 Rear View
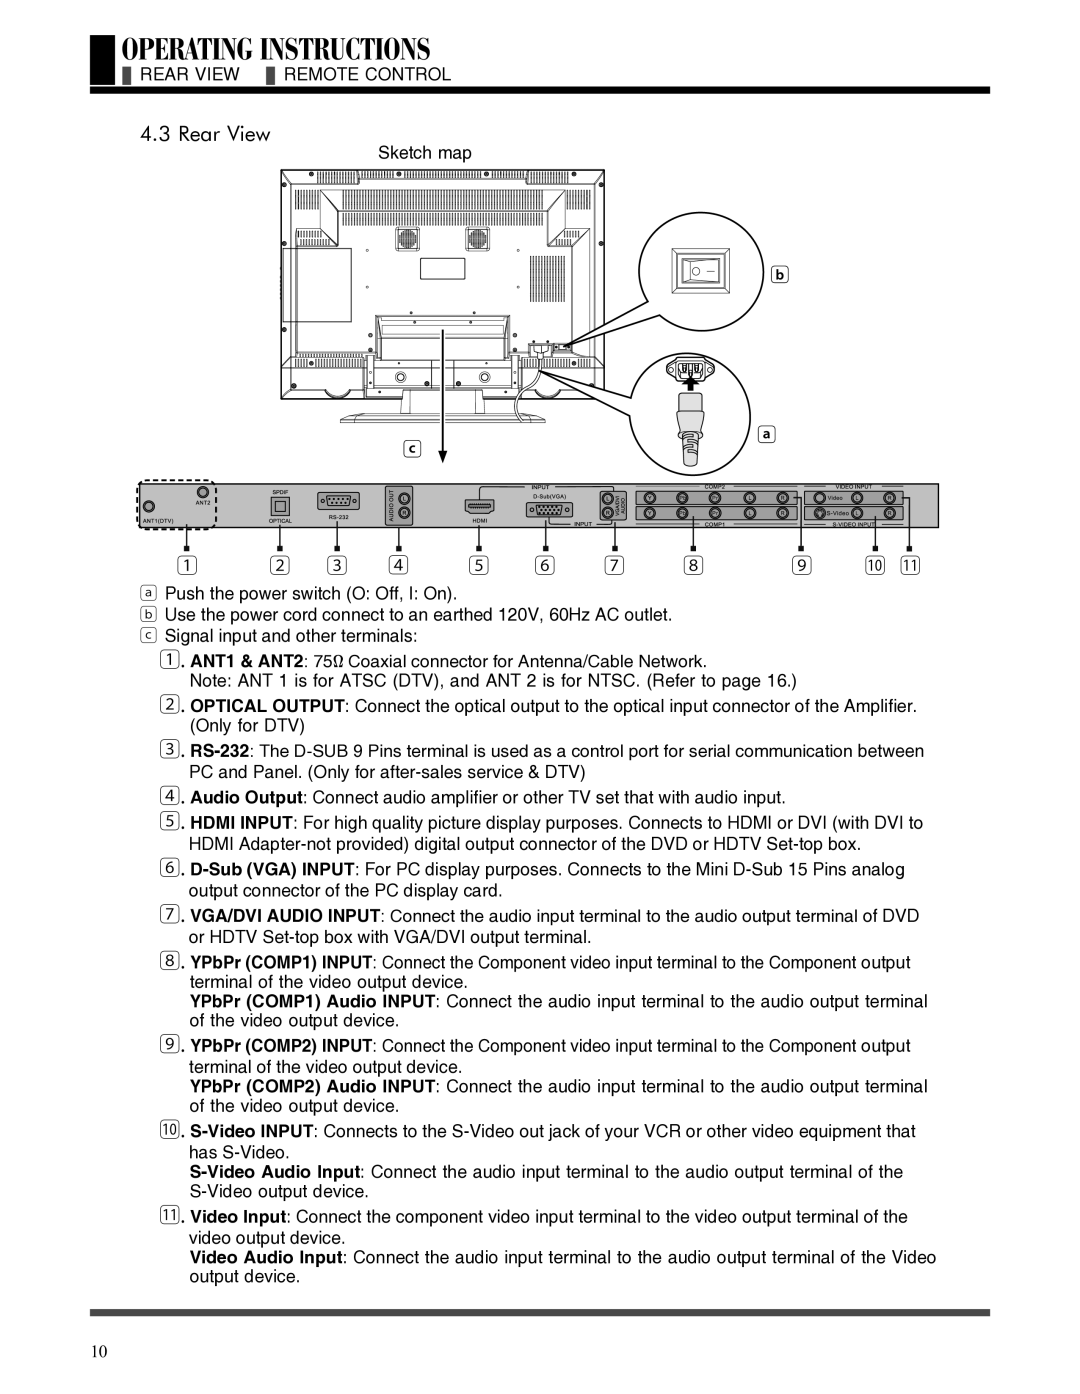
Sketch map
b
c
a
1 | 2 | 3 | 4 | 5 | 6 | 7 | 8 | 9 | 0 1 |
aPush the power switch (O: Off, I: On).
bUse the power cord connect to an earthed 120V, 60Hz AC outlet. c Signal input and other terminals:
1.ANT1 & ANT2: 75Ω Coaxial connector for Antenna/Cable Network.
Note: ANT 1 is for ATSC (DTV), and ANT 2 is for NTSC. (Refer to page 16.)
2.OPTICAL OUTPUT: Connect the optical output to the optical input connector of the Amplifier. (Only for DTV)
3.
4.Audio Output: Connect audio amplifier or other TV set that with audio input.
5.HDMI INPUT: For high quality picture display purposes. Connects to HDMI or DVI (with DVI to HDMI
6.
7.VGA/DVI AUDIO INPUT: Connect the audio input terminal to the audio output terminal of DVD or HDTV
8.YPbPr (COMP1) INPUT: Connect the Component video input terminal to the Component output terminal of the video output device.
YPbPr (COMP1) Audio INPUT: Connect the audio input terminal to the audio output terminal of the video output device.
9.YPbPr (COMP2) INPUT: Connect the Component video input terminal to the Component output terminal of the video output device.
YPbPr (COMP2) Audio INPUT: Connect the audio input terminal to the audio output terminal of the video output device.
0.
1.Video Input: Connect the component video input terminal to the video output terminal of the video output device.
Video Audio Input: Connect the audio input terminal to the audio output terminal of the Video output device.
10
