CHAPTER 4
INSTALLATION
A. Power Connection
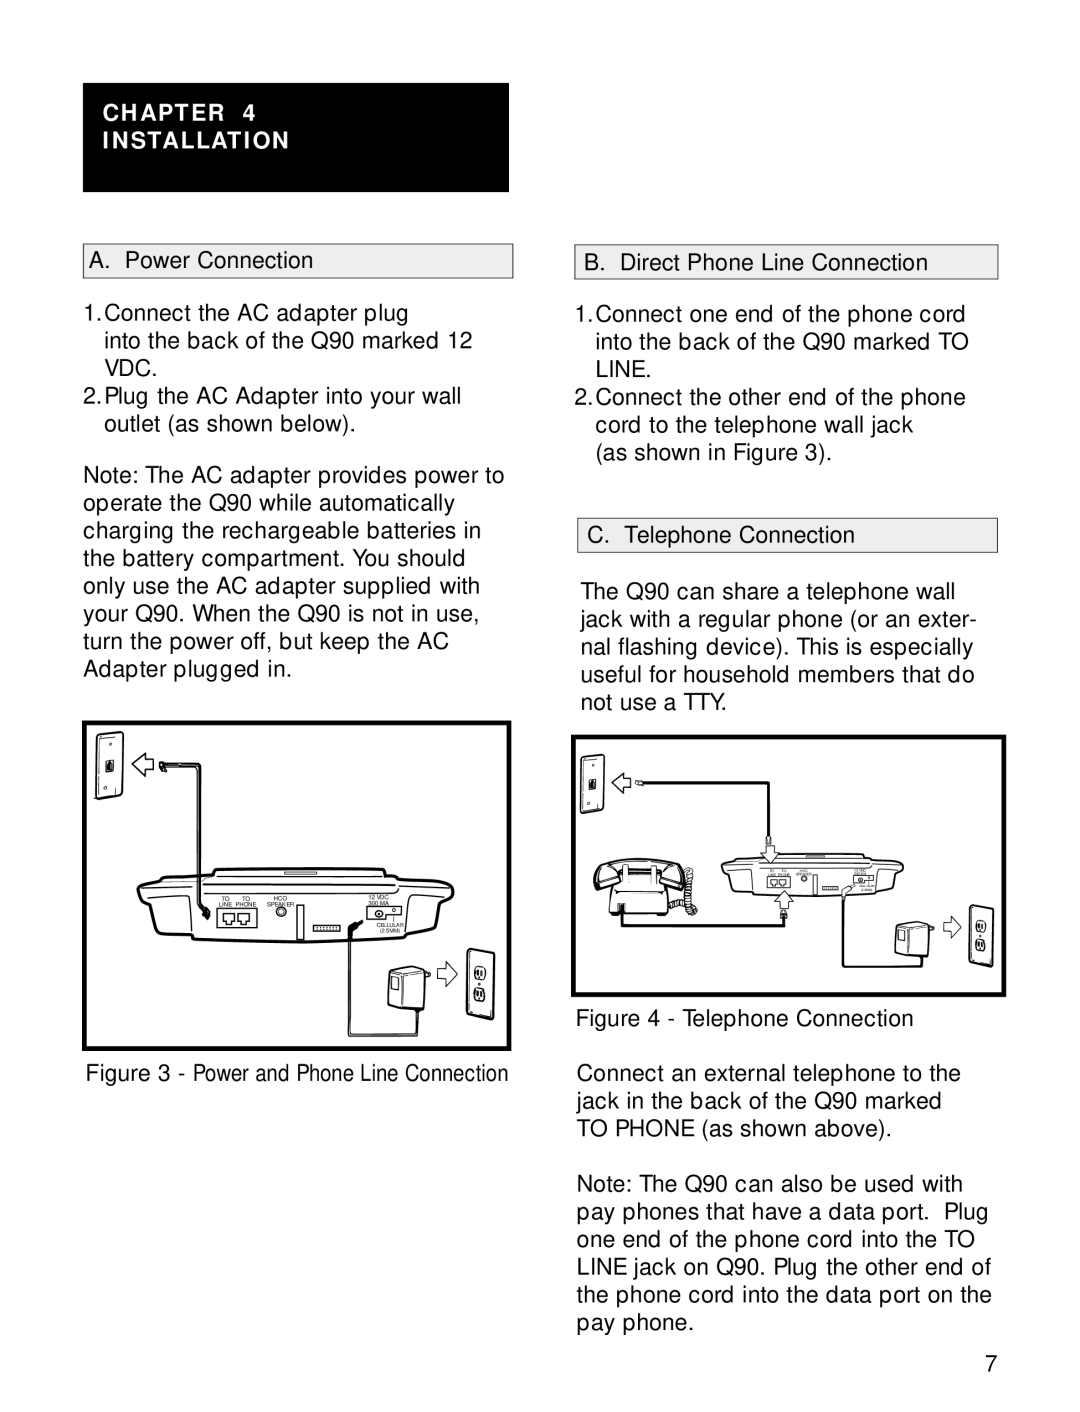
1.Connect the AC adapter plug
into the back of the Q90 marked 12 VDC.
2.Plug the AC Adapter into your wall outlet (as shown below).
Note: The AC adapter provides power to operate the Q90 while automatically charging the rechargeable batteries in the battery compartment. You should only use the AC adapter supplied with your Q90. When the Q90 is not in use, turn the power off, but keep the AC Adapter plugged in.
TO | TO | HCO | 12 VDC |
LINE PHONE | SPEAKER | 300 MA | |
|
|
| CELLULAR |
|
|
| (2.5MM) |
Figure 3 - Power and Phone Line Connection
B. Direct Phone Line Connection
1.Connect one end of the phone cord into the back of the Q90 marked TO LINE.
2.Connect the other end of the phone cord to the telephone wall jack (as shown in Figure 3).
C. Telephone Connection
The Q90 can share a telephone wall jack with a regular phone (or an exter- nal flashing device). This is especially useful for household members that do not use a TTY.
TO | TO | HCO | 12 VDC |
LINE PHONE | SPEAKER | 300 MA | |
|
|
| CELLULAR |
|
|
| (2.5MM) |
Figure 4 - Telephone Connection
Connect an external telephone to the jack in the back of the Q90 marked TO PHONE (as shown above).
Note: The Q90 can also be used with pay phones that have a data port. Plug one end of the phone cord into the TO LINE jack on Q90. Plug the other end of the phone cord into the data port on the pay phone.
7
