MIO Remote Charging Base
5.Remove the back housing.
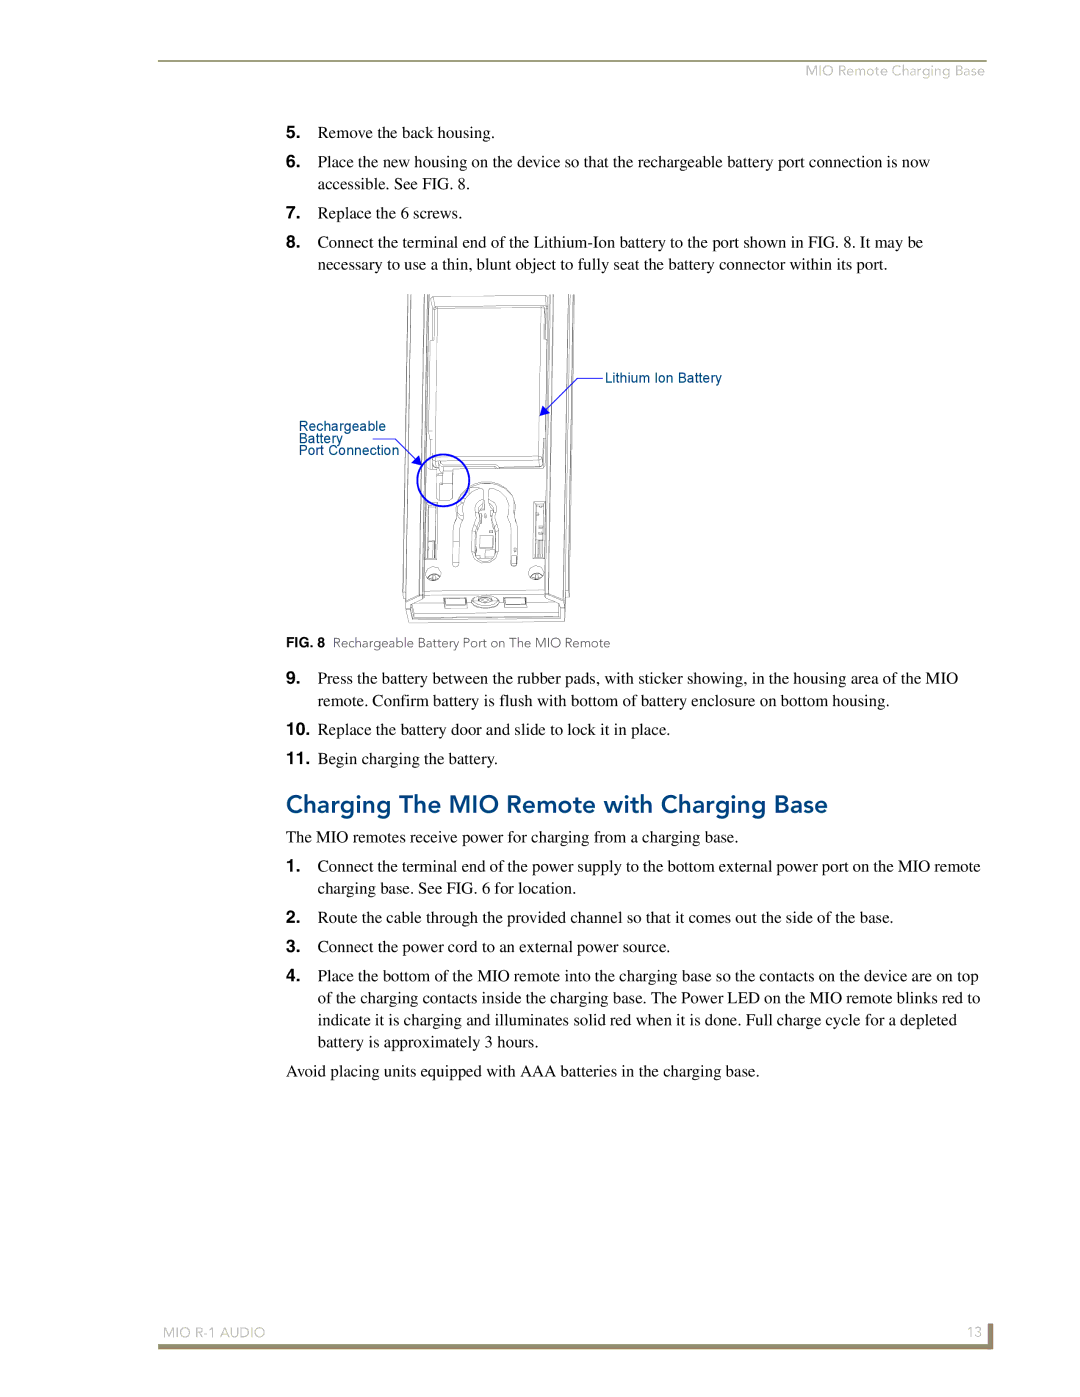
6.Place the new housing on the device so that the rechargeable battery port connection is now accessible. See FIG. 8.
7.Replace the 6 screws.
8.Connect the terminal end of the
Lithium Ion Battery
Rechargeable
Battery
Port Connection
FIG. 8 Rechargeable Battery Port on The MIO Remote
9.Press the battery between the rubber pads, with sticker showing, in the housing area of the MIO remote. Confirm battery is flush with bottom of battery enclosure on bottom housing.
10.Replace the battery door and slide to lock it in place.
11.Begin charging the battery.
Charging The MIO Remote with Charging Base
The MIO remotes receive power for charging from a charging base.
1.Connect the terminal end of the power supply to the bottom external power port on the MIO remote charging base. See FIG. 6 for location.
2.Route the cable through the provided channel so that it comes out the side of the base.
3.Connect the power cord to an external power source.
4.Place the bottom of the MIO remote into the charging base so the contacts on the device are on top of the charging contacts inside the charging base. The Power LED on the MIO remote blinks red to indicate it is charging and illuminates solid red when it is done. Full charge cycle for a depleted battery is approximately 3 hours.
Avoid placing units equipped with AAA batteries in the charging base.
MIO | 13 |
|
|