Winterizing a Heat Pump Equipped with an Internal Drain
(Continued)
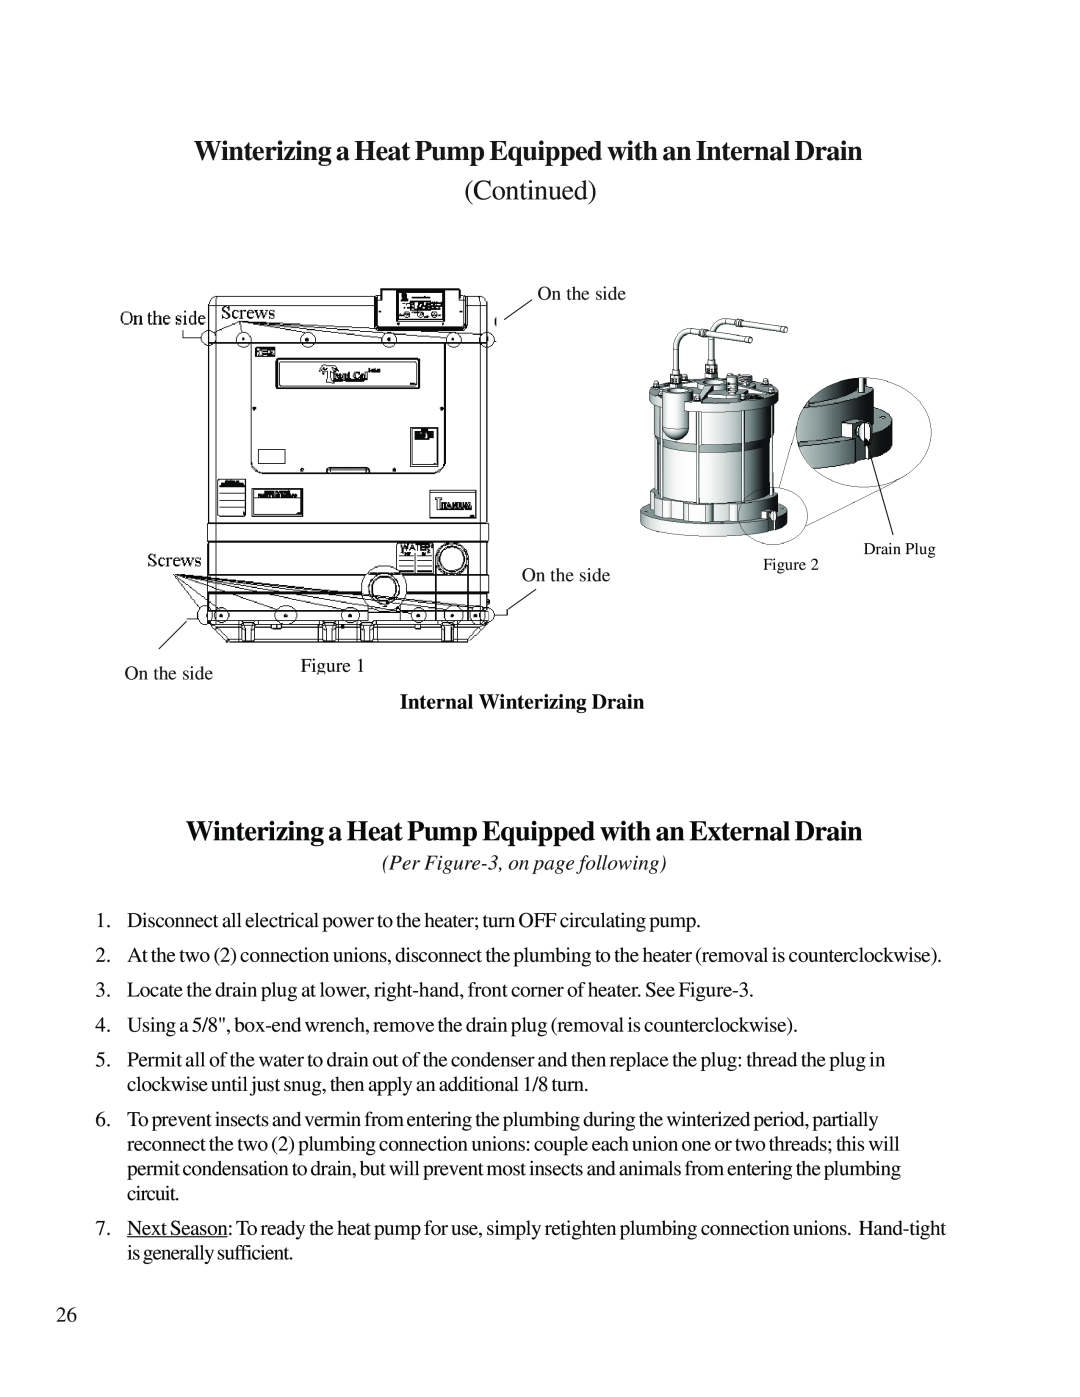
On the side
On the side
On the side | Figure 1 |
|
Drain Plug
Figure 2
Internal Winterizing Drain
Winterizing a Heat Pump Equipped with an External Drain
(Per
1.Disconnect all electrical power to the heater; turn OFF circulating pump.
2.At the two (2) connection unions, disconnect the plumbing to the heater (removal is counterclockwise).
3.Locate the drain plug at lower,
4.Using a 5/8",
5.Permit all of the water to drain out of the condenser and then replace the plug: thread the plug in clockwise until just snug, then apply an additional 1/8 turn.
6.To prevent insects and vermin from entering the plumbing during the winterized period, partially reconnect the two (2) plumbing connection unions: couple each union one or two threads; this will permit condensation to drain, but will prevent most insects and animals from entering the plumbing circuit.
7.Next Season: To ready the heat pump for use, simply retighten plumbing connection unions.
26