INSTALLATION INSTRUCTIONS
FACTORY INSTALLED TILE FLANGE:
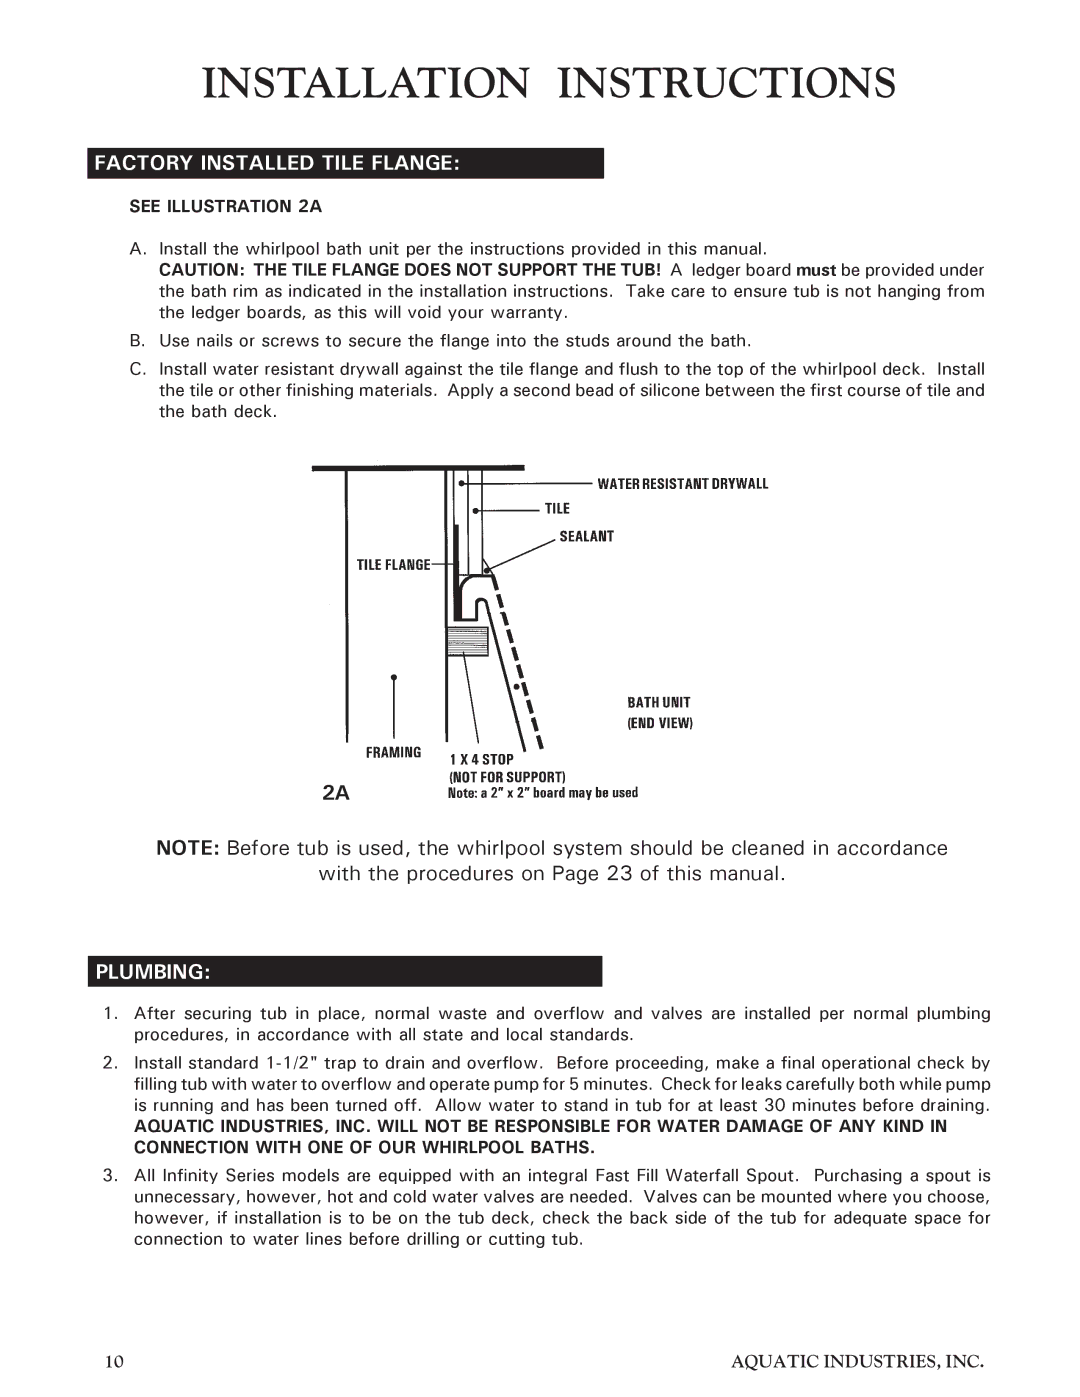
SEE ILLUSTRATION 2A
A.Install the whirlpool bath unit per the instructions provided in this manual.
CAUTION: THE TILE FLANGE DOES NOT SUPPORT THE TUB! A ledger board must be provided under the bath rim as indicated in the installation instructions. Take care to ensure tub is not hanging from the ledger boards, as this will void your warranty.
B.Use nails or screws to secure the flange into the studs around the bath.
C.Install water resistant drywall against the tile flange and flush to the top of the whirlpool deck. Install the tile or other finishing materials. Apply a second bead of silicone between the first course of tile and the bath deck.
2A
NOTE: Before tub is used, the whirlpool system should be cleaned in accordance
with the procedures on Page 23 of this manual.
PLUMBING:
1.After securing tub in place, normal waste and overflow and valves are installed per normal plumbing procedures, in accordance with all state and local standards.
2.Install standard
AQUATIC INDUSTRIES, INC. WILL NOT BE RESPONSIBLE FOR WATER DAMAGE OF ANY KIND IN CONNECTION WITH ONE OF OUR WHIRLPOOL BATHS.
3.All Infinity Series models are equipped with an integral Fast Fill Waterfall Spout. Purchasing a spout is unnecessary, however, hot and cold water valves are needed. Valves can be mounted where you choose, however, if installation is to be on the tub deck, check the back side of the tub for adequate space for connection to water lines before drilling or cutting tub.
10 | AQUATIC INDUSTRIES, INC. |
