Scan
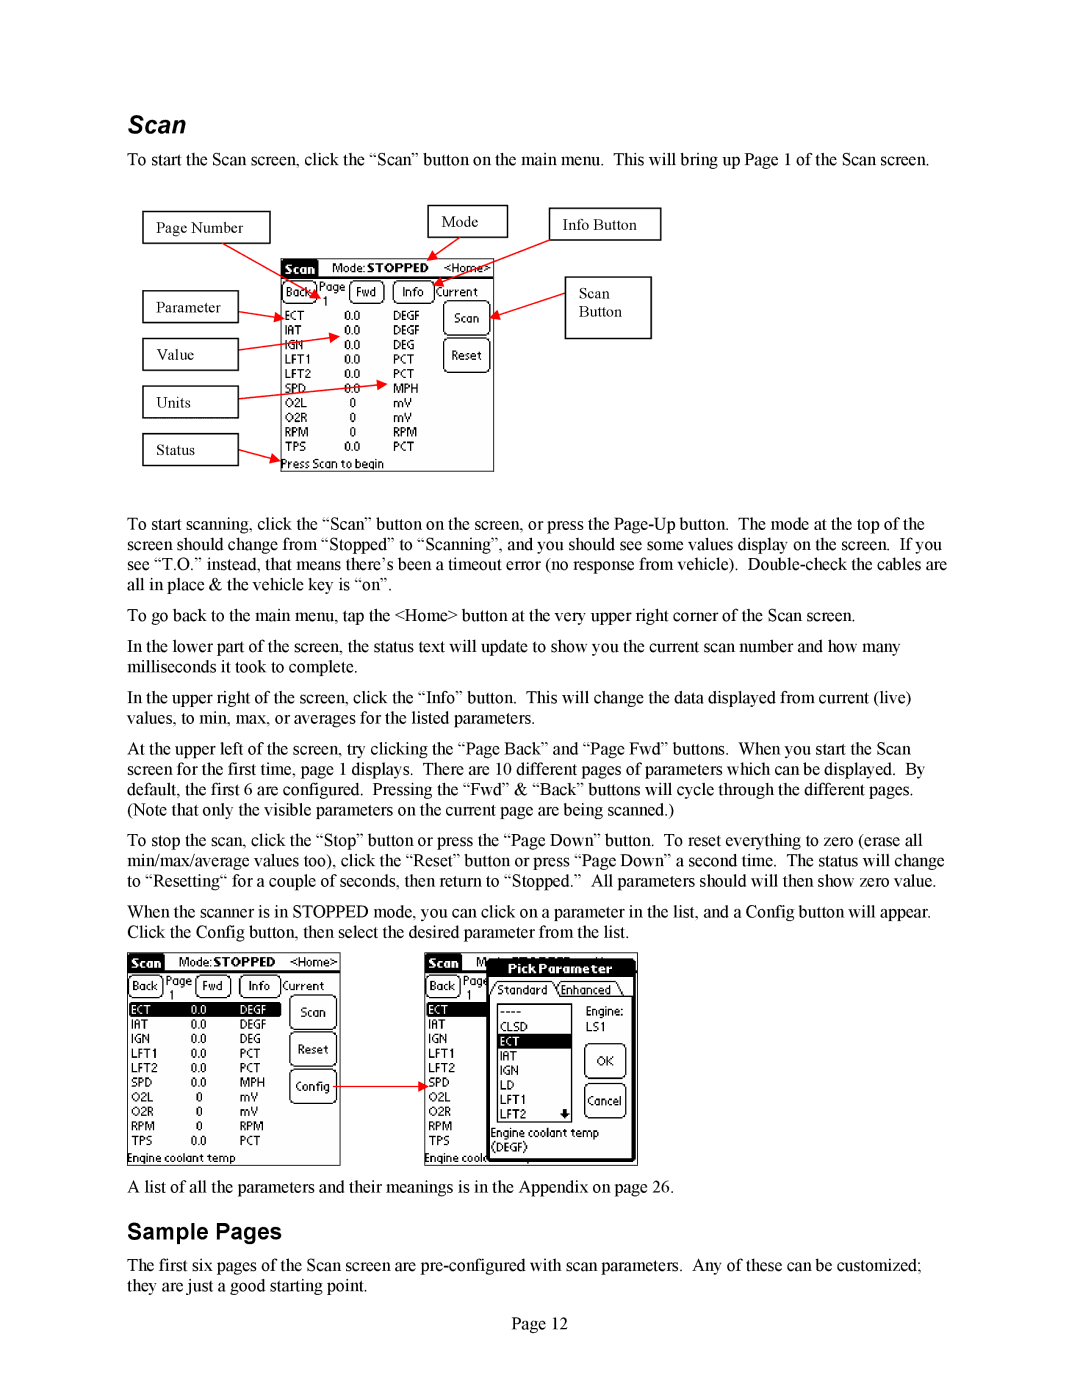
To start the Scan screen, click the “Scan” button on the main menu. This will bring up Page 1 of the Scan screen.
Page Number
Parameter
Value
Units
Status
Mode
Info Button
Scan
Button
To start scanning, click the “Scan” button on the screen, or press the
To go back to the main menu, tap the <Home> button at the very upper right corner of the Scan screen.
In the lower part of the screen, the status text will update to show you the current scan number and how many milliseconds it took to complete.
In the upper right of the screen, click the “Info” button. This will change the data displayed from current (live) values, to min, max, or averages for the listed parameters.
At the upper left of the screen, try clicking the “Page Back” and “Page Fwd” buttons. When you start the Scan screen for the first time, page 1 displays. There are 10 different pages of parameters which can be displayed. By default, the first 6 are configured. Pressing the “Fwd” & “Back” buttons will cycle through the different pages. (Note that only the visible parameters on the current page are being scanned.)
To stop the scan, click the “Stop” button or press the “Page Down” button. To reset everything to zero (erase all min/max/average values too), click the “Reset” button or press “Page Down” a second time. The status will change to “Resetting“ for a couple of seconds, then return to “Stopped.” All parameters should will then show zero value.
When the scanner is in STOPPED mode, you can click on a parameter in the list, and a Config button will appear. Click the Config button, then select the desired parameter from the list.
A list of all the parameters and their meanings is in the Appendix on page 26.
Sample Pages
The first six pages of the Scan screen are
Page 12
