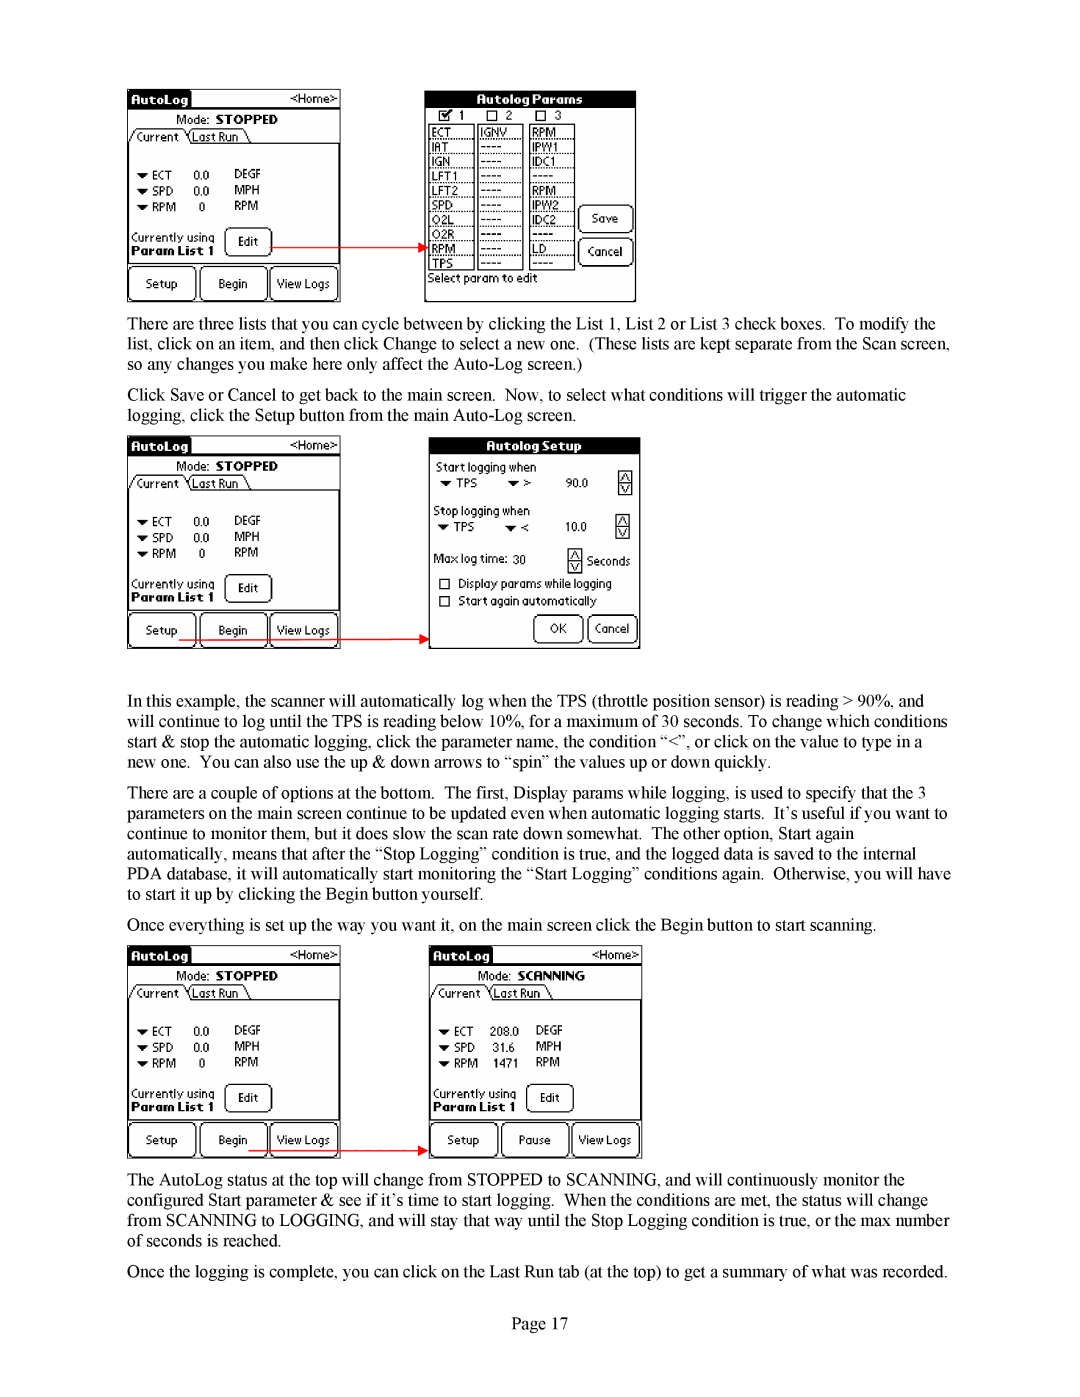
There are three lists that you can cycle between by clicking the List 1, List 2 or List 3 check boxes. To modify the list, click on an item, and then click Change to select a new one. (These lists are kept separate from the Scan screen, so any changes you make here only affect the
Click Save or Cancel to get back to the main screen. Now, to select what conditions will trigger the automatic logging, click the Setup button from the main
In this example, the scanner will automatically log when the TPS (throttle position sensor) is reading > 90%, and will continue to log until the TPS is reading below 10%, for a maximum of 30 seconds. To change which conditions start & stop the automatic logging, click the parameter name, the condition “<”, or click on the value to type in a new one. You can also use the up & down arrows to “spin” the values up or down quickly.
There are a couple of options at the bottom. The first, Display params while logging, is used to specify that the 3 parameters on the main screen continue to be updated even when automatic logging starts. It’s useful if you want to continue to monitor them, but it does slow the scan rate down somewhat. The other option, Start again automatically, means that after the “Stop Logging” condition is true, and the logged data is saved to the internal PDA database, it will automatically start monitoring the “Start Logging” conditions again. Otherwise, you will have to start it up by clicking the Begin button yourself.
Once everything is set up the way you want it, on the main screen click the Begin button to start scanning.
The AutoLog status at the top will change from STOPPED to SCANNING, and will continuously monitor the configured Start parameter & see if it’s time to start logging. When the conditions are met, the status will change from SCANNING to LOGGING, and will stay that way until the Stop Logging condition is true, or the max number of seconds is reached.
Once the logging is complete, you can click on the Last Run tab (at the top) to get a summary of what was recorded.
Page 17
