Getting started
Mounting bracket procedure
Desktop to wall mount installation
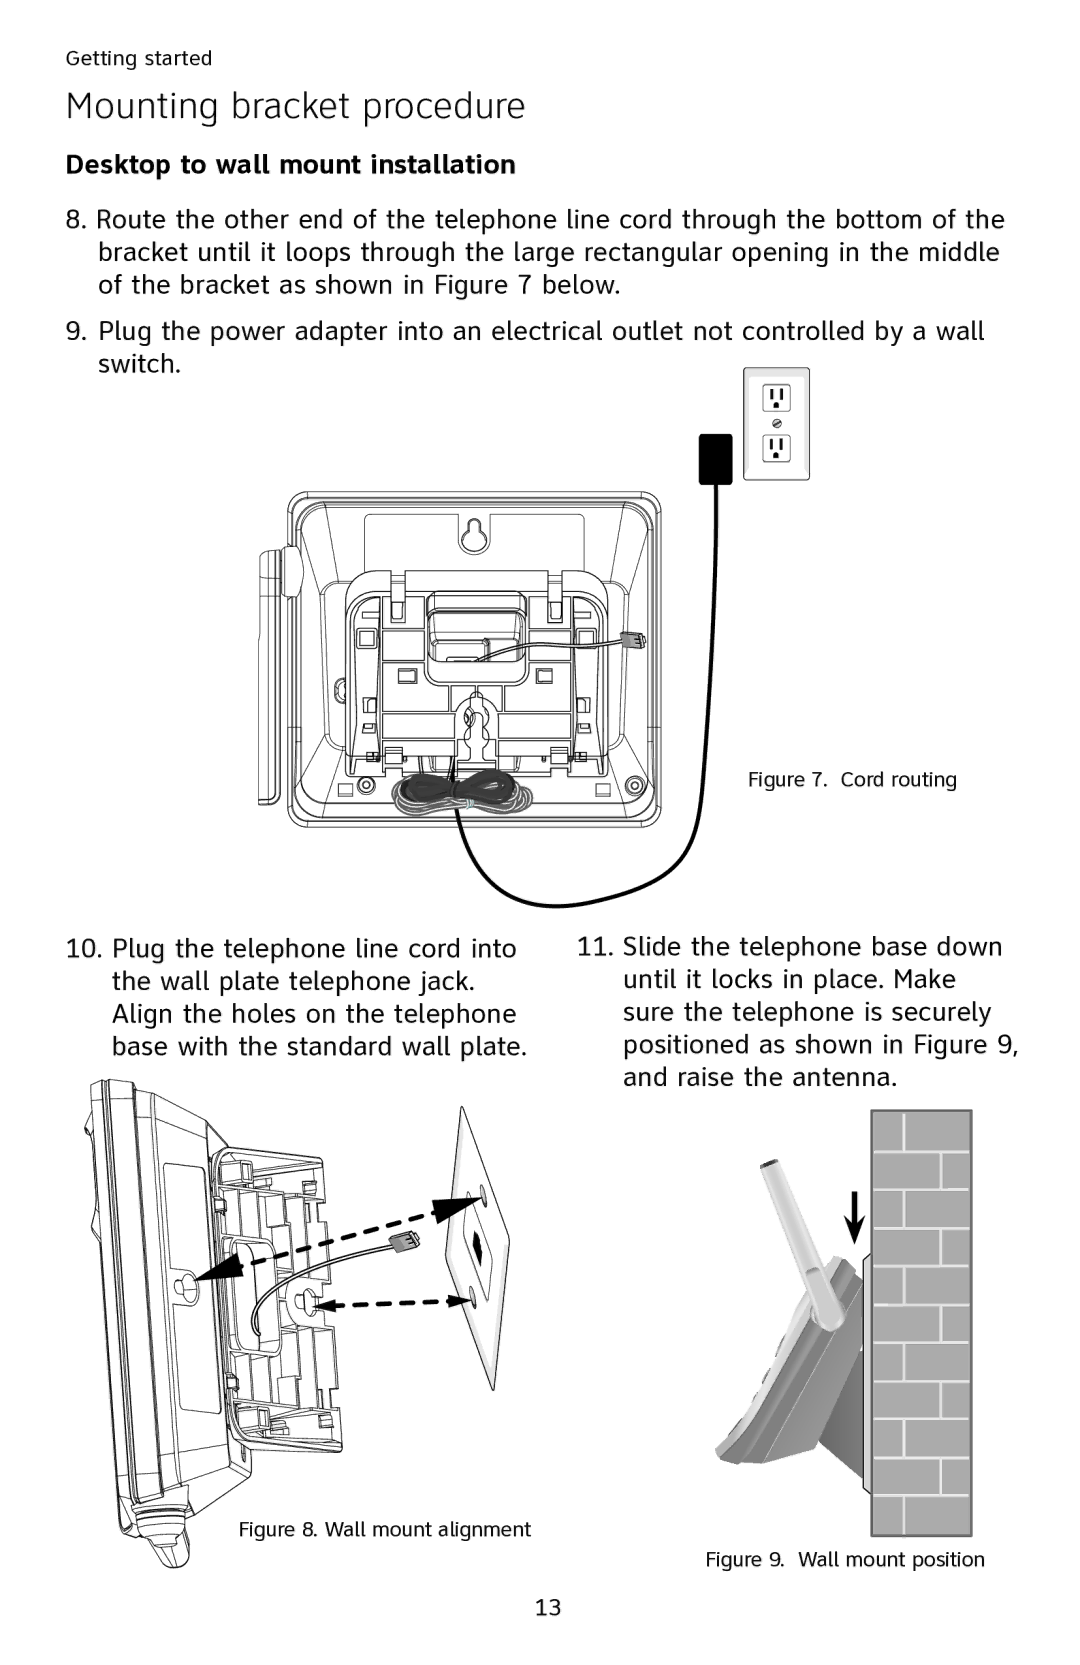
8.Route the other end of the telephone line cord through the bottom of the bracket until it loops through the large rectangular opening in the middle of the bracket as shown in Figure 7 below.
9.Plug the power adapter into an electrical outlet not controlled by a wall switch.
Figure 7. Cord routing
10.Plug the telephone line cord into the wall plate telephone jack. Align the holes on the telephone base with the standard wall plate.
11.Slide the telephone base down until it locks in place. Make sure the telephone is securely positioned as shown in Figure 9, and raise the antenna.
Figure 8. Wall mount alignment Figure 9. Wall mount position
13