Installation-D V D 3200
Th is u nit is design ed for installatio n in vehicle cabs with an existing radio openin g. In m any cases, a sp ecial installation kit w ill b e req uired to m o unt the DVD3200 to th e d ashboard.
Th ese kits are availab le at electro nics supply stores and car stereo specialist sho ps. Always check the kit ap plication b efore purchasing to make sure th e kit works with your vehicle.
U niversal Installation Procedure U sing D IN M ounting S leeves:
1)S lide the m ounting sleeve off of the chassis . If it is locked into position, remove the end caps and use the rem oval tools (supplied) to disengage it.
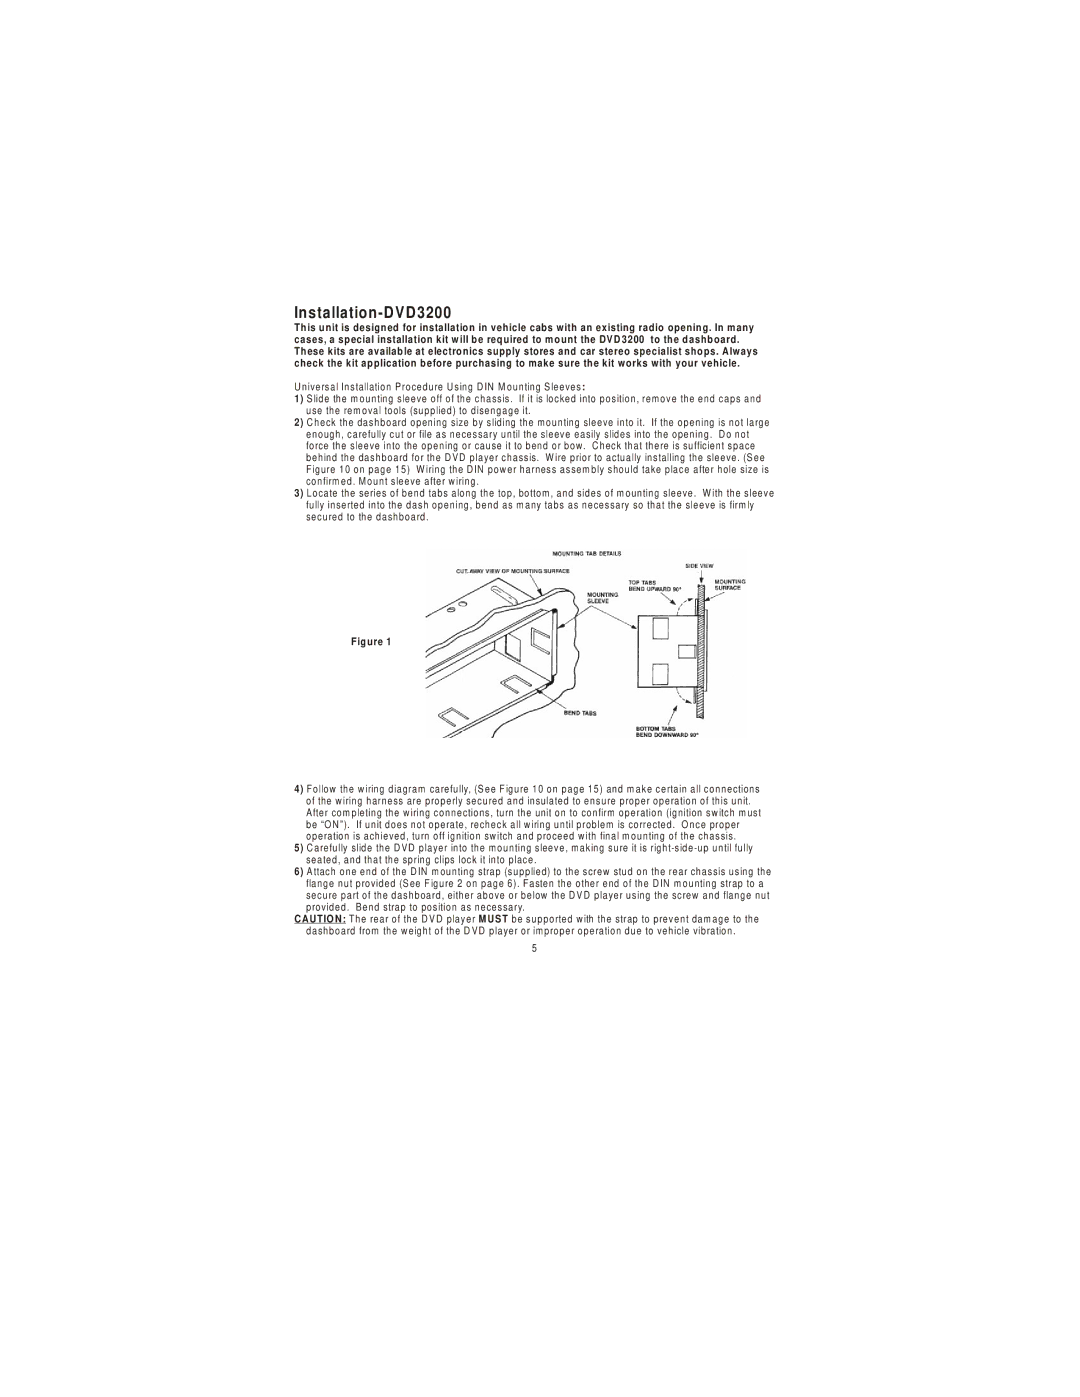
2)C heck the dashboard opening size by sliding the m ounting sleeve into it. If the opening is not large enough, carefully cut or file as necessary until the sleeve easily slides into the opening . D o not force the sleeve into the opening or cause it to bend or bow. C heck that there is sufficient space behind the dashboard for the D VD player chassis. W ire prior to actually installing the sleeve . (S ee Figure 10 on page 15) W iring the D IN pow er harness assem bly should take place after hole size is confirm ed . Mount sleeve after w iring .
3)Locate the series of bend tabs along the top, bottom , and sides of m ounting sleeve . W ith the sleeve fully inserted into the dash opening, bend as m any tabs as necessary so that the sleeve is firm ly secured to the dashboard .
Fig ure 1
4) Follow the w iring diagram carefully, (S ee F igure 10 on page 15) and m ake certain all connections of the w iring harness are properly secured and insulated to ensure proper operation of this unit. After com pleting the w iring connections, turn the unit on to confirm operation (ignition sw itch m ust be “O N ”). If unit does not operate, recheck all w iring until problem is corrected . O nce proper operation is achieved, turn off ignition sw itch and proceed w ith final m ounting of the chassis.
5)C arefully slide the D VD player into the mounting sleeve, making sure it is
6)A ttach one end of the D IN m ounting strap (supplied) to the screw stud on the rear chassis using the flange nut provided (S ee F igure 2 on page 6). Fasten the other end of the D IN m ounting strap to a secure part of the dashboard, either above or below the D V D player using the screw and flange nut provided . Bend strap to position as necessary.
CAUTIO N: The rear of the D V D player M UST be supported w ith the strap to prevent dam age to the dashboard from the w eight of the D VD player or im proper operation due to vehicle vibration .
5