8
Assembly Instructions
Step 1
Front Leg Frame Assembly
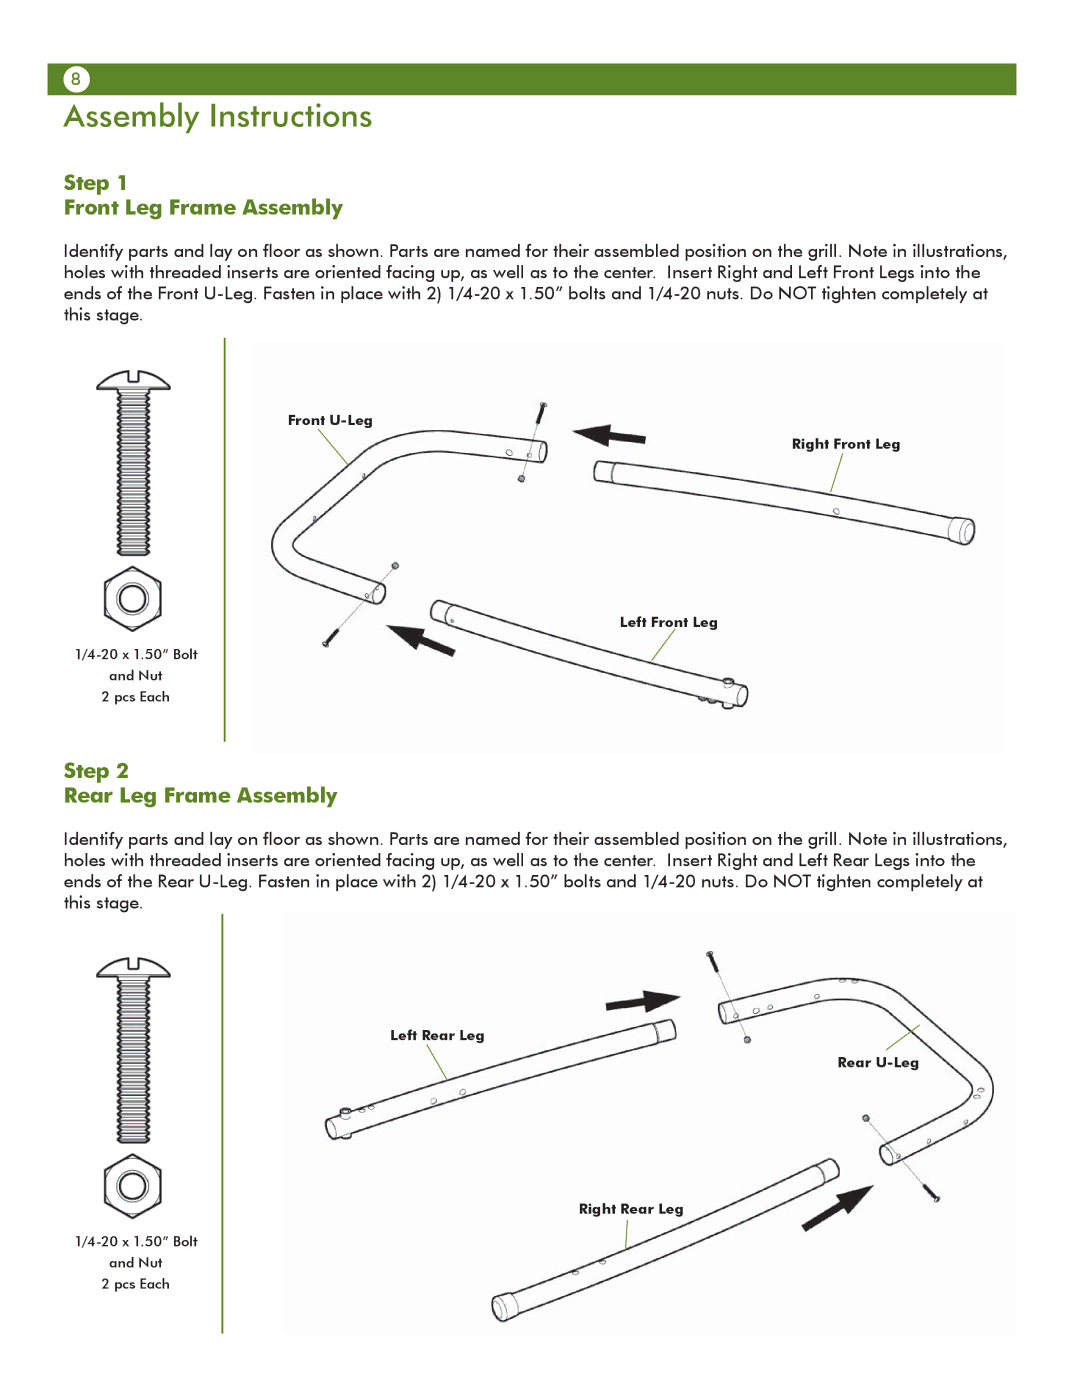
Identify parts and lay on floor as shown. Parts are named for their assembled position on the grill. Note in illustrations, holes with threaded inserts are oriented facing up, as well as to the center. Insert Right and Left Front Legs into the ends of the Front
and Nut
2 pcs Each
Front
Right Front Leg
Left Front Leg
Step 2
Rear Leg Frame Assembly
Identify parts and lay on floor as shown. Parts are named for their assembled position on the grill. Note in illustrations, holes with threaded inserts are oriented facing up, as well as to the center. Insert Right and Left Rear Legs into the ends of the Rear
and Nut
2 pcs Each
Left Rear Leg![]() Rear
Rear
Right Rear Leg
