20
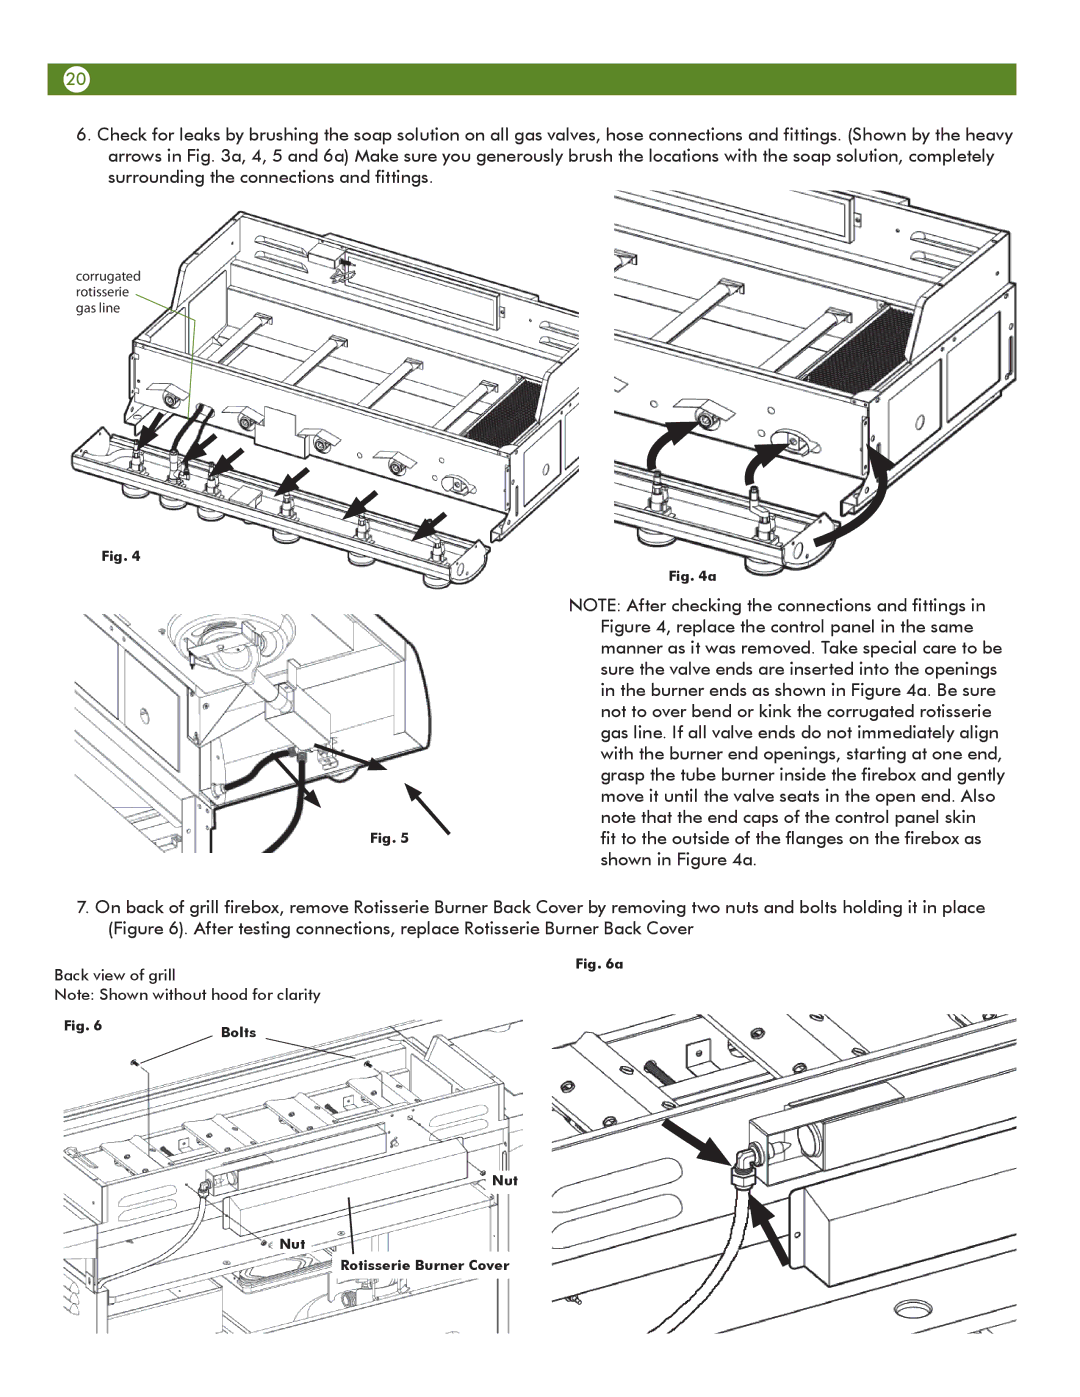
6.Check for leaks by brushing the soap solution on all gas valves, hose connections and fittings. (Shown by the heavy arrows in Fig. 3a, 4, 5 and 6a) Make sure you generously brush the locations with the soap solution, completely surrounding the connections and fittings.
corrugated rotisserie gas line
Fig. 4
| Fig. 4a |
| NOTE: After checking the connections and fittings in |
| Figure 4, replace the control panel in the same |
| manner as it was removed. Take special care to be |
| sure the valve ends are inserted into the openings |
| in the burner ends as shown in Figure 4a. Be sure |
| not to over bend or kink the corrugated rotisserie |
| gas line. If all valve ends do not immediately align |
| with the burner end openings, starting at one end, |
| grasp the tube burner inside the firebox and gently |
| move it until the valve seats in the open end. Also |
| note that the end caps of the control panel skin |
Fig. 5 | fit to the outside of the flanges on the firebox as |
| shown in Figure 4a. |
7.On back of grill firebox, remove Rotisserie Burner Back Cover by removing two nuts and bolts holding it in place (Figure 6). After testing connections, replace Rotisserie Burner Back Cover
Back view of grill
Fig. 6a
Note: Shown without hood for clarity
Fig. 6 | Bolts |
|
Nut
Nut
Rotisserie Burner Cover