23
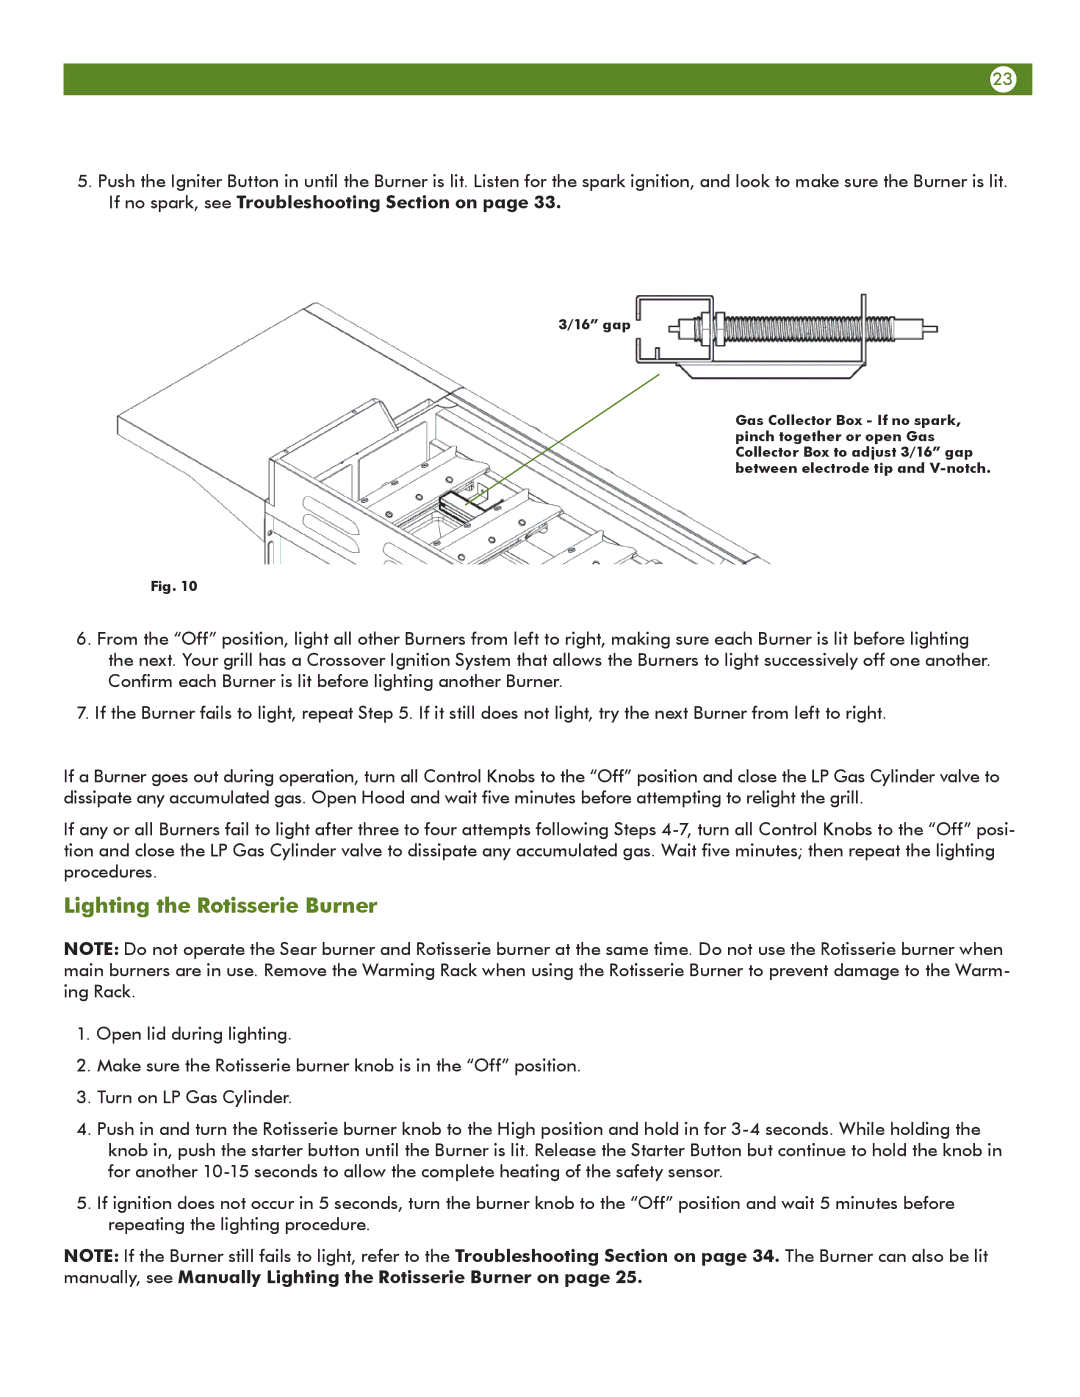
5.Push the Igniter Button in until the Burner is lit. Listen for the spark ignition, and look to make sure the Burner is lit. If no spark, see Troubleshooting Section on page 33.
3/16” gap
Gas Collector Box - If no spark, pinch together or open Gas Collector Box to adjust 3/16” gap between electrode tip and
Fig. 10
6.From the “Off” position, light all other Burners from left to right, making sure each Burner is lit before lighting the next. Your grill has a Crossover Ignition System that allows the Burners to light successively off one another. Confirm each Burner is lit before lighting another Burner.
7.If the Burner fails to light, repeat Step 5. If it still does not light, try the next Burner from left to right.
If a Burner goes out during operation, turn all Control Knobs to the “Off” position and close the LP Gas Cylinder valve to dissipate any accumulated gas. Open Hood and wait five minutes before attempting to relight the grill.
If any or all Burners fail to light after three to four attempts following Steps
Lighting the Rotisserie Burner
NOTE: Do not operate the Sear burner and Rotisserie burner at the same time. Do not use the Rotisserie burner when main burners are in use. Remove the Warming Rack when using the Rotisserie Burner to prevent damage to the Warm- ing Rack.
1.Open lid during lighting.
2.Make sure the Rotisserie burner knob is in the “Off” position.
3.Turn on LP Gas Cylinder.
4.Push in and turn the Rotisserie burner knob to the High position and hold in for
5.If ignition does not occur in 5 seconds, turn the burner knob to the “Off” position and wait 5 minutes before repeating the lighting procedure.
NOTE: If the Burner still fails to light, refer to the Troubleshooting Section on page 34. The Burner can also be lit manually, see Manually Lighting the Rotisserie Burner on page 25.