Page 8 | AXIS |
 Install the hardware
The instructions below describe the installation of AXIS
Install the wall bracket
1.Use the supplied drill template to prepare a wall, ceiling, or pole for installation of the wall bracket.
2.Route the network cable through the wall bracket and the bracket adapter. Leave approximately 30 cm (11.8”) of cable for connecting the camera.
3.Install the wall bracket on a wall, ceiling, or pole and make sure that the screws and plugs are appropriate for the material (e.g. wood, metal, sheet rock, stone).
Notes:
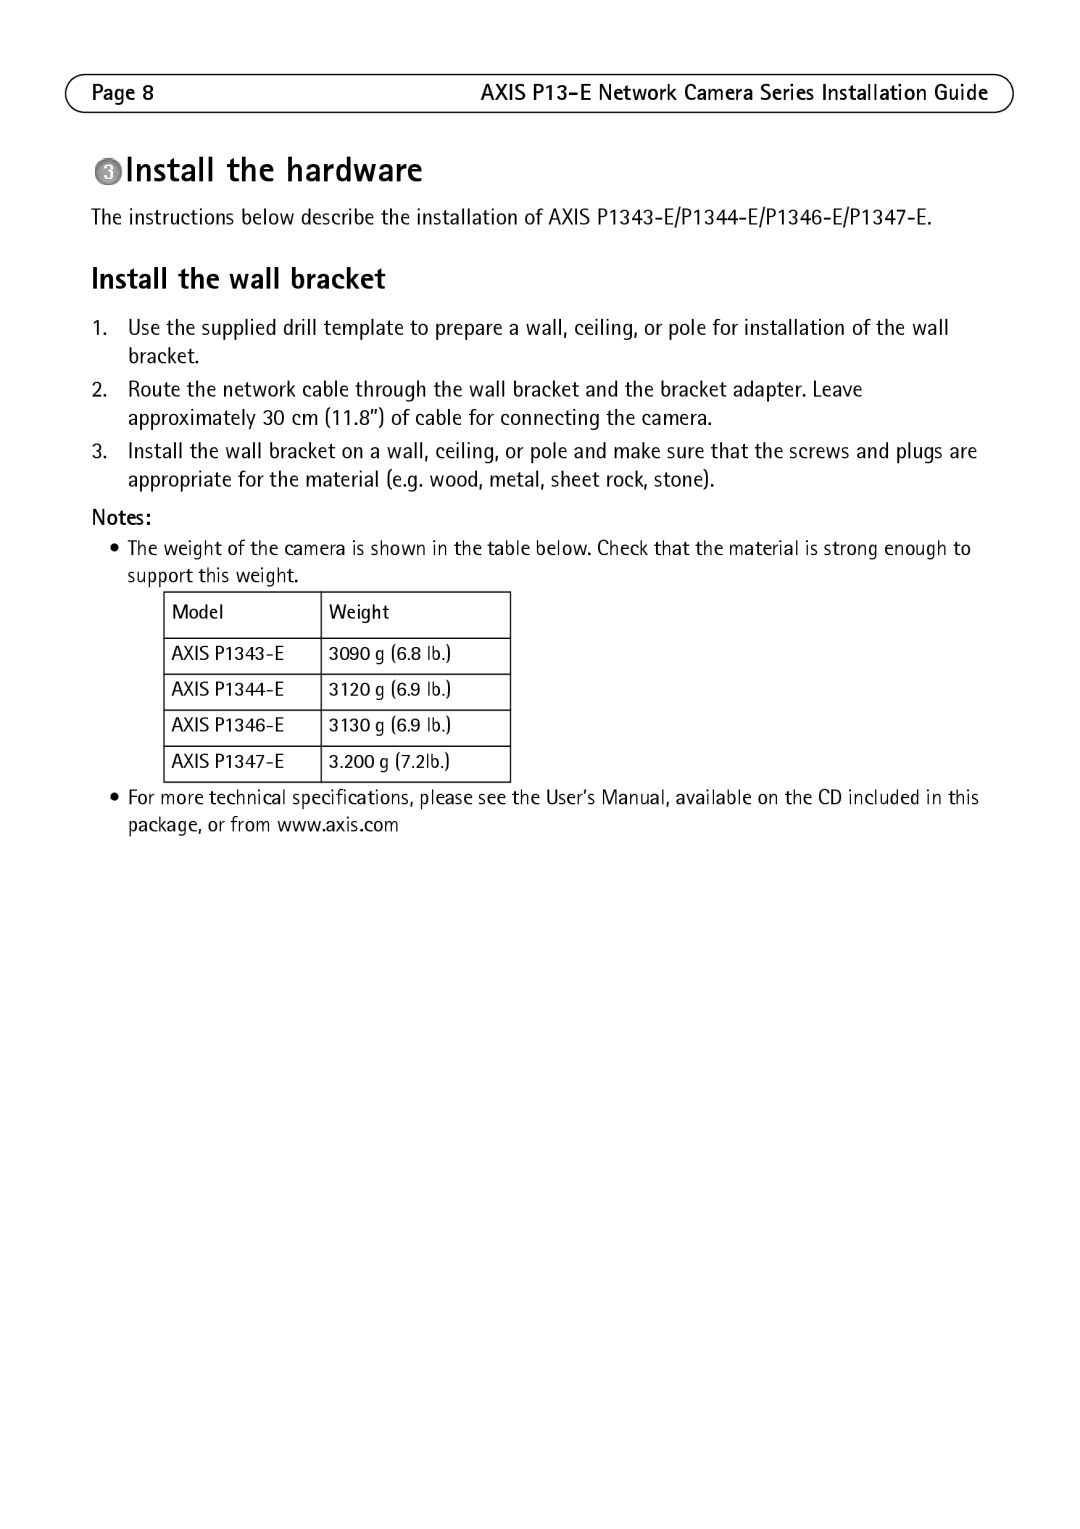
• The weight of the camera is shown in the table below. Check that the material is strong enough to support this weight.
Model | Weight |
|
|
AXIS | 3090 g (6.8 lb.) |
|
|
AXIS | 3120 g (6.9 lb.) |
|
|
AXIS | 3130 g (6.9 lb.) |
|
|
AXIS | 3.200 g (7.2lb.) |
• For more technical specifications, please see the User’s Manual, available on the CD included in this package, or from www.axis.com