Fig. 48
20mm
10.0Installation
10.7Fitting The Flue
HORIZONTAL FLUE
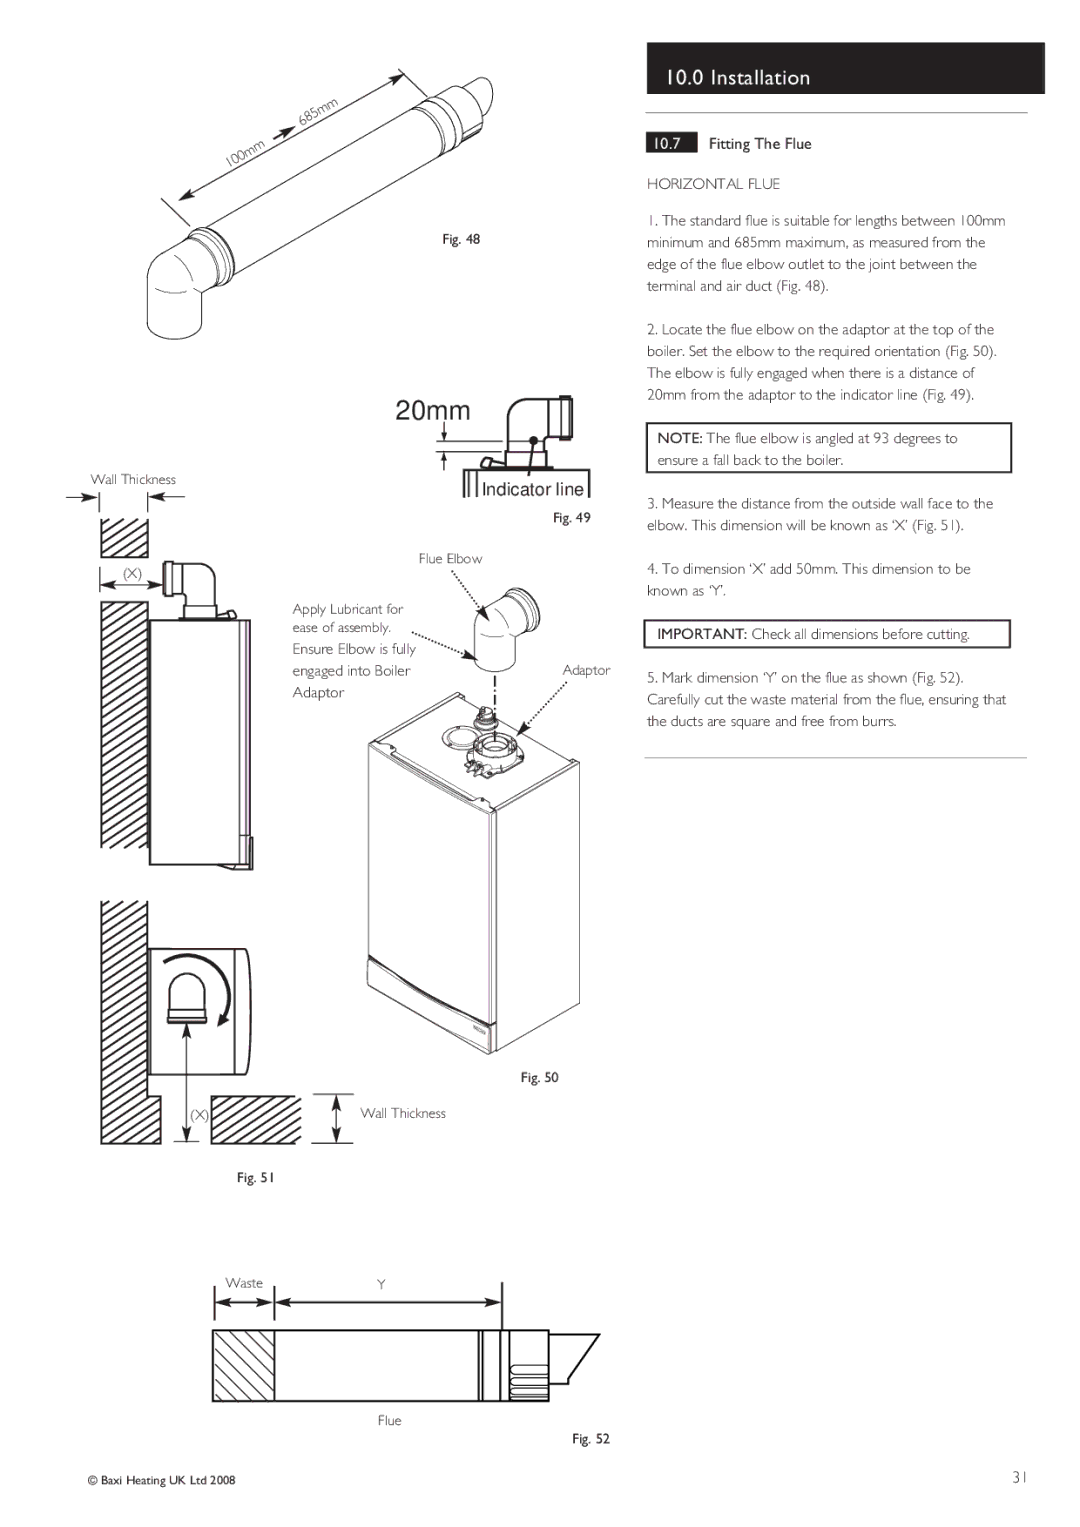
1.The standard flue is suitable for lengths between 100mm minimum and 685mm maximum, as measured from the edge of the flue elbow outlet to the joint between the terminal and air duct (Fig. 48).
2.Locate the flue elbow on the adaptor at the top of the boiler. Set the elbow to the required orientation (Fig. 50). The elbow is fully engaged when there is a distance of 20mm from the adaptor to the indicator line (Fig. 49).
NOTE: The flue elbow is angled at 93 degrees to ensure a fall back to the boiler.
Wall Thickness
(X)
(X)
Fig. 51
Waste


 Indicator line
Fig. 49
Flue Elbow
Apply Lubricant for ease of assembly.
Ensure Elbow is fully
engaged into Boiler |
| Adaptor |
| ||
|
|
|
Adaptor
Fig. 50
Wall Thickness
Y
Flue
Fig. 52
3.Measure the distance from the outside wall face to the elbow. This dimension will be known as ‘X’ (Fig. 51).
4.To dimension ‘X’ add 50mm. This dimension to be known as ‘Y’.
IMPORTANT: Check all dimensions before cutting.
5.Mark dimension ‘Y’ on the flue as shown (Fig. 52). Carefully cut the waste material from the flue, ensuring that the ducts are square and free from burrs.
© Baxi Heating UK Ltd 2008 | 31 |
