REGULATOR HOSE ASSEMBLY Brass
Your cooker is equipped with a | Valves | |
| Connector | |
with the following features: |
| Coupling Nut |
1.The system will not allow gas flow from the cylinder
until a positive connection to the cylinder valve has been made.
NOTE: The cylinder valve must be turned off (clockwise) before any connection is made or removed.
For connection to LP Gas Cylinder
2. A flow limiting device, when activated, restricts the | For connection | Brass Orifice |
to Burner | Connector | |
flow of gas to 10 cubic feet per hour. |
|
|
NOTE: the flow limiting device is a safety feature that can be activated when attempting to light fryer. If this occurs, refer to Trouble Shooting on pages 26 - 27 for proper remedy.
![]() WARNING
WARNING ![]()
The pressure regulator and hose assembly supplied with your gas cooker is designed to work with an LP gas supply cylinder.
•DO NOT attempt to connect it to any other fuel supply source such as a natural gas line.
•DO NOT use any other pressure regulator/hose assembly than the one supplied with your cooker.
•DO NOT attempt to adjust or repair the regulator. A replacement regulator can be supplied by contacting Barbour International, Inc. at
•Never use your cooker without leak testing all gas connections, regulator hose assembly and weld seams on propane tank. See the section on "Gas Leak Testing" in this manual for proper procedures.
CONNECTING REGULATOR HOSE ASSEMBLY TO COOKER
The Regulator Hose Assembly is a
Visually inspect the regulator hose assembly prior to each use. If there is evidence of abrasion, wear, cuts or leaks, the hose must be replaced prior to the appliance being put into operation.
Call
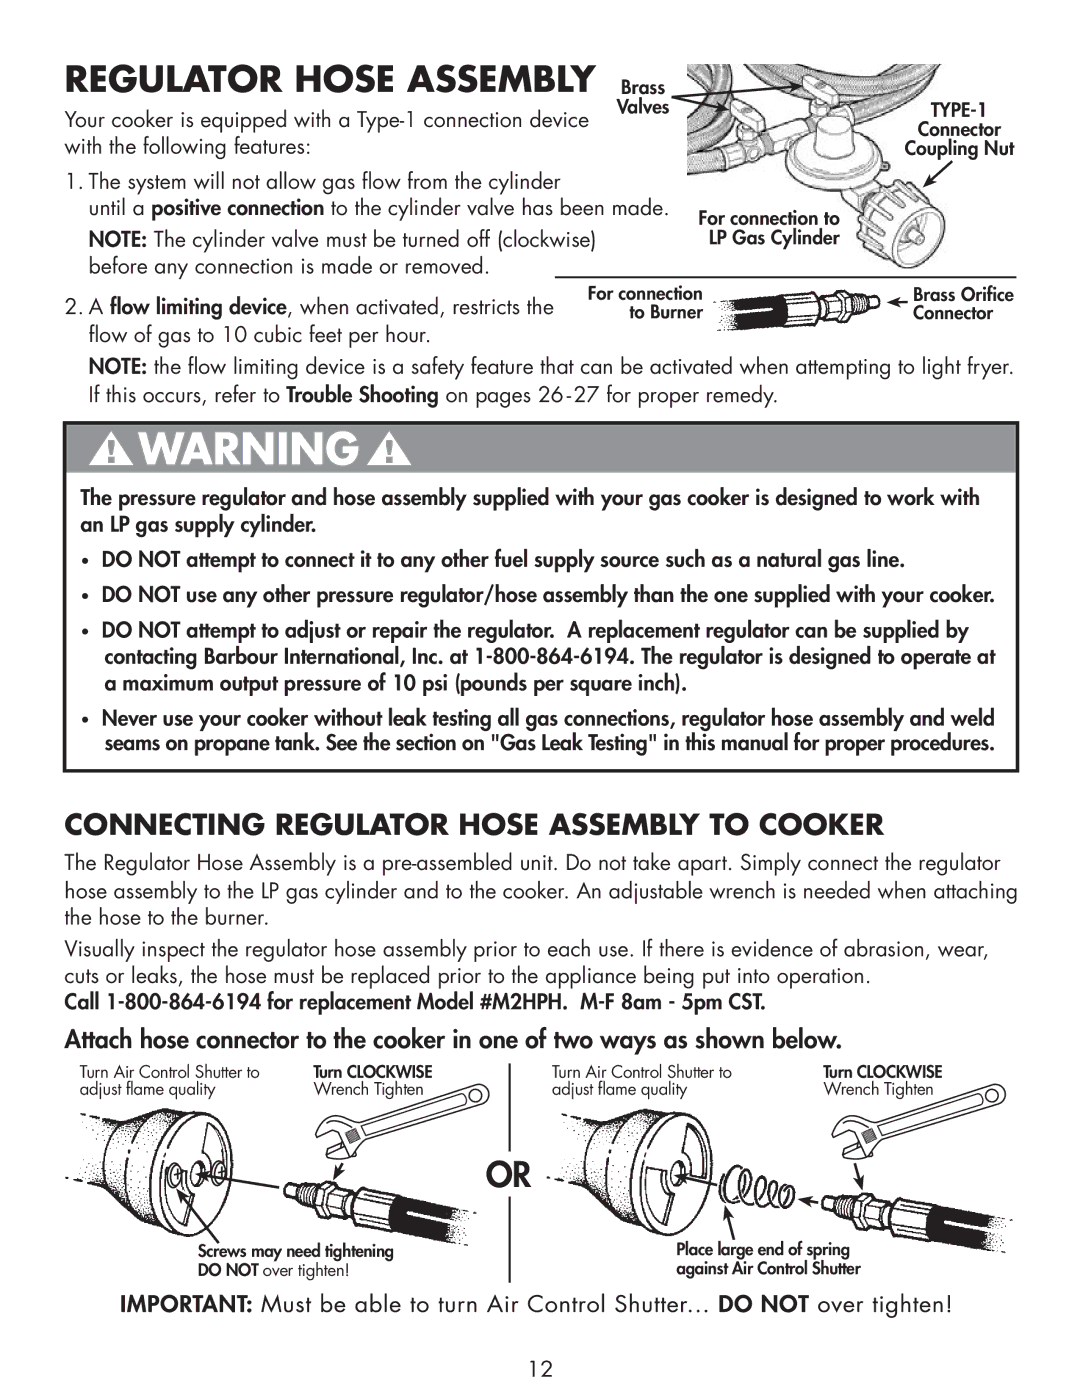
Attach hose connector to the cooker in one of two ways as shown below.
Turn Air Control Shutter to | Turn CLOCKWISE |
adjust flame quality | Wrench Tighten |
Turn Air Control Shutter to | Turn CLOCKWISE |
adjust flame quality | Wrench Tighten |
OR
Screws may need tightening
DO NOT over tighten!
Place large end of spring against Air Control Shutter
12
