ELECTRICAL
INSTALLATION
OPTION 2 – Operator Mounted Switch
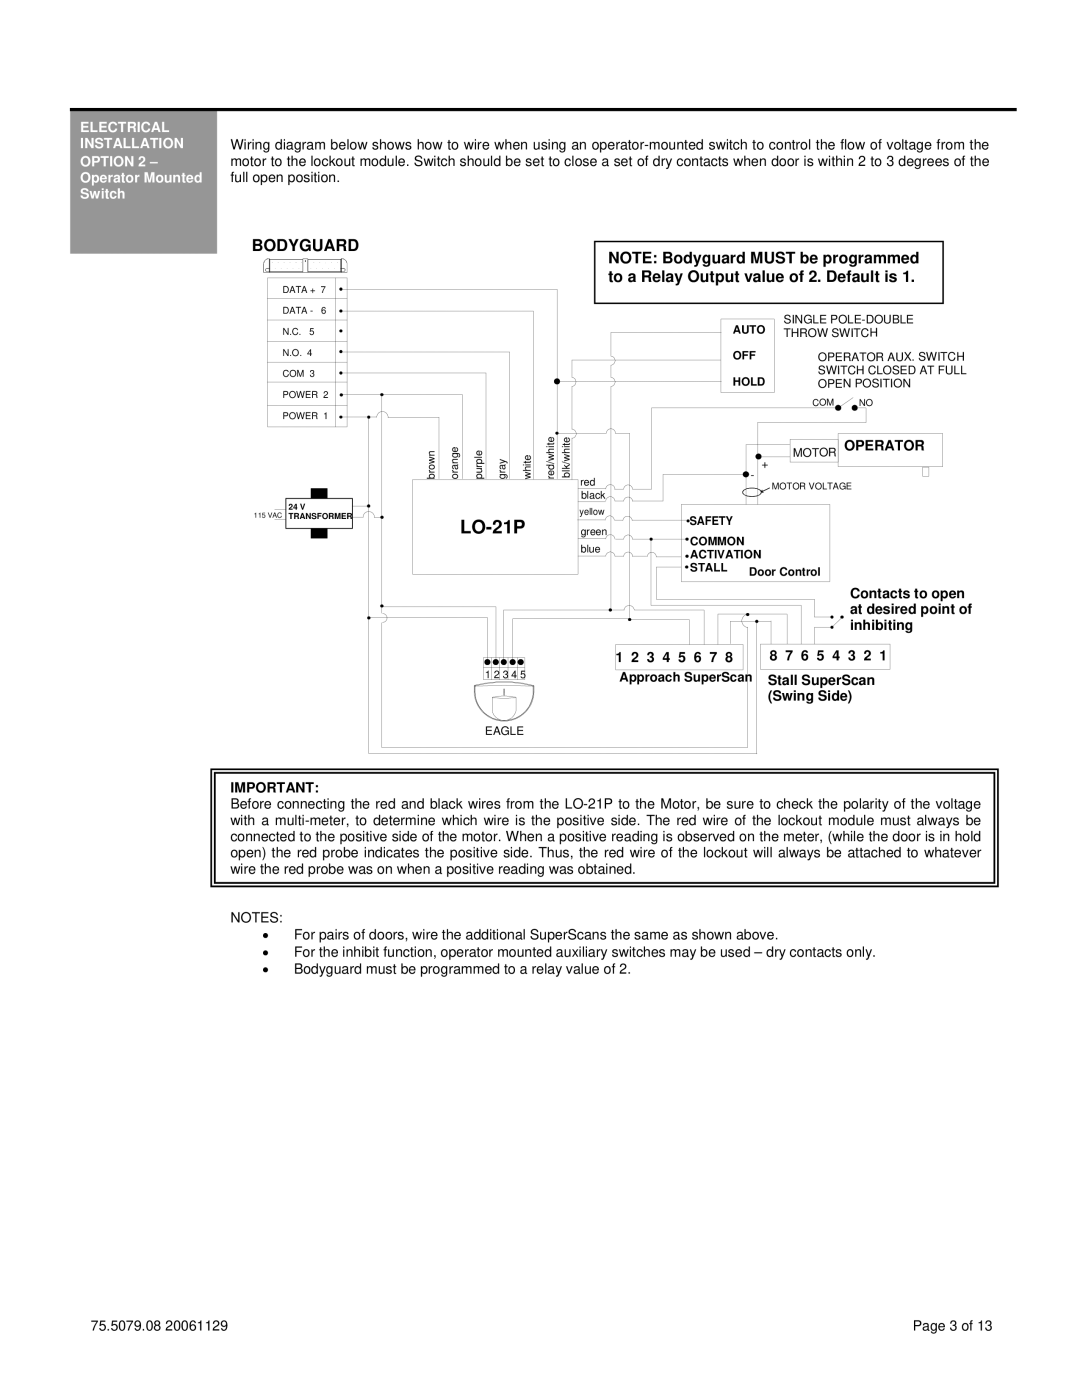
Wiring diagram below shows how to wire when using an
BODYGUARD
DATA + 7
DATA - 6
N.C. 5
N.O. 4
COM 3
POWER 2
POWER 1
NOTE: Bodyguard MUST be programmed to a Relay Output value of 2. Default is 1.
|
| SINGLE | |
| AUTO | THROW SWITCH | |
| |||
| OFF | OPERATOR AUX. SWITCH | |
| HOLD | SWITCH CLOSED AT FULL | |
| OPEN POSITION | ||
|
| COM | NO |
115 VAC
24 V
TRANSFORMER
brown | orange | purple | gray | white | red/white | blk/white |
LO-21P
1 2 3 4 5
|
|
| MOTOR OPERATOR |
|
| - | + |
red |
| MOTOR VOLTAGE | |
|
| ||
black |
|
| |
|
|
| |
yellow | SAFETY |
|
|
green |
|
| |
COMMON |
|
| |
blue |
|
| |
ACTIVATION |
| ||
|
| ||
| STALL | Door Control | |
|
| ||
|
|
| Contacts to open |
|
|
| at desired point of |
|
|
| inhibiting |
| 1 2 3 4 5 6 7 8 |
| 8 7 6 5 4 3 2 1 |
| Approach SuperScan | Stall SuperScan | |
|
|
| (Swing Side) |
EAGLE
NOTES:
•For pairs of doors, wire the additional SuperScans the same as shown above.
•For the inhibit function, operator mounted auxiliary switches may be used – dry contacts only.
•Bodyguard must be programmed to a relay value of 2.
75.5079.08 20061129 | Page 3 of 13 |
