
N1 specifications
The Belkin N1 is a robust wireless router designed to provide high-speed internet connectivity, ideal for both home and small office environments. This device is well-suited for streaming, gaming, and heavy internet usage thanks to its advanced technologies and features.One of the standout characteristics of the Belkin N1 is its support for N technology, which offers significantly faster wireless speeds compared to the previous G technology. The Belkin N1 boasts a coverage area that can extend up to 3 times further than standard routers, allowing for seamless connectivity in larger homes or offices. Utilizing MIMO (Multiple Input Multiple Output) technology, the Belkin N1 can transmit multiple data streams simultaneously, improving overall performance and reducing dead zones.
The router operates on dual bands, providing both 2.4 GHz and 5 GHz frequencies. This dual-band capability allows users to choose the best frequency for their devices. For instance, the 2.4 GHz band is ideal for basic browsing and compatible devices, while the 5 GHz band offers less interference and is perfect for high-bandwidth applications like HD video streaming and online gaming.
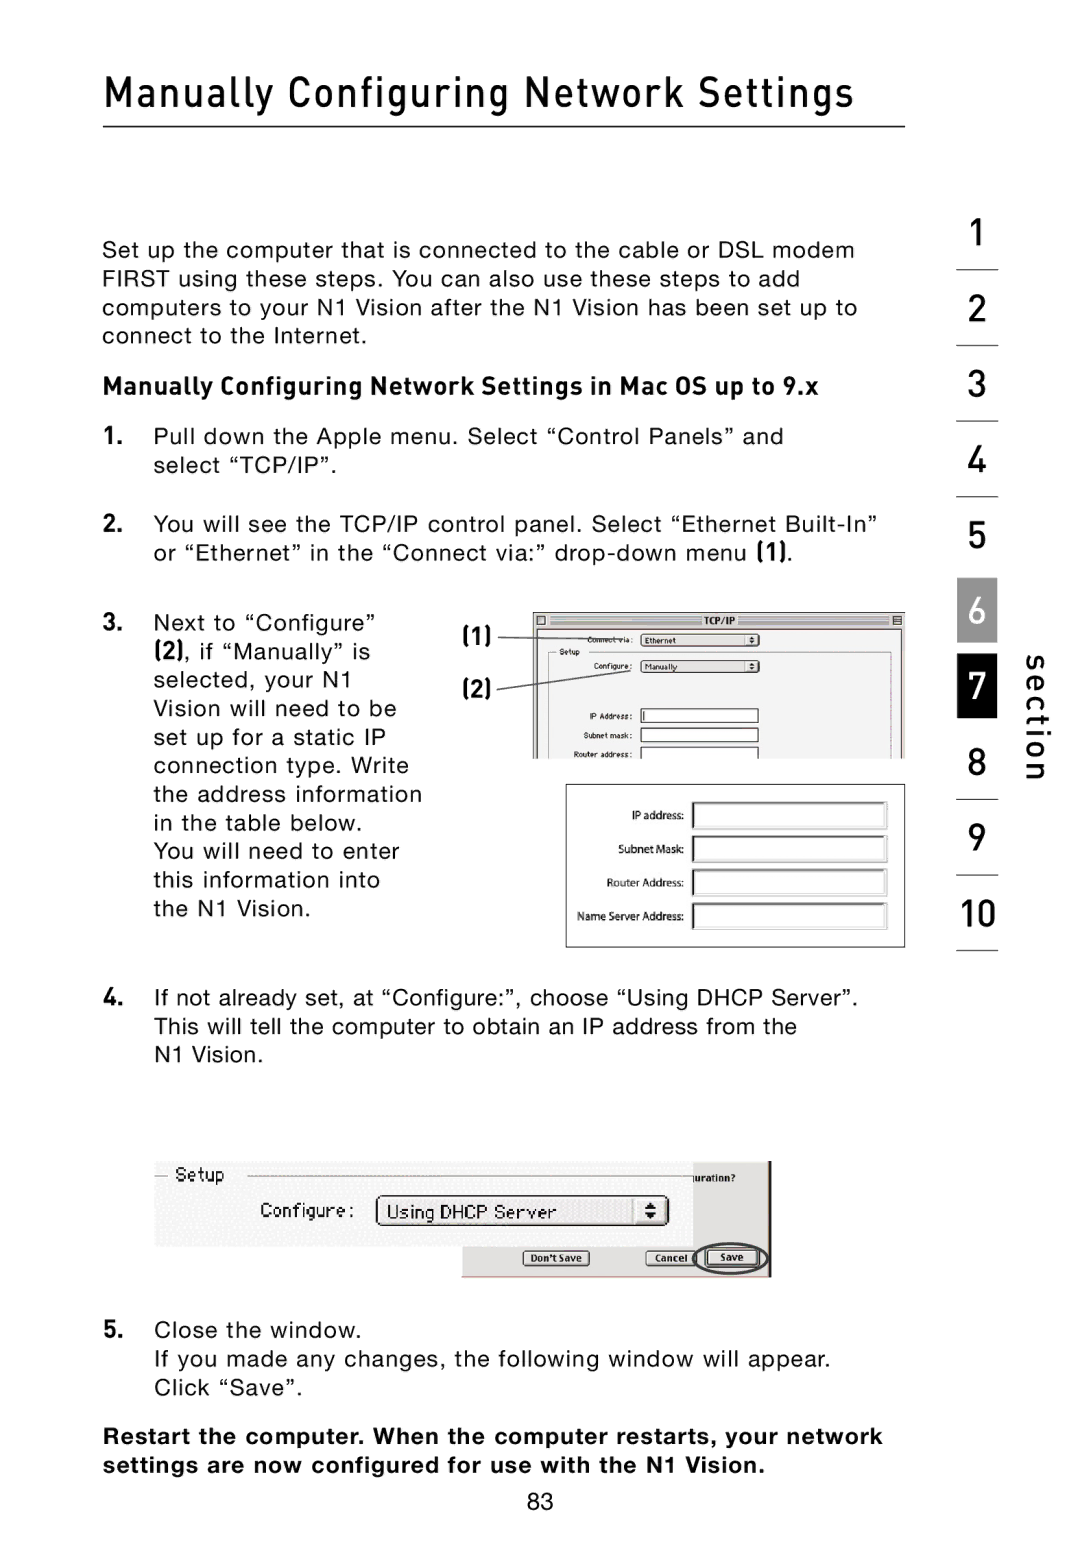
The Belkin N1 is equipped with several advanced security protocols, including WPA and WPA2 encryption, ensuring that users' data is protected from unauthorized access. Additionally, it features a robust firewall to prevent potential threats, offering peace of mind to users concerned about online security.
Another notable feature of the Belkin N1 is its user-friendly setup process. The router comes with a straightforward installation CD, guiding users through the setup in mere minutes. For those who prefer more control, the Belkin N1 also provides an intuitive web interface, allowing users to customize settings to fit their specific needs.
Furthermore, the Belkin N1 includes several Ethernet ports, enabling direct wired connections for devices that may require stable connections, such as gaming consoles or desktop computers. This ensures that users can enjoy optimal performance without compromising on speed.
In summary, the Belkin N1 is a feature-rich wireless router that excels in speed, coverage, and security. Its dual-band support, MIMO technology, and user-friendly setup make it an excellent choice for anyone looking to enhance their home networking experience. Whether for streaming, gaming, or everyday browsing, the Belkin N1 is designed to meet the demands of modern internet users, making it a valuable addition to any digital environment.