Replacing the lamp
•To reduce the risk of electrical shock, always turn the projector off and disconnect the power cord before changing the lamp.
•To reduce the risk of severe burns, allow the projector to cool for at least 45 minutes before replacing the lamp.
To reduce the risk of injuries to fingers and damage to internal components, use caution when removing lamp glass that has shattered into sharp pieces.
To reduce the risk of injuries to fingers and/or compromising image quality by touching the lens, do not touch the empty lamp compartment when the lamp is removed.
This lamp contains mercury. Consult your local hazardous waste regulations to dispose of this lamp in a proper manner.
Step 1. Turn the power off and disconnect the projector from the wall socket.
Step 2. Protect the projector's surface by clearing a flat open area on your desk and placing a
soft item on the desk for padding.
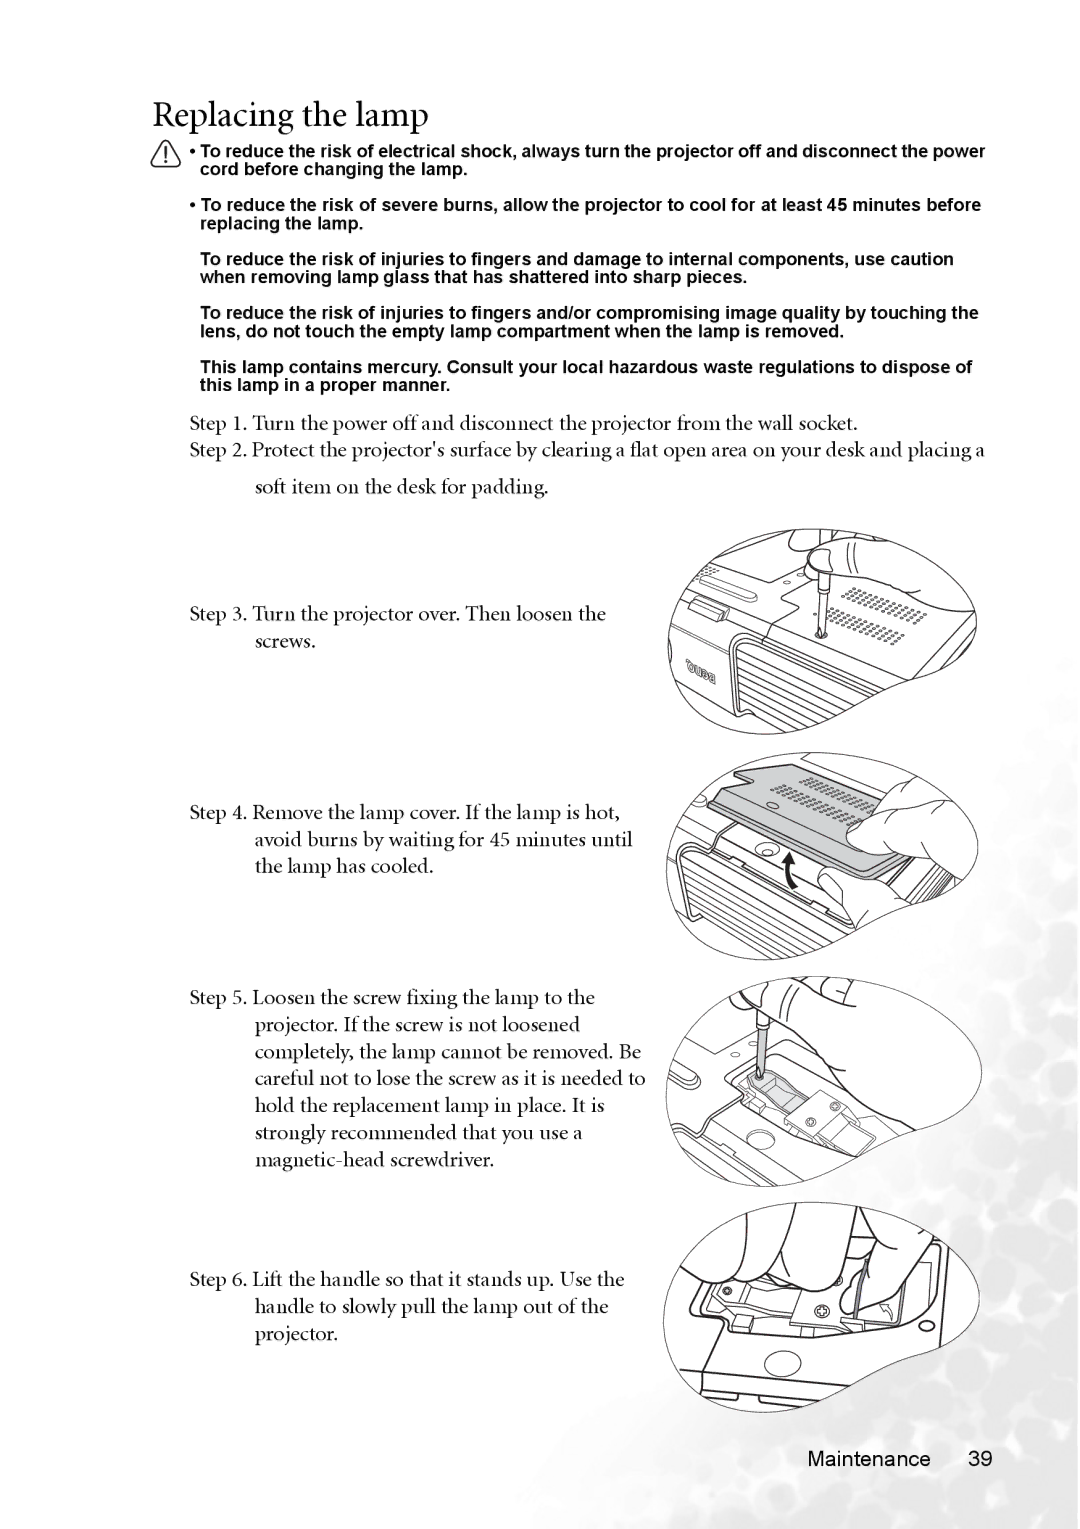
Step 3. Turn the projector over. Then loosen the screws.
Step 4. Remove the lamp cover. If the lamp is hot, avoid burns by waiting for 45 minutes until the lamp has cooled.
Step 5. Loosen the screw fixing the lamp to the projector. If the screw is not loosened completely, the lamp cannot be removed. Be careful not to lose the screw as it is needed to hold the replacement lamp in place. It is strongly recommended that you use a
Step 6. Lift the handle so that it stands up. Use the handle to slowly pull the lamp out of the projector.
Maintenance 39