Adjusting the image
Adjusting the height
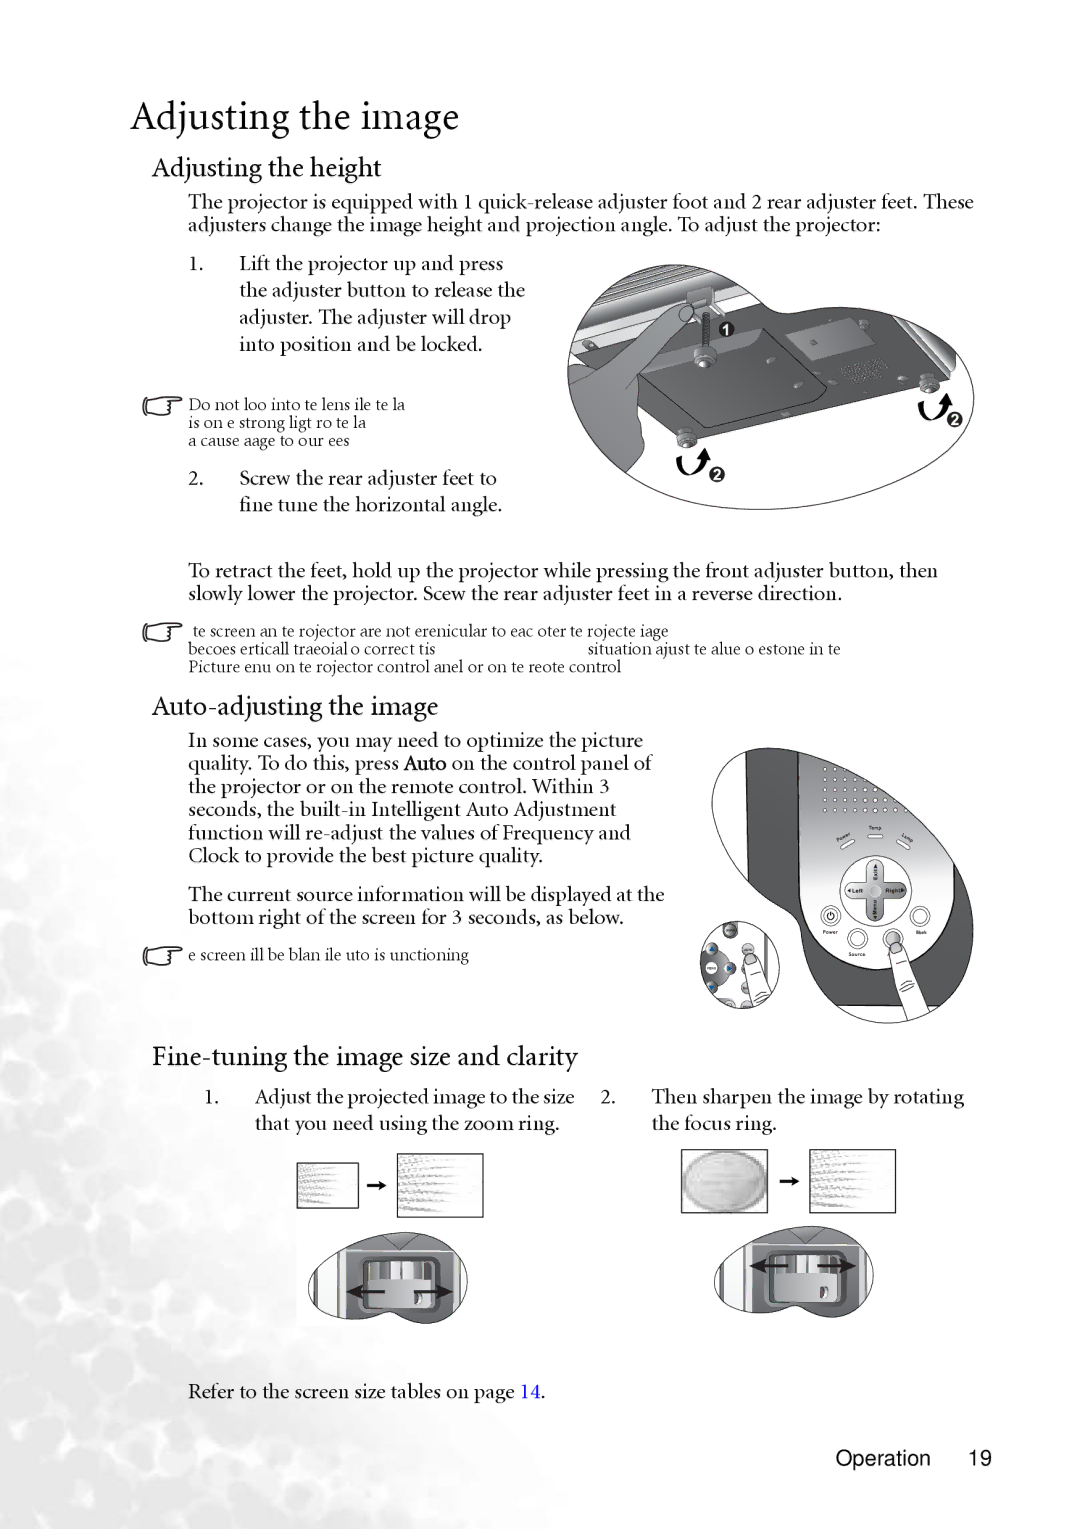
The projector is equipped with 1
1.Lift the projector up and press
the adjuster button to release the adjuster. The adjuster will drop into position and be locked.
Do not look into the lens while the lamp is on. The strong light from the lamp may cause damage to your eyes.
2. Screw the rear adjuster feet to fine tune the horizontal angle.
To retract the feet, hold up the projector while pressing the front adjuster button, then slowly lower the projector. Scew the rear adjuster feet in a reverse direction.
If the screen and the projector are not perpendicular to each other, the projected image becomes vertically trapezoidal. To correct this situation, adjust the value of Keystone in the Picture menu, on the projector control panel, or on the remote control.
Auto-adjusting the image
In some cases, you may need to optimize the picture quality. To do this, press Auto on the control panel of the projector or on the remote control. Within 3 seconds, the
The current source information will be displayed at the bottom right of the screen for 3 seconds, as below.
![]() The screen will be blank while Auto is functioning.
The screen will be blank while Auto is functioning.
Fine-tuning the image size and clarity
1. | Adjust the projected image to the size 2. | Then sharpen the image by rotating | |||||||||||||||
| that you need using the zoom ring. | the focus ring. | |||||||||||||||
|
|
|
|
|
|
|
|
|
|
|
|
|
|
|
|
|
|
|
|
|
|
|
|
|
|
|
|
|
|
|
|
|
|
|
|
|
|
|
|
|
|
|
|
|
|
|
|
|
|
|
|
|
|
|
|
|
|
|
|
|
|
|
|
|
|
|
|
|
|
|
|
|
|
|
|
|
|
|
|
|
|
|
|
|
|
|
|
|
|
|
|
|
|
|
|
|
|
|
|
|
|
|
|
|
|
|
|
Refer to the screen size tables on page 14.
Operation 19