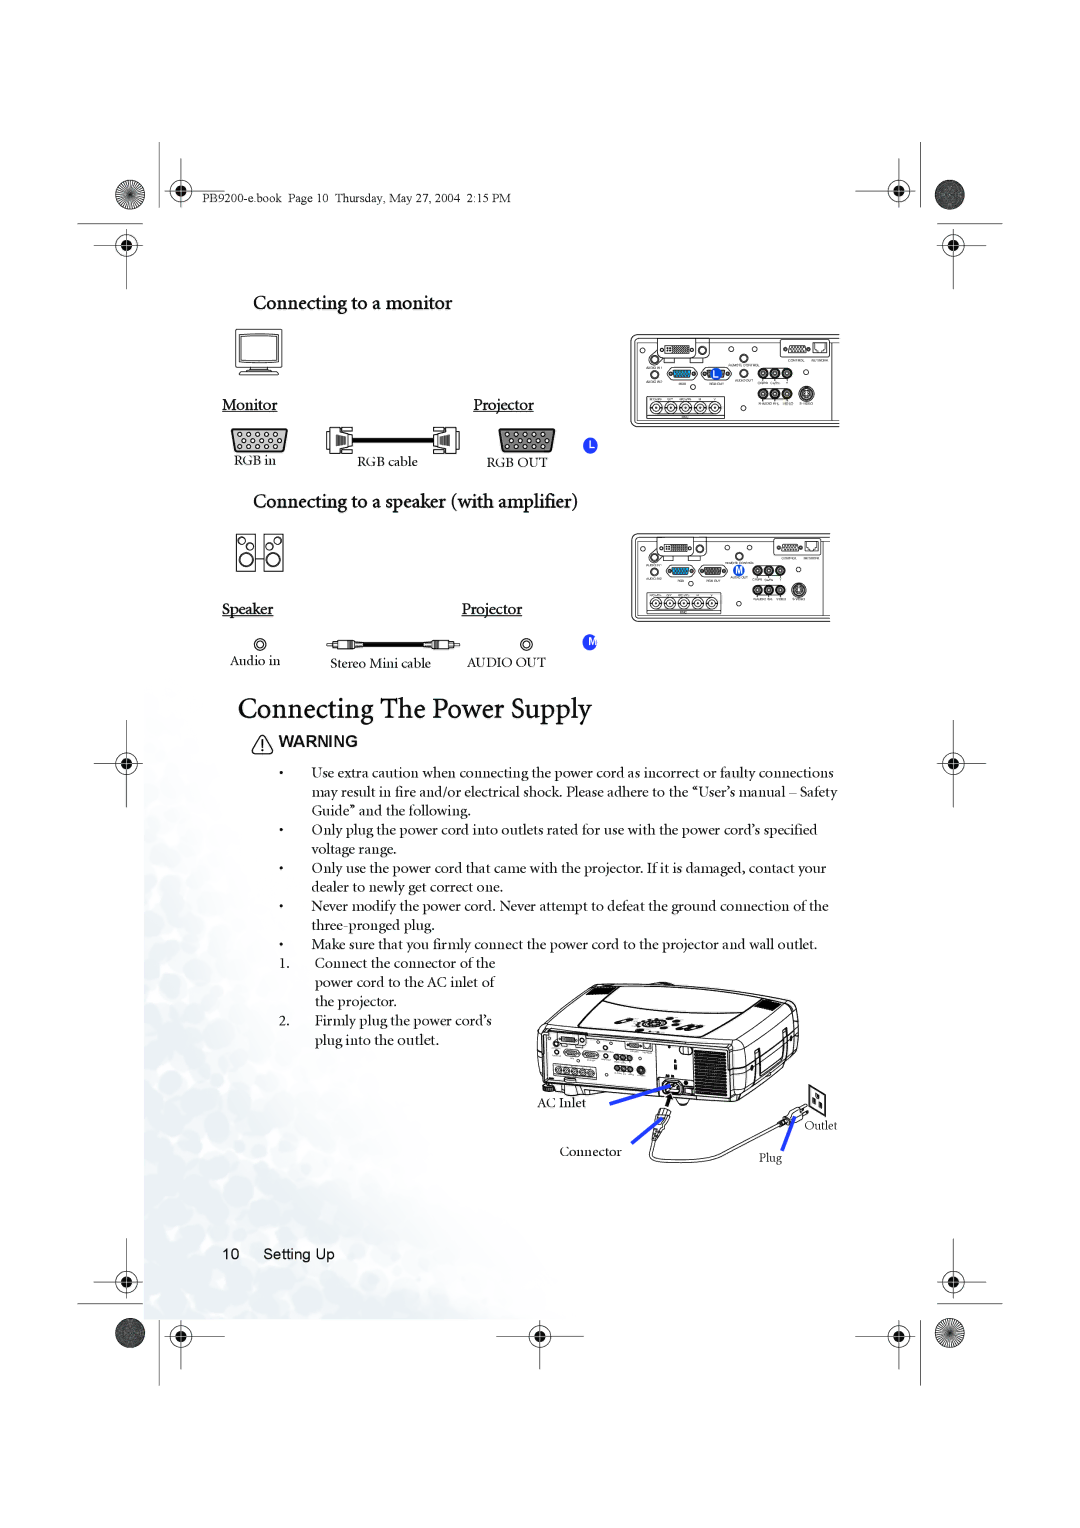
Connecting to a monitor
Monitor |
| Projector |
|
| L |
RGB in | RGB cable | RGB OUT |
Connecting to a speaker (with amplifier)
Speaker |
| Projector |
|
| M |
Audio in | Stereo Mini cable | AUDIO OUT |
|
|
|
| CONTROL | NETWORK |
AUDIO IN1 |
| L | REMOTE CONTROL |
|
|
|
|
|
| ||
AUDIO IN2 |
| AUDIO OUT | Y |
| |
RGB |
| RGB OUT | CR/PR Ca/Pa |
| |
R/CR/PR G/Y B/CB/PB | H | V |
|
|
|
|
|
| VIDEO | ||
BNC
|
|
|
| CONTROL | NETWORK |
AUDIO IN1 |
|
| REMOTE CONTROL |
|
|
|
| M |
|
| |
|
|
|
|
| |
AUDIO IN2 |
| RGB OUT | AUDIO OUT | Y |
|
RGB |
| CR/PR Ca/Pa |
| ||
R/CR/PR G/Y B/CB/PB | H | V |
|
|
|
|
|
| VIDEO | ||
BNC
Connecting The Power Supply
![]() WARNING
WARNING
•Use extra caution when connecting the power cord as incorrect or faulty connections may result in fire and/or electrical shock. Please adhere to the “User’s manual – Safety Guide” and the following.
•Only plug the power cord into outlets rated for use with the power cord’s specified voltage range.
•Only use the power cord that came with the projector. If it is damaged, contact your dealer to newly get correct one.
•Never modify the power cord. Never attempt to defeat the ground connection of the
•Make sure that you firmly connect the power cord to the projector and wall outlet.
1.Connect the connector of the
power cord to the AC inlet of the projector.
2. Firmly plug the power cord’s plug into the outlet.
AUDIO IN1 |
|
|
|
|
|
|
|
|
|
|
|
| REMOTE CONTROL | CONTROL NETWORK | |
AUDIO IN2 |
|
|
|
|
|
|
|
|
| RGB |
| RGB OUT | AUDIO OUT |
|
|
R/C /P |
|
|
|
| CR/PR Ca/Pa | Y |
|
G/Y | B/C /P | H |
|
|
|
| |
|
| V |
|
|
| ||
|
| BNC |
|
| VIDEO | ||
AC Inlet
![]() Outlet
Outlet
ConnectorPlug
10 Setting Up
