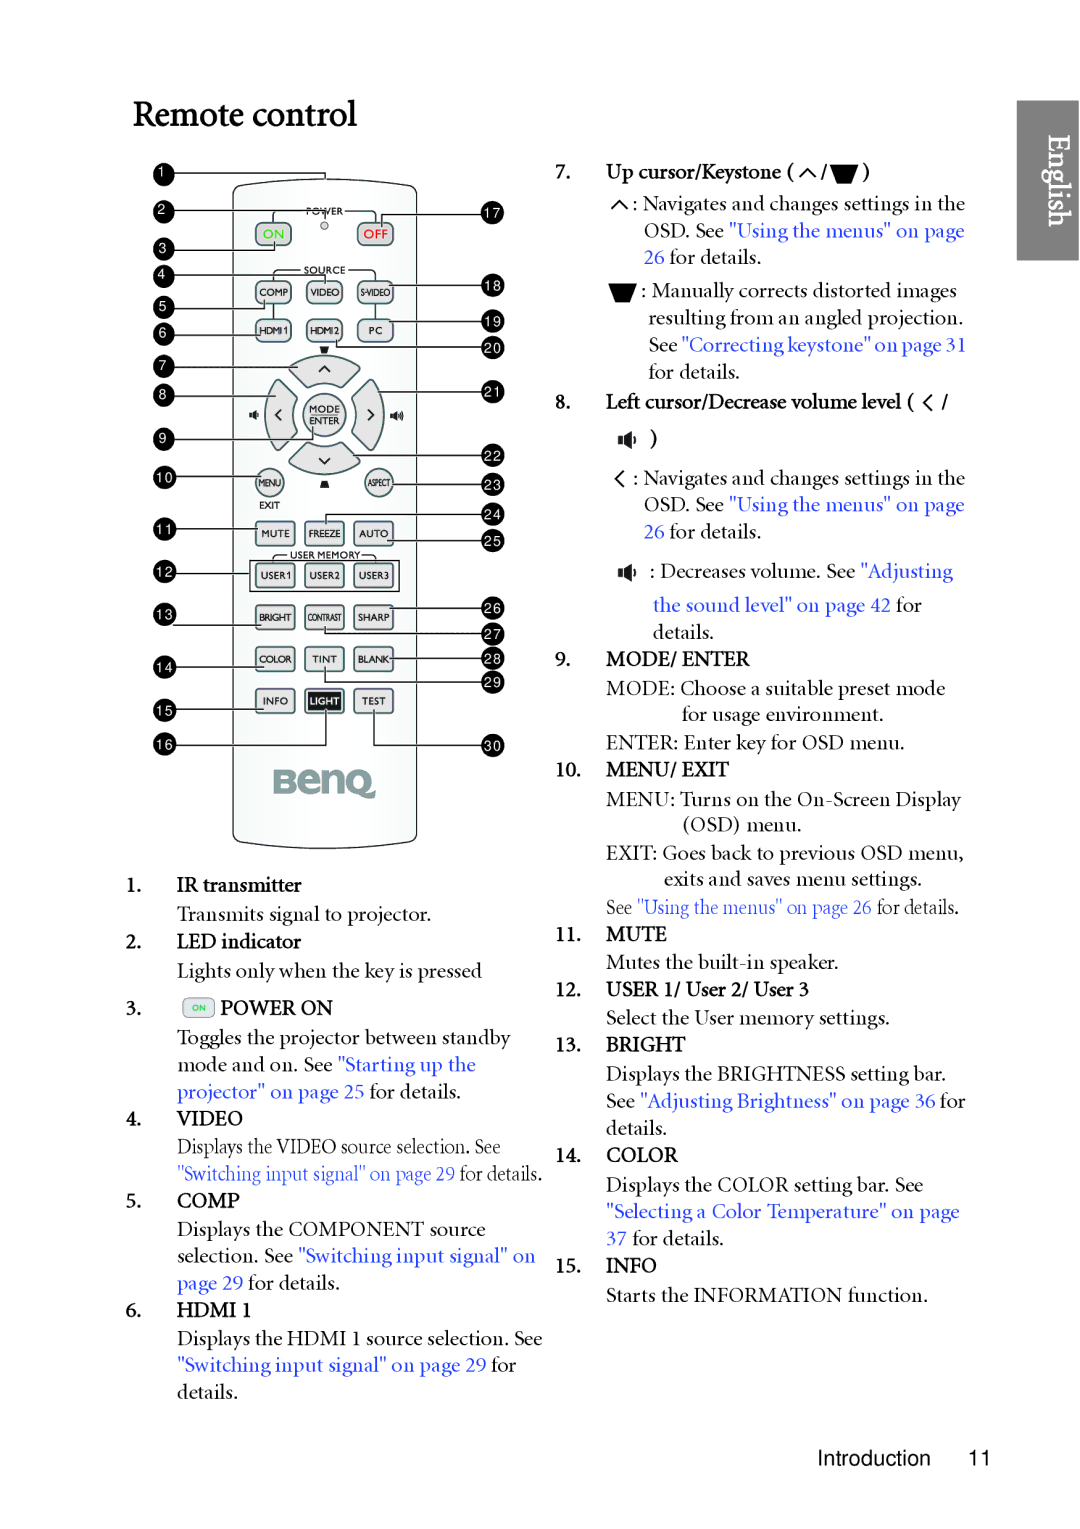
Remote control
1 |
| |
2 | 17 | |
3 |
| |
4 | 18 | |
| ||
5 | 19 | |
6 | ||
20 | ||
7 | ||
| ||
8 | 21 | |
9 |
| |
| 22 | |
10 | 23 | |
| ||
11 | 24 | |
25 | ||
| ||
12 |
| |
13 | 26 | |
| ||
| 27 | |
14 | 28 | |
29 | ||
| ||
15 |
| |
16 | 30 |
1.IR transmitter
Transmits signal to projector.
2.LED indicator
Lights only when the key is pressed
3. POWER ON
Toggles the projector between standby mode and on. See "Starting up the projector" on page 25 for details.
4.VIDEO
Displays the VIDEO source selection. See "Switching input signal" on page 29 for details.
5.COMP
Displays the COMPONENT source selection. See "Switching input signal" on page 29 for details.
6.HDMI 1
Displays the HDMI 1 source selection. See "Switching input signal" on page 29 for details.
7.Up cursor/Keystone (  /
/ )
)
![]() : Navigates and changes settings in the OSD. See "Using the menus" on page 26 for details.
: Navigates and changes settings in the OSD. See "Using the menus" on page 26 for details.
![]() : Manually corrects distorted images resulting from an angled projection. See "Correcting keystone" on page 31 for details.
: Manually corrects distorted images resulting from an angled projection. See "Correcting keystone" on page 31 for details.
8.Left cursor/Decrease volume level (  /
/
![]()
![]()
![]() )
)
![]() : Navigates and changes settings in the OSD. See "Using the menus" on page 26 for details.
: Navigates and changes settings in the OSD. See "Using the menus" on page 26 for details.
: Decreases volume. See "Adjusting
the sound level" on page 42 for details.
9.MODE/ ENTER
MODE: Choose a suitable preset mode for usage environment.
ENTER: Enter key for OSD menu.
10.MENU/ EXIT
MENU: Turns on the
EXIT: Goes back to previous OSD menu, exits and saves menu settings.
See "Using the menus" on page 26 for details.
11.MUTE
Mutes the
12.USER 1/ User 2/ User 3
Select the User memory settings.
13.BRIGHT
Displays the BRIGHTNESS setting bar. See "Adjusting Brightness" on page 36 for details.
14.COLOR
Displays the COLOR setting bar. See "Selecting a Color Temperature" on page 37 for details.
15.INFO
Starts the INFORMATION function.
English
Introduction 11