Happy Voyager
Installing the Hoop Tech Device/Machine Set Up | 23 |
Warning: Any movement of the Tubular Clamping System must only be carried out with the clamp in the closed position.
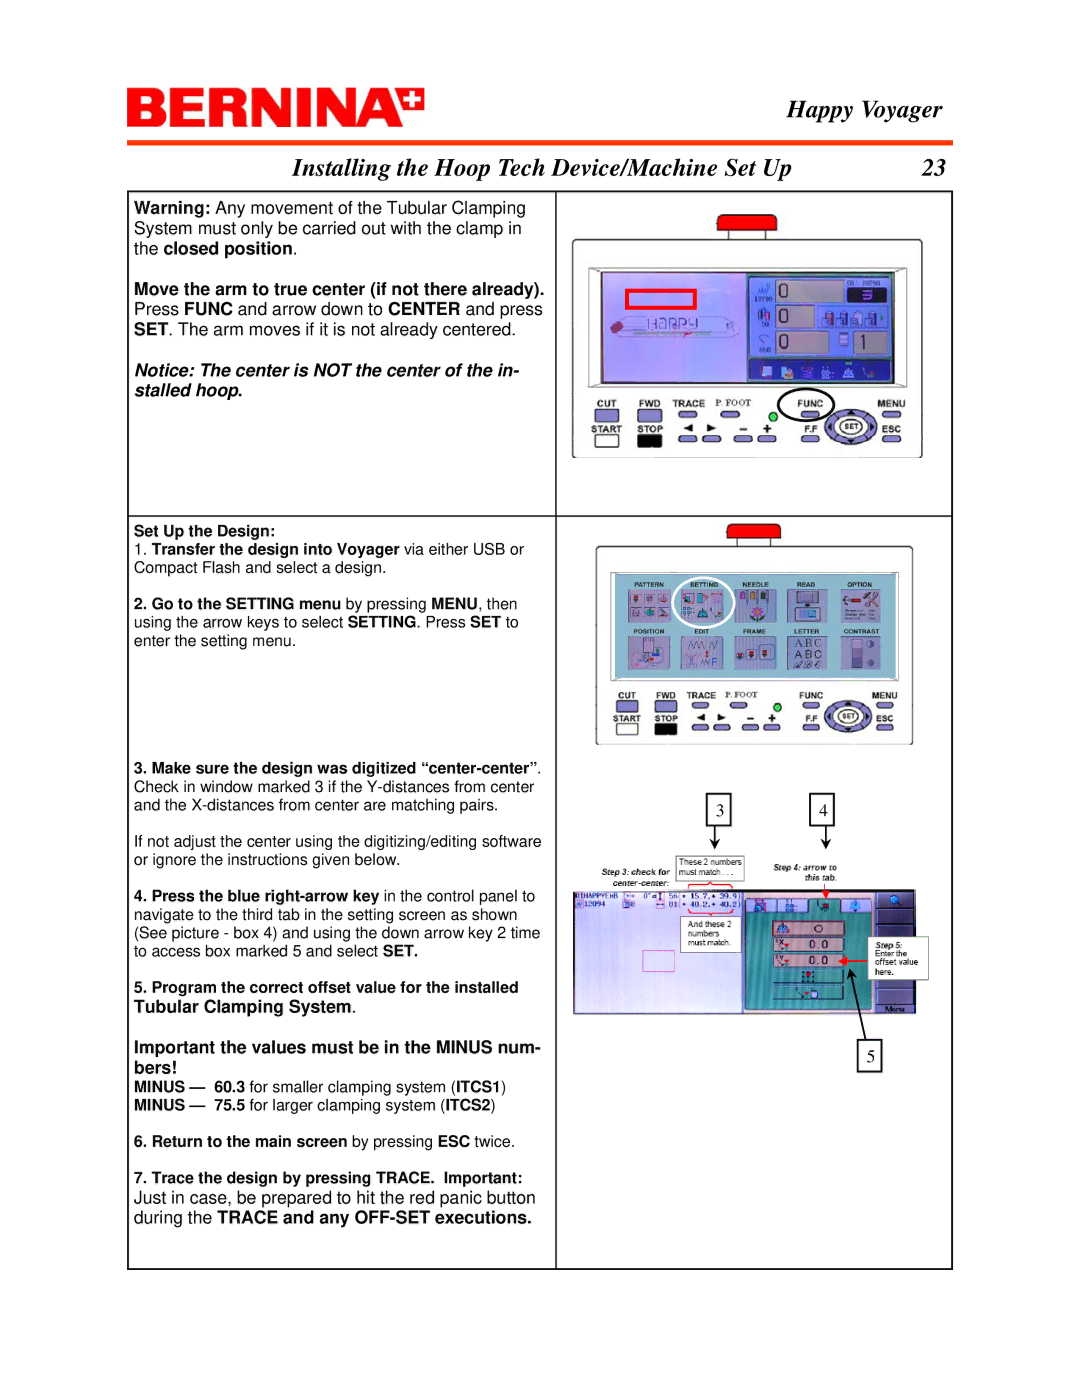
Move the arm to true center (if not there already).
Press FUNC and arrow down to CENTER and press
SET. The arm moves if it is not already centered.
Notice: The center is NOT the center of the in- stalled hoop.
Set Up the Design:
1.Transfer the design into Voyager via either USB or Compact Flash and select a design.
2.Go to the SETTING menu by pressing MENU, then using the arrow keys to select SETTING. Press SET to enter the setting menu.
3.Make sure the design was digitized
and the | 3 |
| 4 |
|
| |
If not adjust the center using the digitizing/editing software |
|
|
|
|
| |
|
|
|
|
| ||
or ignore the instructions given below. |
|
|
|
|
| |
4. | Press the blue |
|
|
|
|
|
navigate to the third tab in the setting screen as shown |
|
|
|
|
| |
(See picture - box 4) and using the down arrow key 2 time |
|
|
|
|
| |
to access box marked 5 and select SET. |
|
|
|
|
| |
5. | Program the correct offset value for the installed |
|
|
|
|
|
Tubular Clamping System. |
|
|
|
|
| |
Important the values must be in the MINUS num- |
|
|
|
|
| |
|
|
|
| 5 | ||
bers! |
|
| ||||
|
|
|
|
| ||
|
|
|
|
| ||
MINUS — 60.3 for smaller clamping system (ITCS1) |
|
|
|
|
| |
MINUS — 75.5 for larger clamping system (ITCS2) |
|
|
|
|
| |
6. | Return to the main screen by pressing ESC twice. |
|
|
|
|
|
7. | Trace the design by pressing TRACE. Important: |
|
|
|
|
|
Just in case, be prepared to hit the red panic button |
|
|
|
|
| |
during the TRACE and any |
|
|
|
|
| |
