90539499 01 EM100B.qxd 7/7/08 10:05 AM Page 6
02 UNDERSTANDING YOUR POWER MONITOR
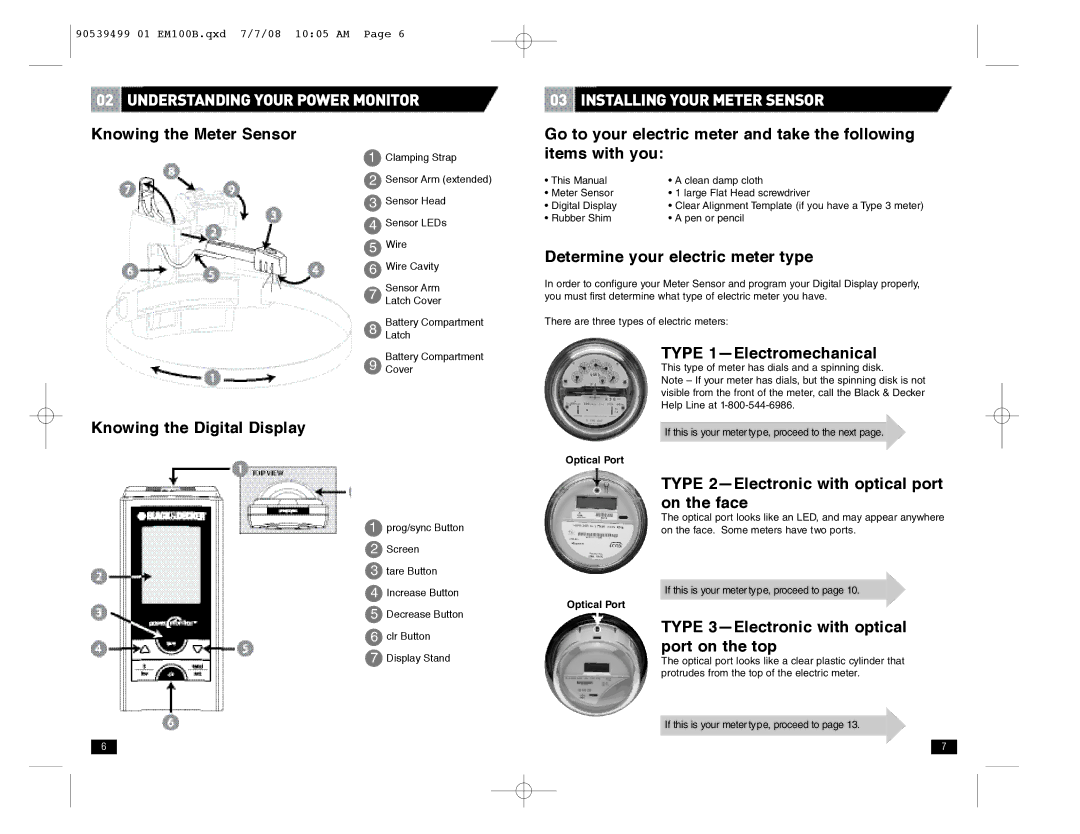
Knowing the Meter Sensor
1 Clamping Strap
2 Sensor Arm (extended)
3 Sensor Head
4 Sensor LEDs
5 Wire
6 Wire Cavity
Sensor Arm
7 Latch Cover
Battery Compartment
8 Latch
Battery Compartment
9 Cover
Knowing the Digital Display
1 prog/sync Button
2 Screen
3 tare Button
4 Increase Button
5 Decrease Button
6 clr Button
7 Display Stand
6
03 INSTALLING YOUR METER SENSOR
Go to your electric meter and take the following items with you:
• This Manual | • A clean damp cloth |
• Meter Sensor | • 1 large Flat Head screwdriver |
• Digital Display | • Clear Alignment Template (if you have a Type 3 meter) |
• Rubber Shim | • A pen or pencil |
Determine your electric meter type
In order to configure your Meter Sensor and program your Digital Display properly, you must first determine what type of electric meter you have.
There are three types of electric meters:
TYPE 1—Electromechanical
This type of meter has dials and a spinning disk.
Note – If your meter has dials, but the spinning disk is not visible from the front of the meter, call the Black & Decker Help Line at
If this is your meter type, proceed to the next page.
Optical Port
TYPE 2—Electronic with optical port on the face
The optical port looks like an LED, and may appear anywhere on the face. Some meters have two ports.
If this is your meter type, proceed to page 10 .
Optical Port
TYPE 3—Electronic with optical port on the top
The optical port looks like a clear plastic cylinder that protrudes from the top of the electric meter.
If this is your meter type, proceed to page 13 .
7